With Kdenlive we can modify the objects that appear in the scenes, for example by making a hole appear in a door, as if it had been smashed by someone with a kick or shotgun. Without really having to destroy a door.
Among the many clichés of action films is the destruction of objects. And one of the most versatile situations is the breaking of a door: in most action films and even in many comic films, at some point someone makes a hole in a door. With a kick, a punch, or a shotgun. The problem, for non-professional filmmakers, is that it is a fairly difficult effect to achieve directly in the room if you don’t have a budget. Destroying doors costs, and it is still difficult to do in reality: a fake door should be built, because a real door does not break easily like those seen in films. No actor can really punch a hole in a 3-4cm thick wooden door. And for obvious security reasons it’s not a great idea to use a loaded shotgun to seem like a real hole in a door. The most handy solution is to drill the hole digitally, so we won’t spend a single penny and we won’t put any actor at risk. The basic effect is simple, because it is based on rotoscoping to draw the hole. As a starting point we need two video clips: one will simply have to shoot the door (or possibly the wall) to break through. The other video clip must contain the actor who makes the gesture of breaking through the door, for example with a shotgun shot. The actor must be in the same position where the door is located: just open it and shoot the video, it does not matter if a piece of the door is still visible together with the actor. We will only use a small portion of this clip, there is no need to unhinge the door and remove it completely, however you will not see it in the final result. Obviously, when assembling the clip with the door closed must be placed over the clip with the actor and the door open. To open the hole in the door, simply apply the rotoscoping effect to its clip, but invert it (with the appropriate tick). In this way everything that is contained in the drawing we make will become transparent and you will be able to see the video that is underneath. Let’s draw, therefore, the outline of what the hole will be: it must not be too regular, in reality it is unlikely to make a perfectly circular hole. Then, in order not to make the hole appear at any moment, we use the keyframes of the rotoscoping effect to reshape the contours of the hole in order to make it grow gradually. In other words, at the beginning of the clip the hole must be so small that it is not visible, and within twenty frames or so it must grow to its final size. The effect will be fast, so it is not essential to be too careful about the movement you draw, the important thing is that the viewer understands that the hole has enlarged as it is normal for it to happen. Then you can add a clip of a muzzle flash, or flying wood splinters (debris) to give more realism. We thought to present the effect with a shotgun that opens a hole through a door, because it is the basic preparation on which variants can then be built. If you want to make the effect with a punch, instead of with a shotgun, just give the actor a punch in the void, then using rotoscoping to make visible not only the background but also the hand that passes through the hole. As always, you can see the example video at the following address: https://www.youtube.com/watch?v=EyFiycNvo2M
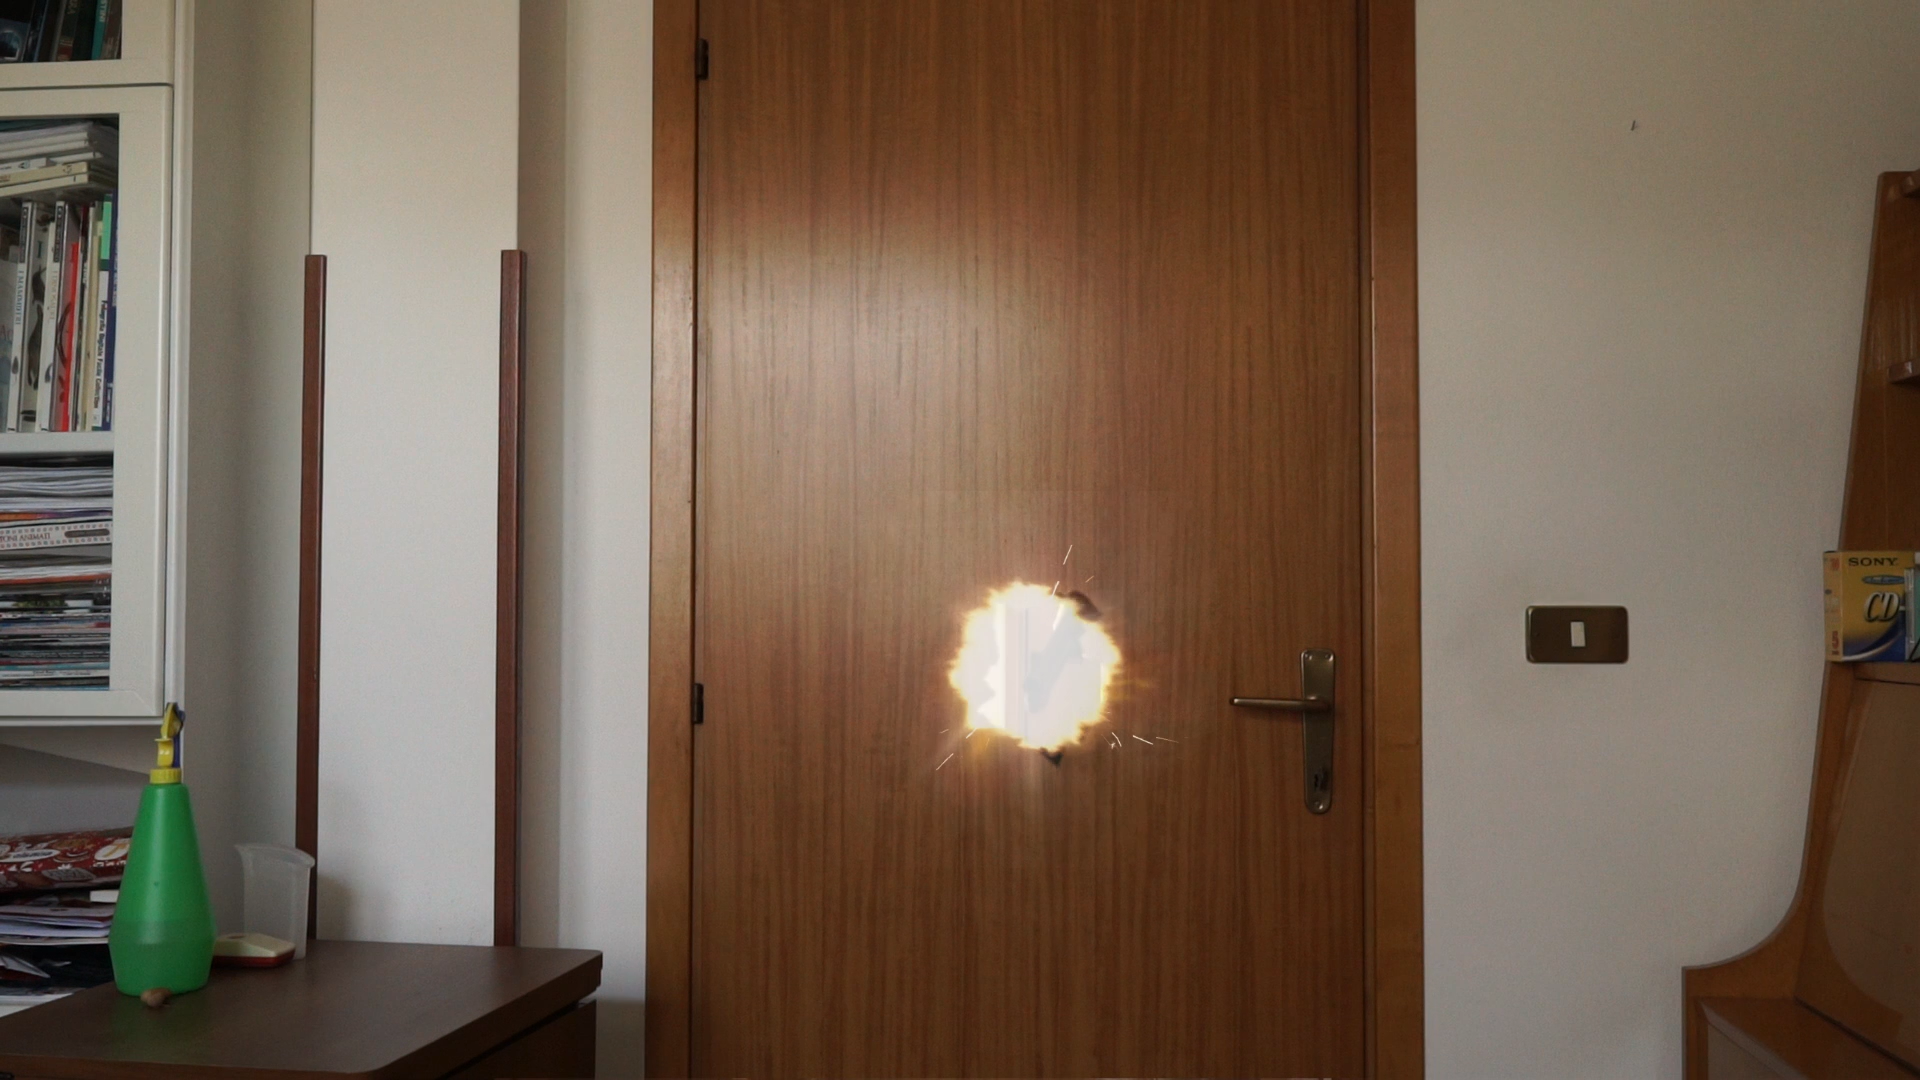 The hole in the door begins to appear along with a flash
 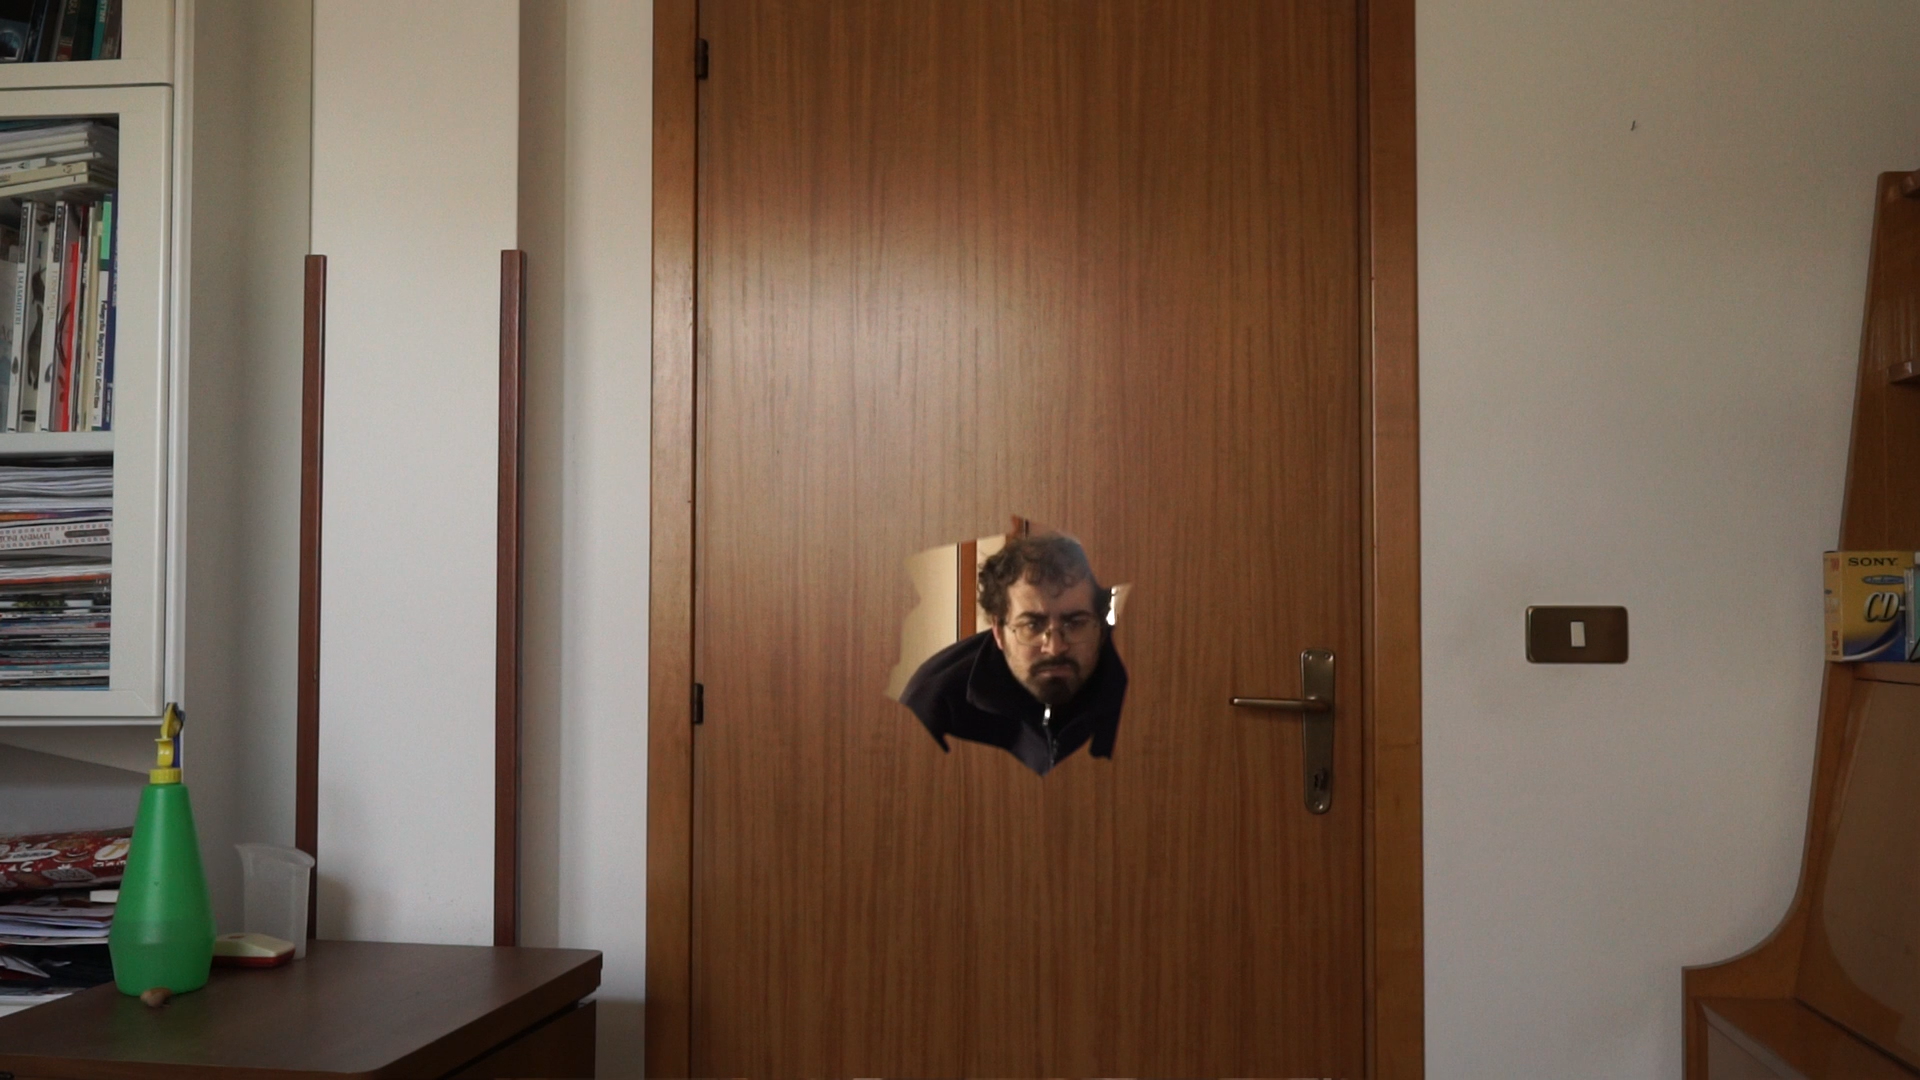 Through the hole in the door you can see the actor
 The movement of the room
To add realism to the scene we can also insert a movement: after rendering the sequence in which the actor makes the hole in the door with Kdenlive, we can import it into another Kdenlive project and superimpose it on a black clip using an Affine type transition. At that point we can enlarge the image a little: if we are making a FullHD movie we can increase its size by up to 120% without anyone noticing. Using the keyframes of the transition we can move the image up and down, left and right, in the fraction of a second in which the hole in the door appears. This will lead the public to believe that the camera was shaken by the same blow that opened the hole in the door. You can also add a slight rotation, but do not exaggerate otherwise you understand that the image is fake because the perspective is missing.
Overlay the initial clips
Let’s see how to position the clips of the door and the actor in the video tracks
 1 BEFORE THE ACTOR – To begin with we position the clip that contains the actor in the lowest video track, the Video1 . Of course, we cut the clip to eliminate unnecessary parts using the tool scissors .
 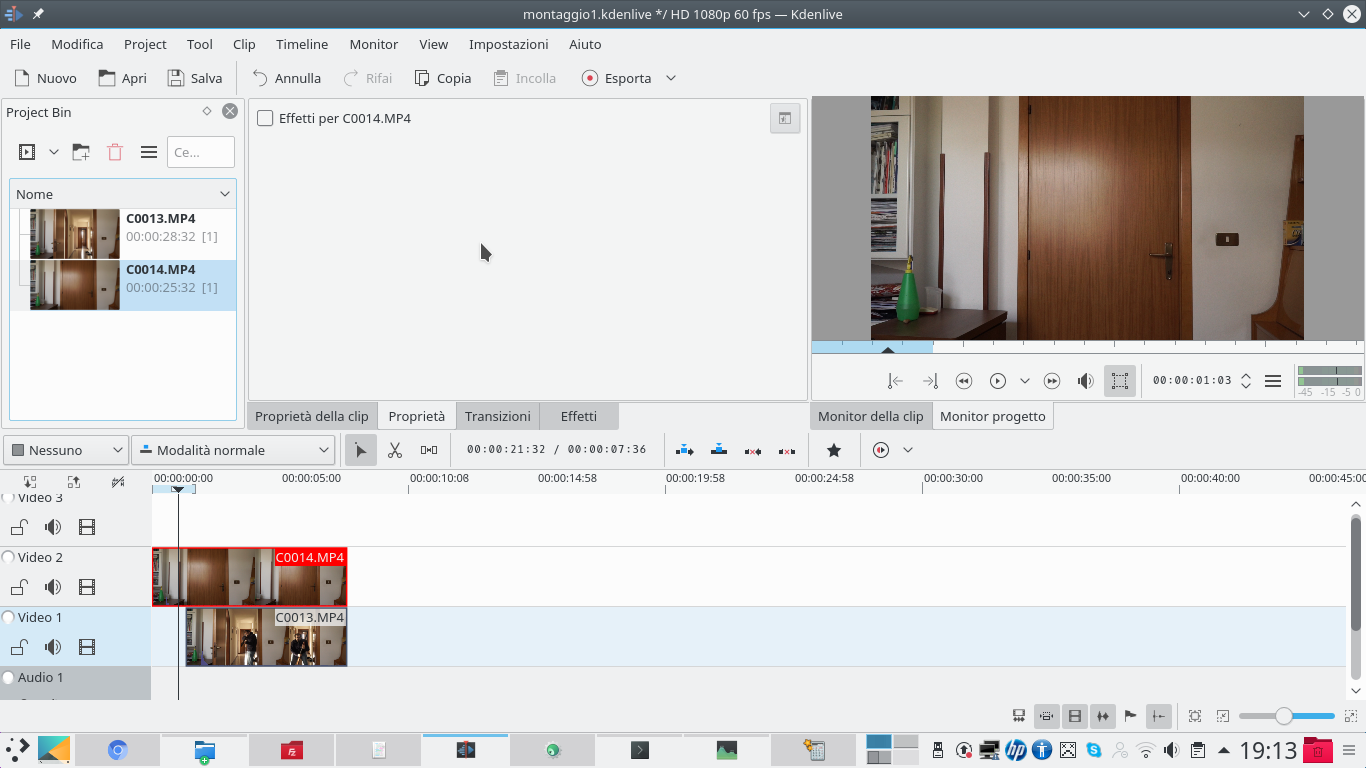 2 AND THEN THE DOOR – In the track Video2 instead, the video clip containing the door must be positioned. The two clips must overlap: that of the track Video1 it must end exactly at the same time as the clip with the door closed.
 Draw the hole in the door
We use rotoscoping to draw the outline of the hole in the door
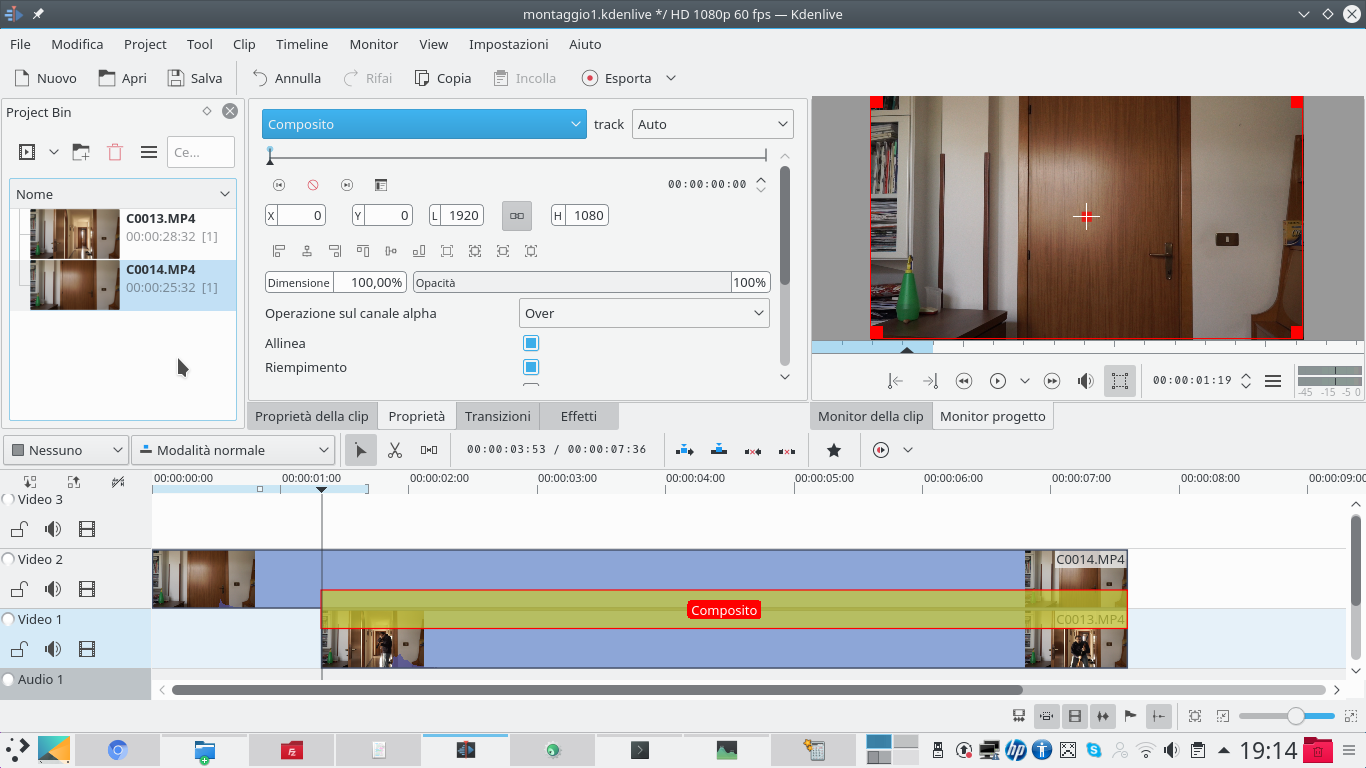 1 THE TRANSITION – A transition of type must be inserted between the two clips Composite . The transition must be extended for the duration of the shorter clip, i.e. the one containing the actor. No need to change the basic parameters.
 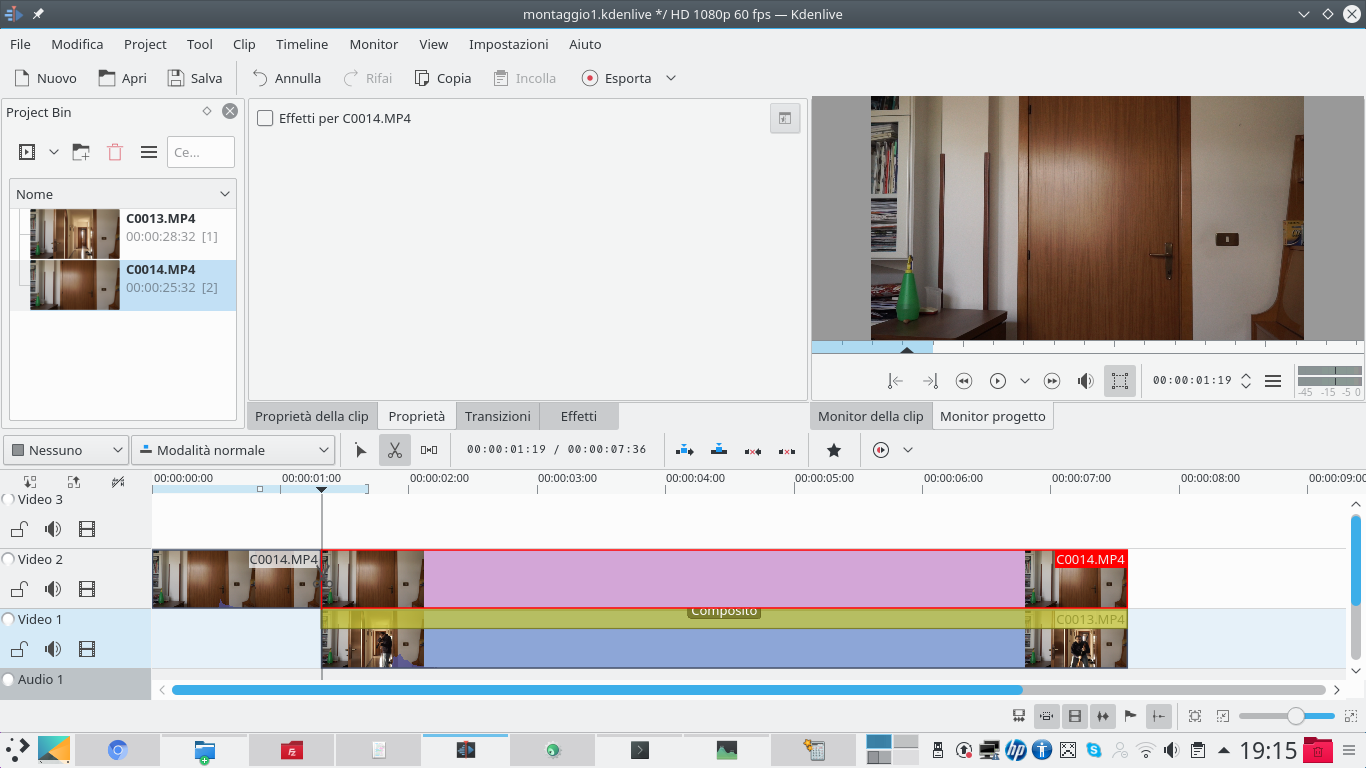 2 THE RIGHT CUT– It’s a good idea to split the clip with the port: using the tool scissors we can cut it the moment the clip containing the actor begins. We will therefore have two clips side by side, and practically the same. But the second of the two is superimposed on the actor.
 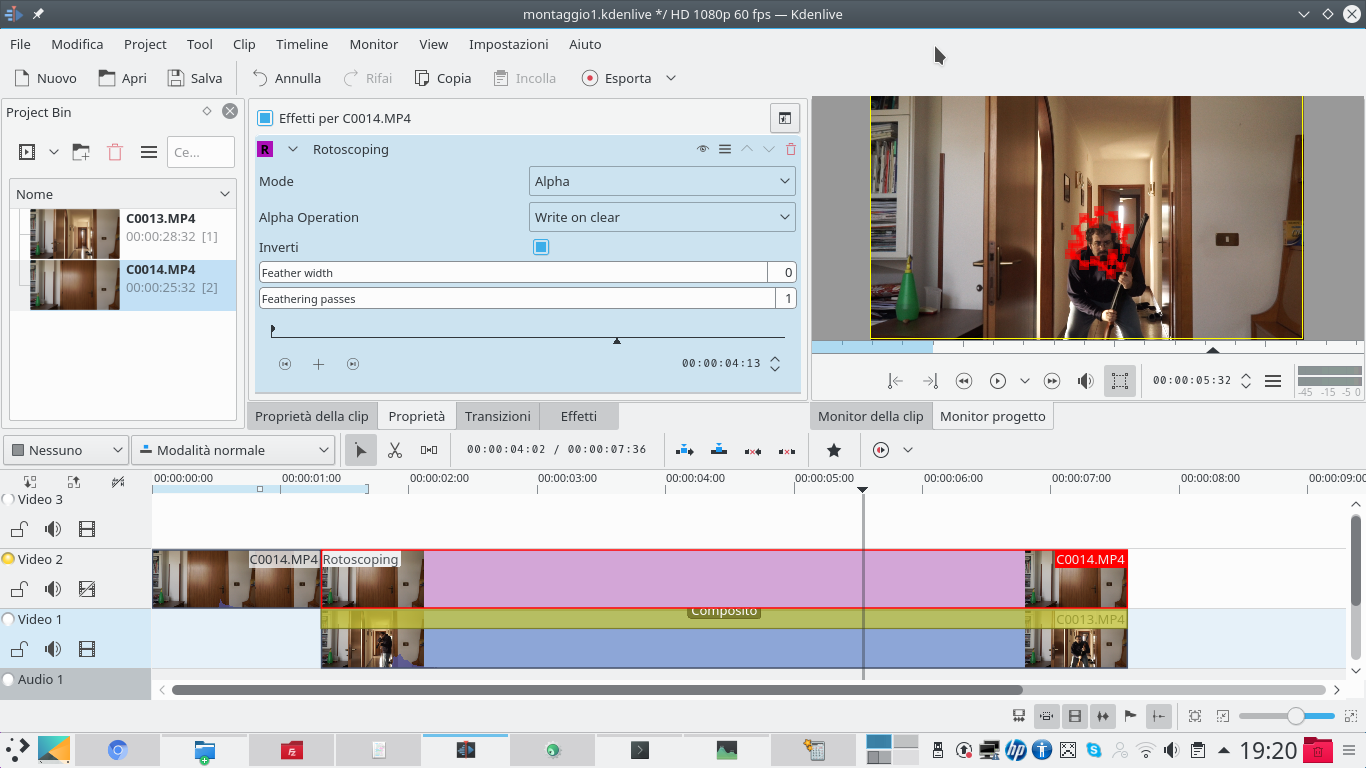 3 THE ROTOSCOPING – We add to the second clip of the track Video2 , the one superimposed on the actor’s clip, the effect rotoscoping popping up Invert . To help us with the drawing, we make the trace invisible Video2 by clicking on its button.
  4 DRAW THE HOLE – We need to draw the outline of what the hole in the door will be: while tracing it Video2 it is not visible we can understand what the correct position should be. By making the door visible again, you can check that you have obtained the desired effect.
 An animation for the appearance of the hole
We make the hole appear in the door with an animation in which it grows gradually
 1 BEVELED EDGES – In order not to make the edges too sharp, they would not be realistic, you can set the feather width to 2 . Now let’s move along the timeline of the effect and choose the point where the hole in the door must be formed: here a new key frame must be created.
  2 AN ANIMATION – We begin to go back, a couple of frames at a time, and set new key frames: in each of them we reduce the size of the hole we have designed, proceeding gradually.
  3 AT THE BEGINNING THERE IS NO – The first frame must have a practically invisible hole: just bring all the points of the drawing made with rotoscoping so that they are superimposed. Checking the animation, it must seem that the hole becomes bigger and bigger.
  4 A MUZZLE FLASH – Now we need a front muzzle flash, possibly animated: we find one at the address https://media.giphy.com/media/EdqagnjCgdx1C/giphy.gif , we just download the gif to our computer.
 Add the explosion
We insert a muzzle flash to give the impression that the hole was from a rifle
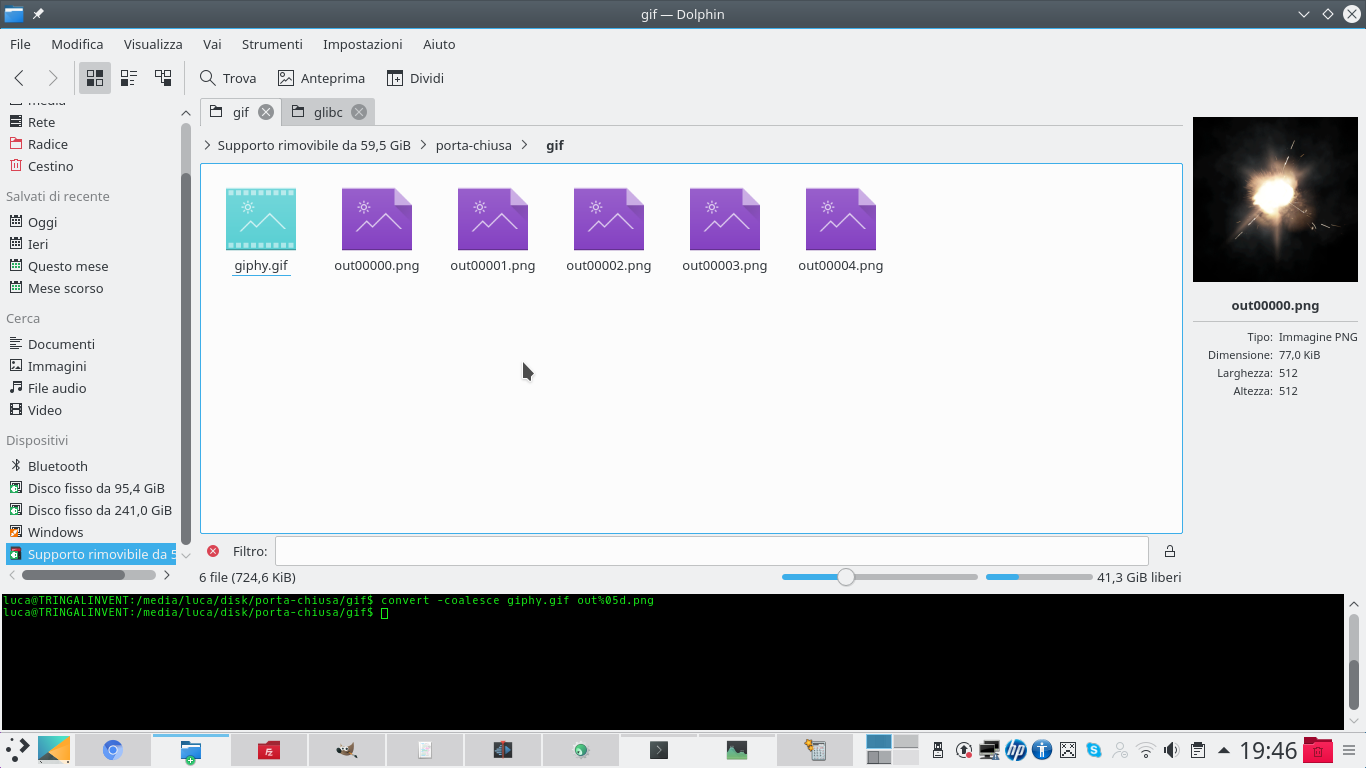 1 THE PHOTOGRAPHS – Obviously the one we downloaded is the gif: to have maximum control we have to convert it into a series of images. We can do this using ImageMagick, with the command convert -coalesce giphy.gif out% 05d.png
  2 A NEW CLIP – Now we can produce a presentation clip in Kdenlive, using the menu Project / Add presentation clip . We must specify the folder where the images produced by ImageMagick are located, and the PNG format.
  3 OVERLAP – As duration of each image, we can set 00: 00: 00: 02 , but it also depends on what you want to achieve. The clip is then placed on the track Movie3 , superimposing it on the first moments in which the hole in the door is formed.
  4 A TRANSITION – The clip must have a type transition Composite and transform , with Compositing set to Screen . Using the transition, we can position and resize the clip as necessary to make it look like the blaze of the shotgun.
  5 WITH LESS OPACITY – We can also use keyframes to give the clip one opacity variable, possibly never more than 90%. You can start and end with 0%, keeping between 90 and 80% in the intermediate frames.
 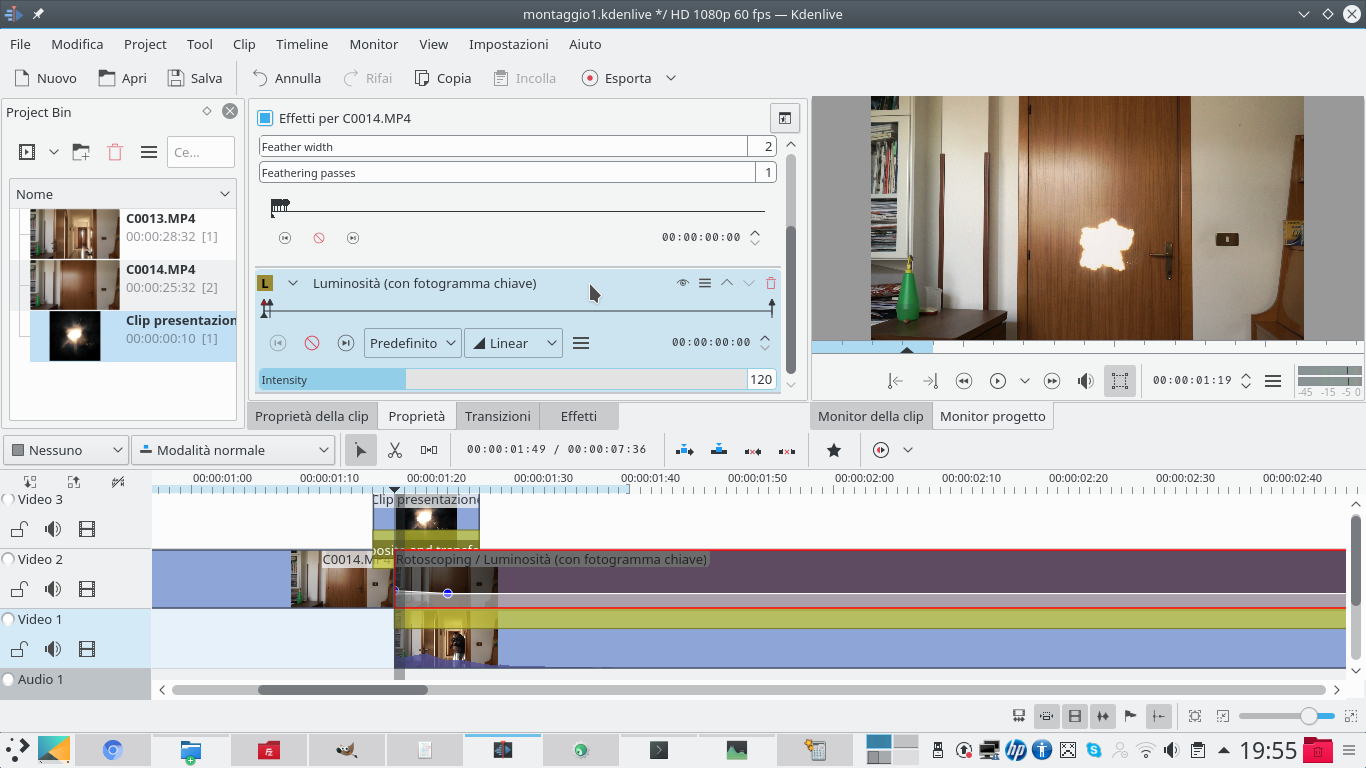 6 A SHOT OF LIGHT– Lastly, we can apply the effect to the clip containing the door after the hole has started appearing Brightness . When the blaze appears, we increase the brightness to 120 points, gradually bringing it back to 100 in the rest of the clip.

