Do you have to shoot a scene outside at night and you only have a small lamp to illuminate everything? All you have to do is shoot multiple clips illuminating different points of the scene, and use Kdenlive to blend everything into one very bright movie.
One of the most common problems in cinematography is lighting. To have a good photograph you need a lot of funds, and in some cases these are unlikely even for medium budget productions. In the world of independent cinema, of course, this problem is even more felt. In particular, shooting scenes at night is always very difficult. Even in great films, some tricks are required to maximize the amount of light entering the camera. Kubrick made himself an adapter to mount on his camera a very fast lens that Zeiss had produced exclusively for NASA’s moon missions. Today, most of the directors of photography resort to the trick of emptying tankers of water in the place to be illuminated: if you notice, many of the scenes shot at night outdoors always have puddles or in any case a certain humidity of the asphalt, of the concrete, and steel. This is because, by correctly illuminating, the water reflects the light towards the camera and a much more “shimmering” scene is obtained instead of a dark mass with a single illuminated point. Another trick is to improve the video digitally, and that’s what we can do without spending anything, thanks to Kdenlive. The basic idea was born from HDR photographs, or from those made with “brush strokes of light”. Those who are used to photographing dark environments, such as caves, abandoned buildings, etc., know that it is quite easy to illuminate a large room with a single lamp simply by holding a very long exposure time and painting with a beam of light every point of the image while the shutter is open. Another version is that of HDR images, with high dynamic range. To achieve them, just produce several shots with different brightness, so that every part of the scene is well lit, not too much and not too little. This second method is the most precise, because then you can merge the photos automatically or manually by choosing the right exposure for each part of the image. And it’s the same thing we can do with videos: just fix your camera on a tripod, and then make several movies, all with the same shot but with different lighting. Just hold your lamp in your hand and move between shots, in order to adequately illuminate every part of your scene. We will then use Kdenlive to merge all the clips one above the other, adding the amount of light present in each movie, obtaining a unique shot in which everything is correctly illuminated. We can do it thanks to the way of misapplication Screen , which sums up the various bright components of the movies without increasing the background noise, and thanks to the Lighten mode. This superimposes only the part of a clip that is brighter than the rest over the other clips. This mode is useful in detail, to avoid that the shadows produced by strong light overlap with those produced by weaker lights in other clips, which would produce a blur of the image. As always, you can see the example video at the following address: https://www.youtube.com/watch?v=1JccPPiGmnc
 One of the starting clips and the final result
  With so many tracks Kdenlive could run out of memory: better to render with a script
 Illuminate with different exposures
The advantage of this method is that it actually allows the sum of light, even by combining different exposures. It means that you can use fast and low ISO exposures for parts of the scene that are closest to the camera, and therefore you can see them better. Instead, for the background you can safely raise the ISO sensitivity, in order to obtain greater lighting. In this way, the noise is not noticeable too much, because it is relegated to the areas that, in the scene, are at the bottom, and maybe even a little out of focus. The use of a diffused light source helps not to overly complicate the overlap: too sharp edges would be easily noticed, while merging patches of diffused light the final image is perfectly homogeneous.
So many lights, so many clips
We import a clip into Kdenlive for each different scene lighting
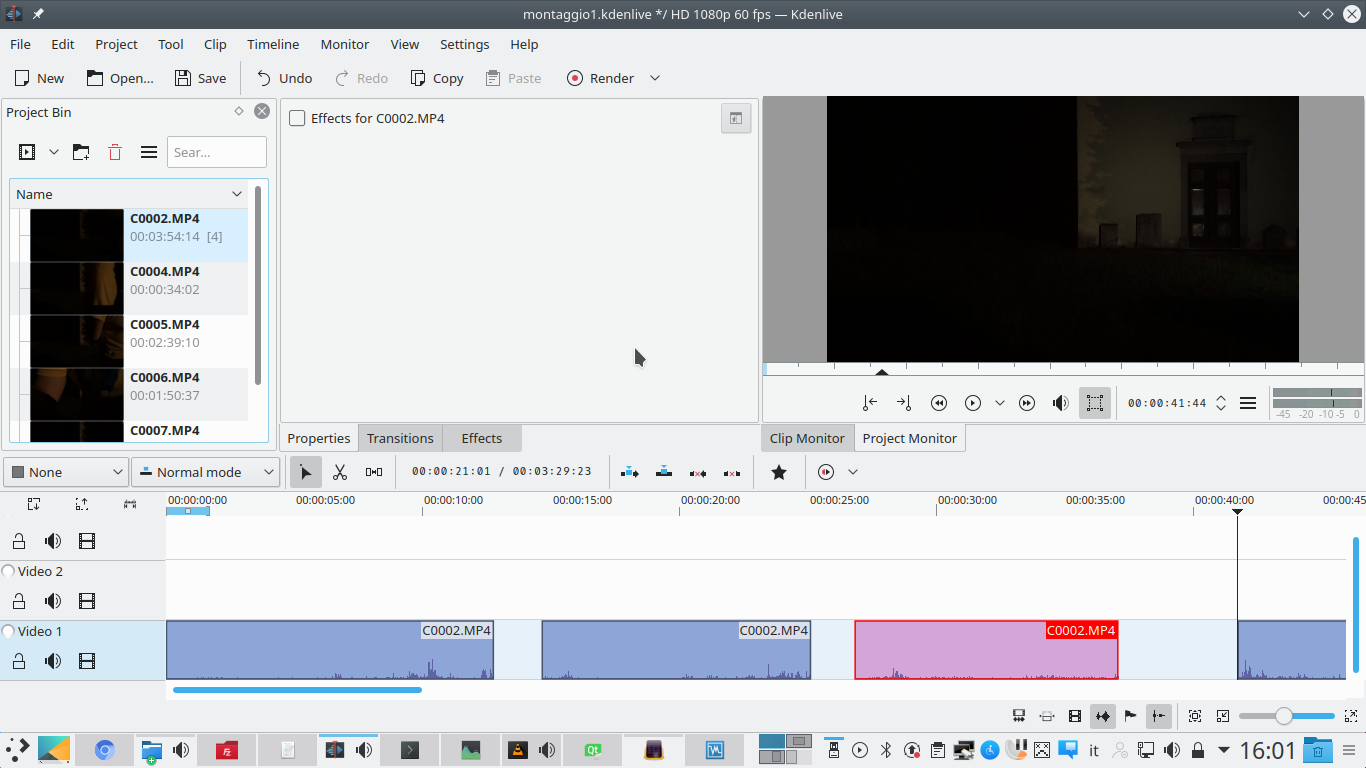 1 ALL CLIPS – You can start by inserting all the clips shot with the various illuminations into a new Kdenlive project. It is important to cut the clips so as to have individual segments that each contain the shot of a particular area illuminated in a fixed way.
  2 DUPLICATION – Let’s start by placing a clip on the track Video1 and one in the track Video2 . If one of the clips is too small, you can duplicate it by making a cut in the center. One of the two portions must be moved to the upper track, keeping the alignment.
 The first fusion of lights
We combine the first two clips into a single doubly bright image
 1 RESIZE – With the two halves of the clip aligned, just use the handles to extend the two halves again until they are the original size. Two perfectly identical clips were thus obtained.
 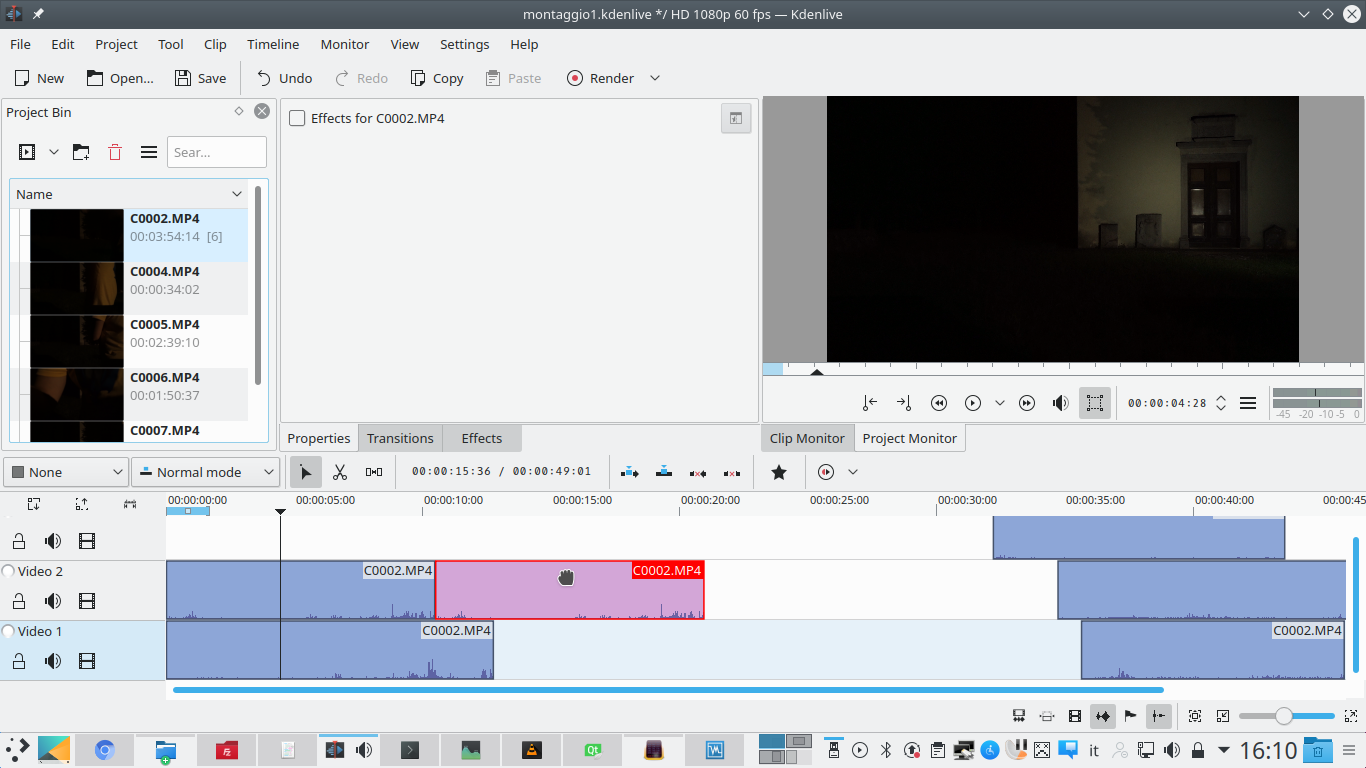 2 A LOOP EFFECT – Identical clips can then be placed side by side on the same track, so as to obtain a loop effect. In practice, the movie repeats itself, and we can be sure that we have enough to not have breaks in the overlap that we will create.
  3 THE COMPOSITION – Now, between the clips of the upper track (Video2) and those of the lower track (Video1) we put a transition of type Composite and transform . The transition must refer to the track Video1 , and this also applies to upcoming transitions.
 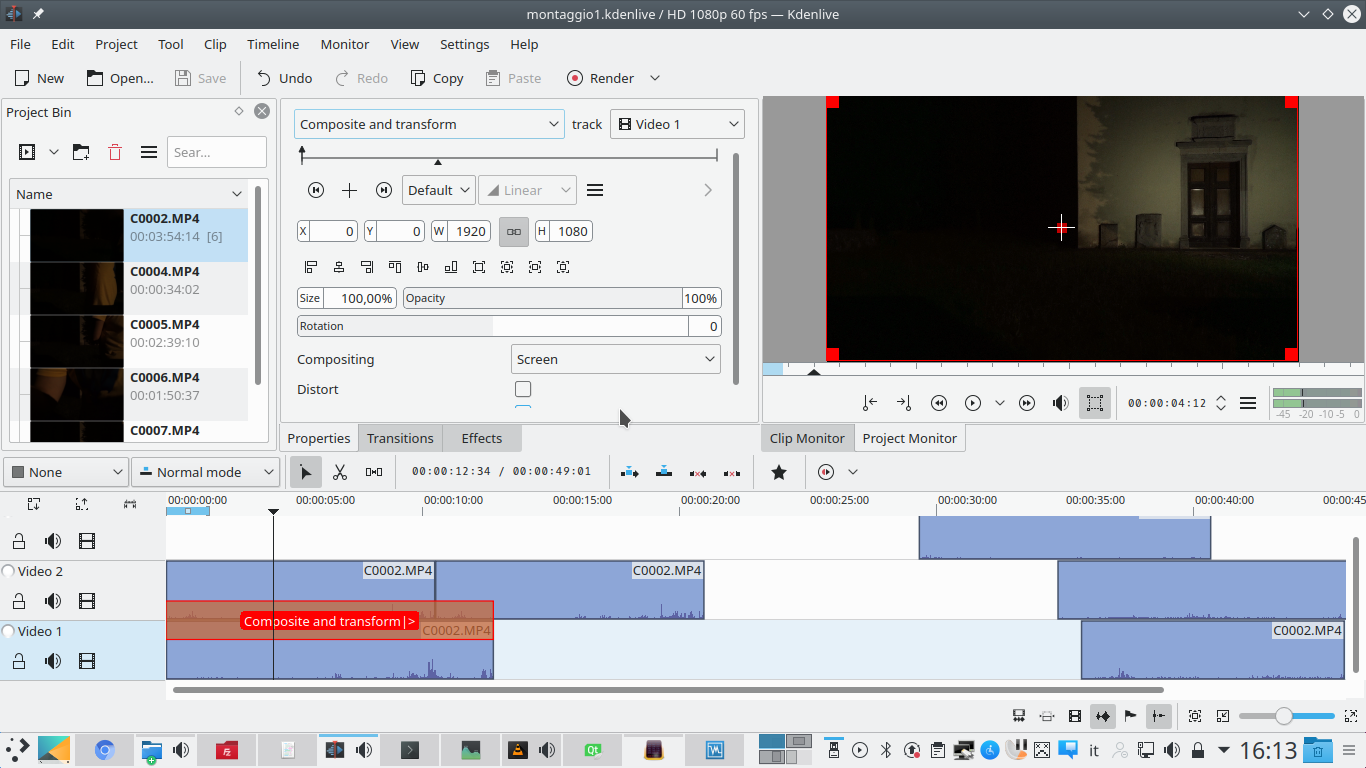 4 SCREEN MODE – How to Compositing we choose the function Screen . This allows us to add up the light sources of the clips. If one of the lights is too strong, you can always reduce the opacity, to your liking.
 Every detail in its place
We add all the clips needed to illuminate even the details
 1 FOR EVERY CLIP – All you have to do is continue adding clips one above the other, always with the transition Composite and transform referred to the track Video1 with mode Screen . This is as long as the scene seems adequately illuminated to us.
 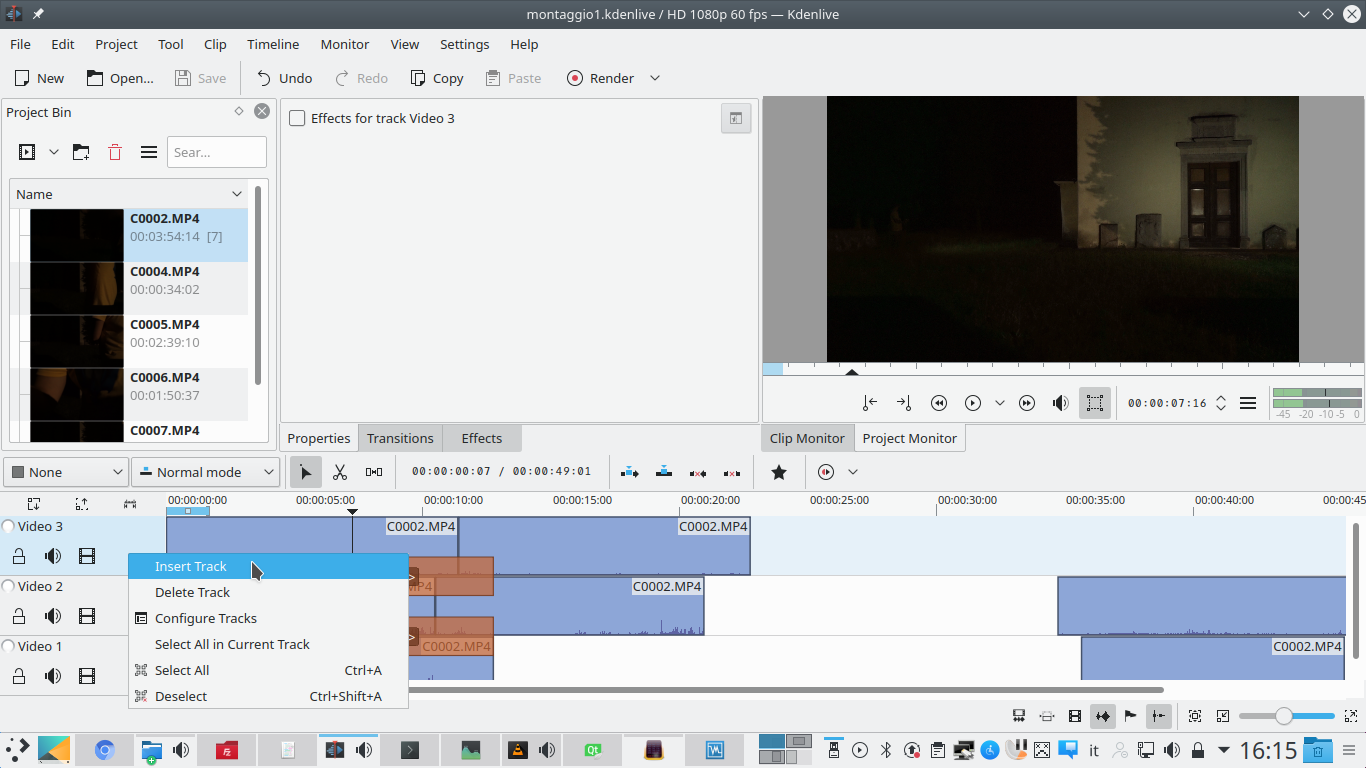 2 NEW TRACK – At some point the classic three video tracks will not be enough: to add more, just right click on the upper track and choose Insert track . Among the options, just indicate that you want a new video track placed above the current one.
  3 ROTOSCOPING – In some shots there may be objects and characters that you do not want to show: for example, the person who is holding the lamp. To hide points, just add an effect rotoscoping with mode Invert .
 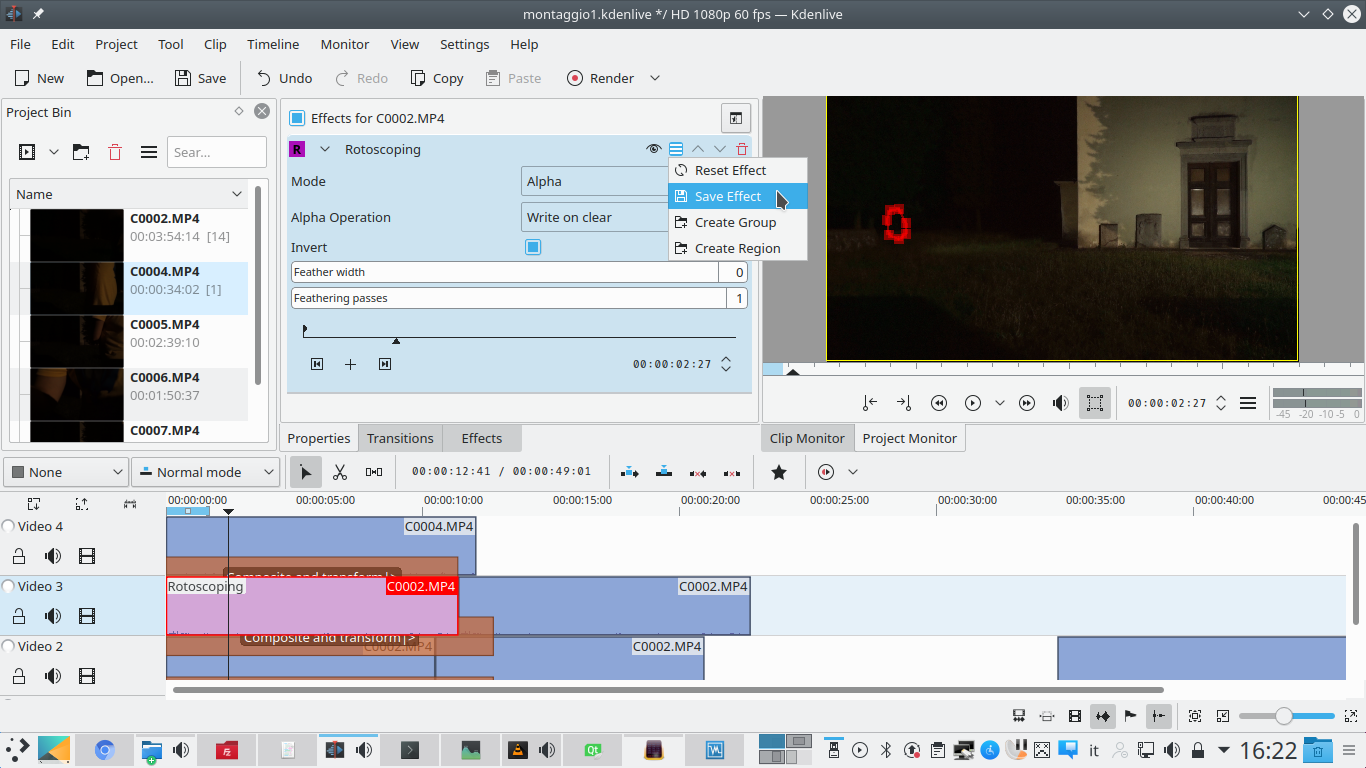 4 SAVE EFFECT – If in the rotoscoping effect with inverted mode the outline of the object to be hidden is drawn, that part of the movie disappears and is then replaced by the other clips. To save the settings just click on the menu and then on Save effect .
 Light to the foreground subject
To merge the subject with the illuminated scene we have to take care of edges and brightness curves
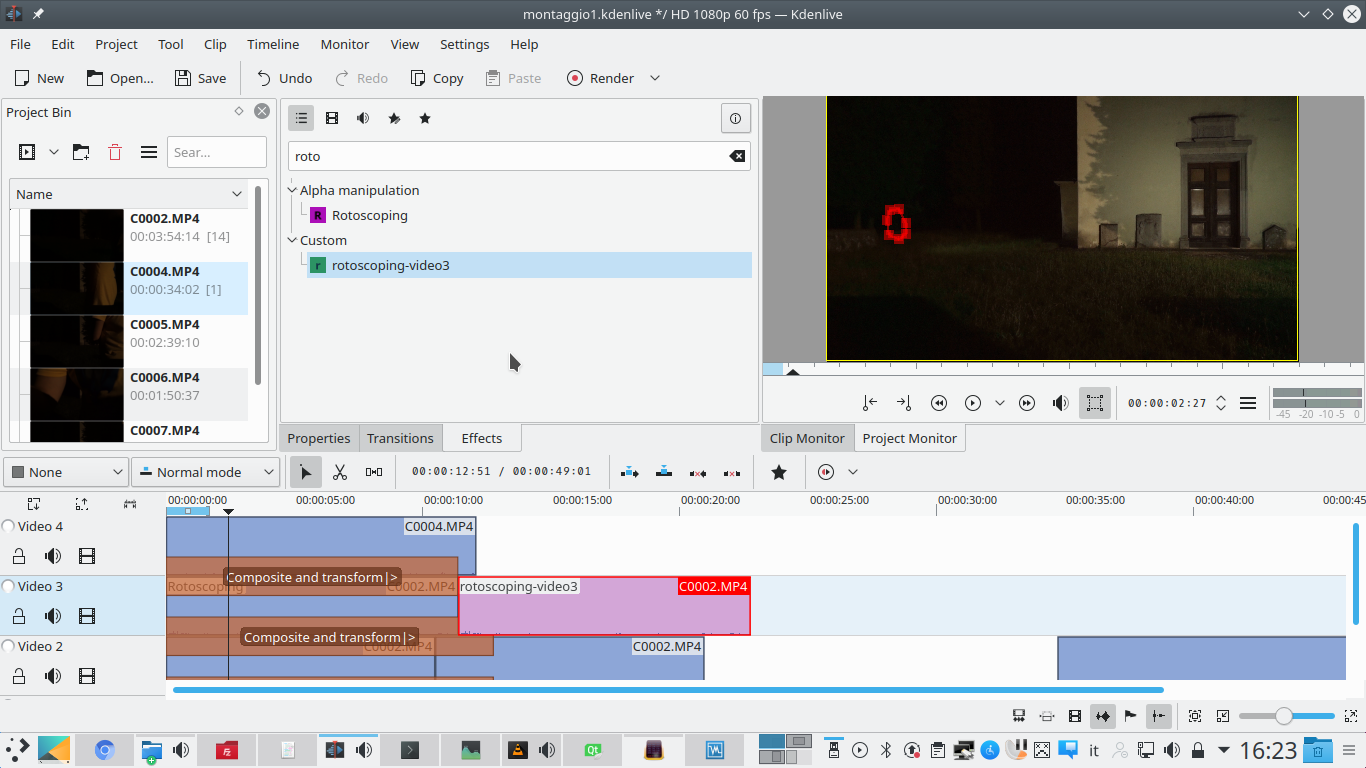 1 NOW WE REPEAT IT – If the effect has been saved it will be very easy to repeat it on another clip: this is convenient if you want to make the same element disappear from two clips side by side. Just find it in the section Custom and drag it to the clip that still has no effect.
  2 THE LIGHTEN MODE – In movies that include very bright lights, used mostly to highlight edges and particular points of the scene, you can use the same transition Composite and transform , but with modality Lighten , so as to avoid blurring by overlapping shadows.
  3 SHADED EDGE – Again in the case of videos that contain the lighting of important details, it is a good idea to use the effect rotoscoping to cut out only the area where you want this light to take effect, setting the Feather width at least 10 for the nuance.
  4 WITHOUT THE BACKGROUND – The last clip to add is the one that should be in front of everything, for example the one with the actor. To remove its background and prevent it from interfering, the effect can be used Color Selection with Invert Selection : it is a kind of more precise chroma key.
 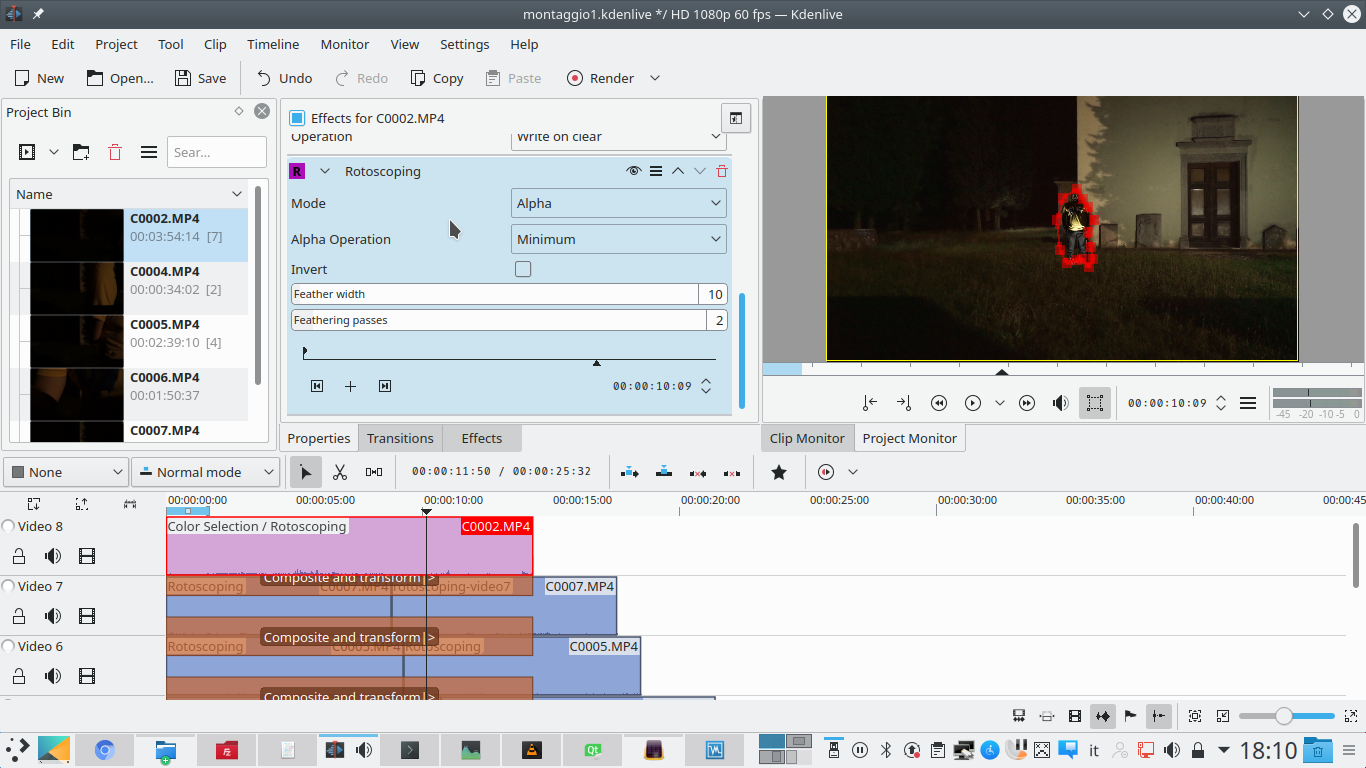 5 OTHER SHADING – A rotoscoping can also be added to hide irrelevant objects. For example, the base of the light source used to illuminate the actor. To blend it well you need to set the Feathering passes at least a 2 and the Feather width a 10 .
  6 THE CURVES OF LIGHT– Finally, it can be a good idea to use the effect Curves to adjust the brightness to be similar to that of the rest of the scene (which is now very clear). The mode of Composite and transform ideal for the subject is usually Alpha blend .

