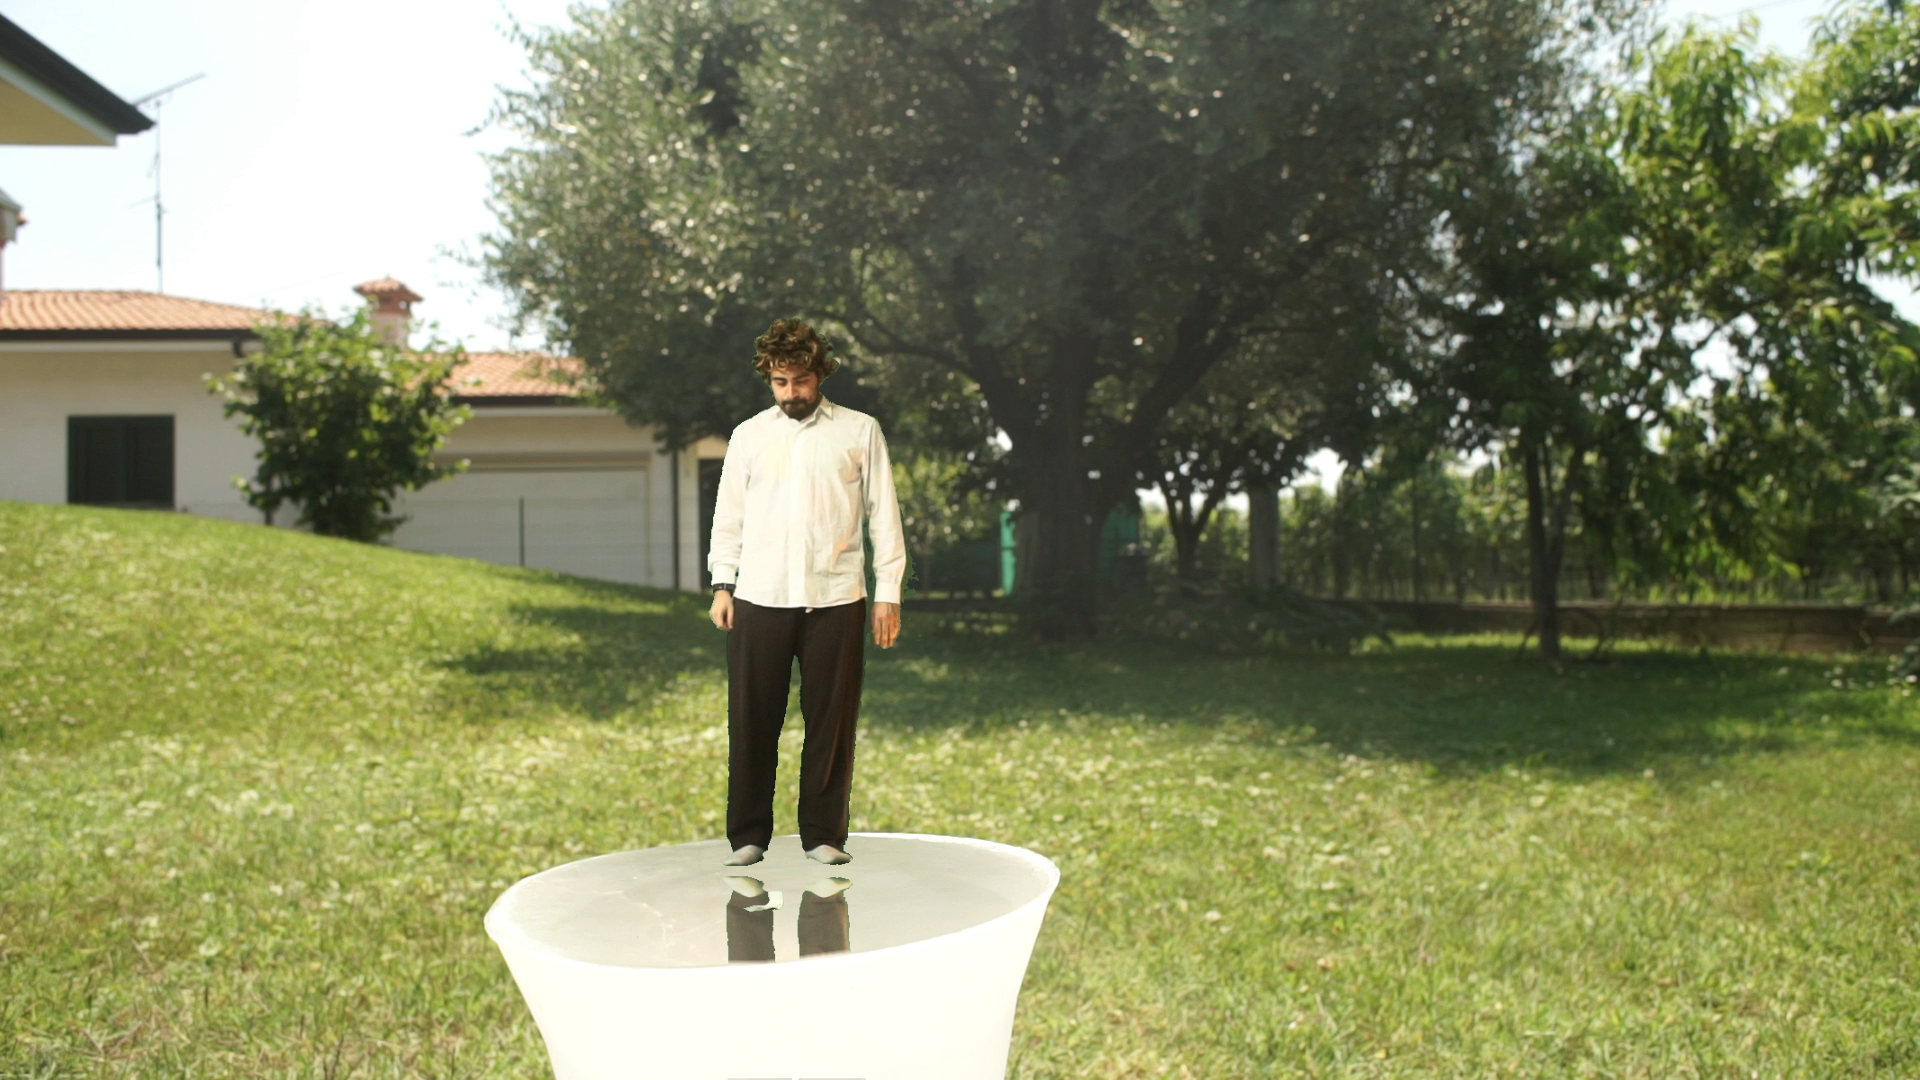
Thanks to the power of computer graphics, it is possible to walk on a body of water without the need for miracles, superpowers, or illusionist tricks. All you need is Kdenlive and the right video footage.
Among the special effects of a film there are not only explosions and lightsabers: sometimes you may want to make something more “biblical”, like walking on water. It is an effect scene, because it suggests that the actor has some kind of superpower, or because it is simply something bizarre that strikes the audience’s attention. Now, there are several methods for doing this specific “in-room” effect, but they are not very practical. They are based mostly on suspending the actor with two steel wires and a harness, or on placing a glass plate under the surface of the water on which the actor can walk. The problem is that these things require a lot of money and a good organization, and in some cases they are not even feasible (for example when you don’t have a basin of water available). However, we can achieve this effect in Kdenlive, not only by saving time and money, but also by obtaining the possibility to “adjust” the video according to our needs. Starting to build the movie is quite simple: first of all we need a video in which the water basin is taken, then a clip with the actor pretending to walk on it. Since we will have to extract the actor from its clip and superimpose it on that of the water, the actor must be positioned in front of a green sheet. Any other color can be chosen, but green is usually the one that works best. Taking advantage of the chromatic key effect, Kdenlive will cancel all objects of the same color as the sheet, making them transparent. To really give the idea of being on the water, however, we must give the actor a reflection. The operation is not too complicated: just duplicate the actor’s video clip, with all the effects applied, and add the Mirror effect (i.e. mirror). With some small foresight on the overlapping method, we can give the illusion of a true reflection. In our example, we have decided to make a complication: usually, in fact, when you want to show an actor who walks on water, you take him from the side, so that his walk appears on a single horizontal line. Instead, we show how to achieve this effect with an actor walking in the direction of the camera, then along a vertical line. This is obviously a complication because it means that the actor’s reflex will have to be repositioned. In fact, due to the concept of mirror itself, if the actor approaches the camera his reflection will tend to go in the opposite direction (while with a true reflection this does not happen). Nothing difficult, however: Kdenlive’s transitions allow us to move the video clip practically automatically. Using the keyframes, in fact, we only need to indicate the initial position of the clip that contains the actor’s reflection, and its final position. The program will calculate all the other frames automatically. To make this image a real reflection, we will use the Hard light overlay mode. This makes it possible to see the image of the reflection, but you can also notice the lines of the water waves below it, to really give the illusion that the reflection is appearing on the surface of the water. As always, you can see the example video at the following address: https://www.youtube.com/watch?v=yh8wp_aHlRU
 Under the actor his reflection appears in the water
  As the actor moves, his reflection follows him
 Make the water more realistic
One of the simplest options, of course, is to get a photograph of a lake or any other water basin. However, the problem with a photo is that it is inevitably false: it is too firm. The water, even that of a pond or a basin, must have minimal movement. Furthermore, it is obvious that the water must move at least a little when someone walks on it, it is intuitive. The simplest solution is to disturb the water in some way, producing wind with a tool to blow the leaves from the sidewalks, throwing a stone, or hitting the bottom of the bowl. Then just cut the video clip so that only the waves are seen, and not the entity that caused them (for example, the stone is no longer seen once it has gone to the bottom, but the waves remain for a while ).
The simple overlap
We insert the clip with the actor over the background
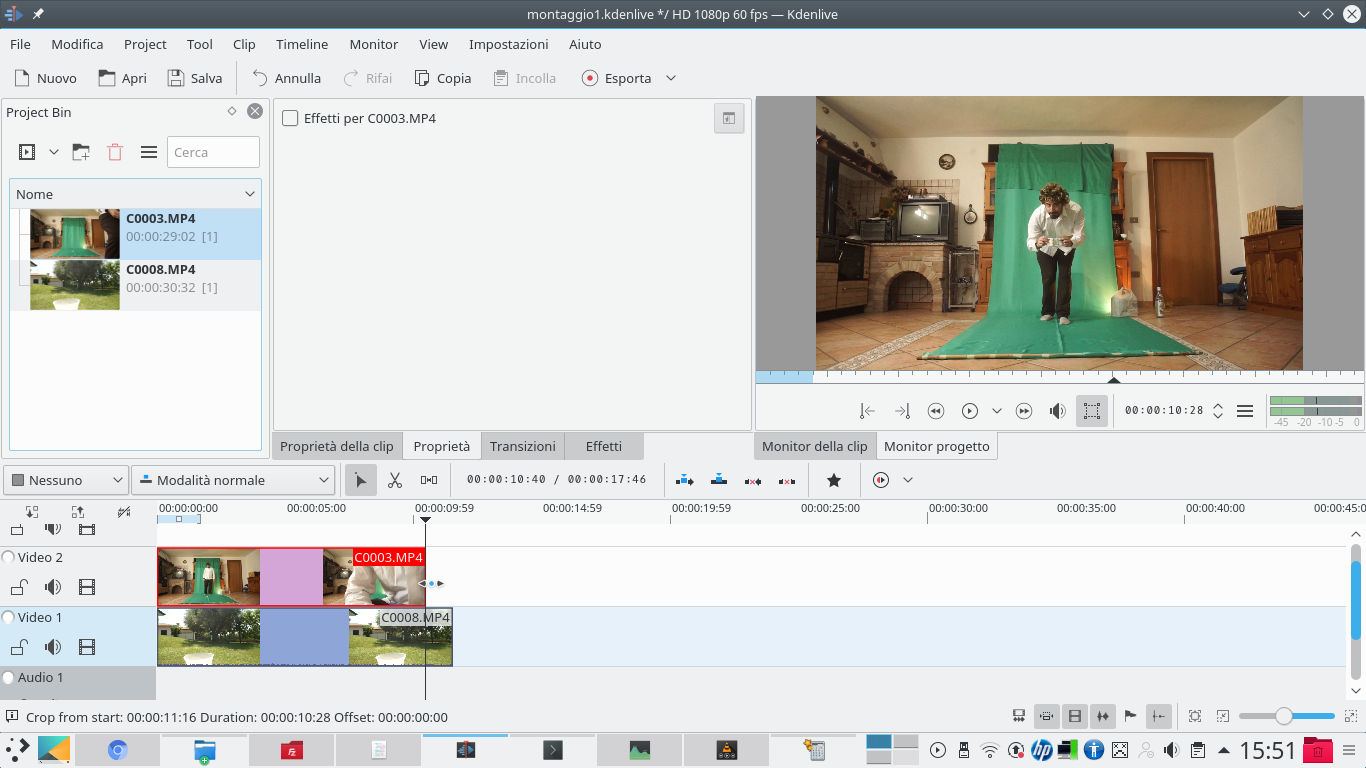 1 BEFORE THE TWO CLIPS – Let’s start by entering in the track Video1 the video clip containing the background, i.e. the basin of water. In the track Video2 instead insert the clip with the actor with the green sheet.
  2 THEN THE TRANSITION – If necessary, we cut the clips with the tool scissors . We insert a transition between the two clips Affine , obviously extending it for the duration of the clips.
 Clear the green sheet
The actor was filmed in front of a green cloth that we will make disappear
 1 CHROMA KEY – We add a type effect to the clip containing the actor Chromatic key . Using the color selection button, we click on the green sheet to select the tint. Then we modify the variance so as not to delete parts of the actor..
  2 ROTOSCOPING– Of course we can also add more Chromatic keys , so as to cancel other shades (such as el ombre del telo). If necessary we also add an effect rotoscoping drawing the outline of the green sheet.
 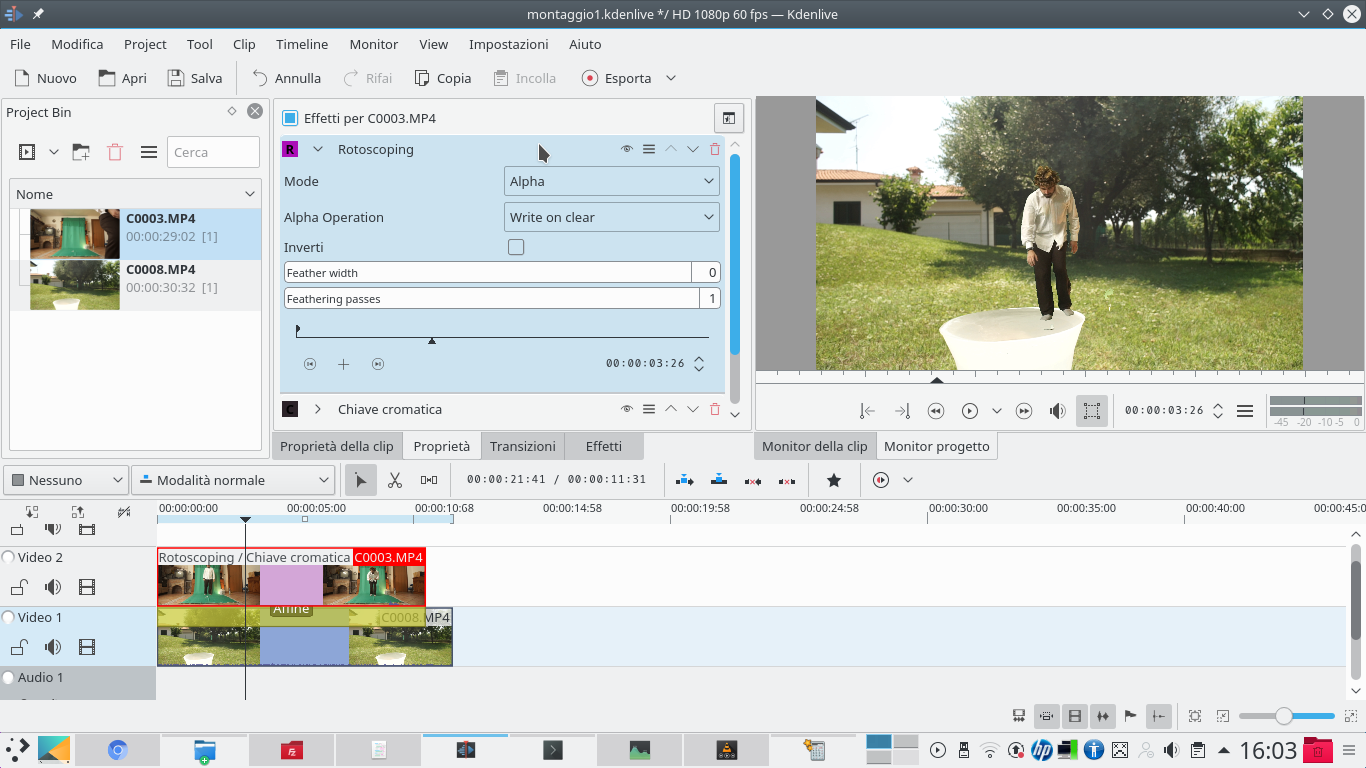 3 THE SHAPE – The rotoscope allows us to eliminate everything that is outside the shape we draw, so we can make any parts of the frame not covered by the green sheet disappear. But the effect must be dragged over the various chromatic keys, to work.
  4 POSITIONING – Now, working on the transition Affine , we can decide the position of the actor: we just have to move it right above the water level. It may also be necessary to increase or decrease the size of the actor to adapt it to the scene.
 We prepare the reflection
The actor must mirror himself in the water, so let’s build his reflection
 1 DUPLICATION – When the actor’s image is clean and in position, we take the tool scissors and cut the clip in half. Then we move the second half on the track Movie3 , keeping the alignment, and we extend the two clips so that they come back as the original.
  2 THE TRANSITION – We now have two perfectly identical clips. We add between tracks Movie3 is Video2 a transition of type Composite and transform . The transition must refer to the track Video1 .
  3 A MIRROR – The clip of the Video3 track must now be reversed. We can do this by adding the effect to it Mirror , setting the direction on Flop . If desired, this can be done on the track clip Video2 instead of Movie3 .
 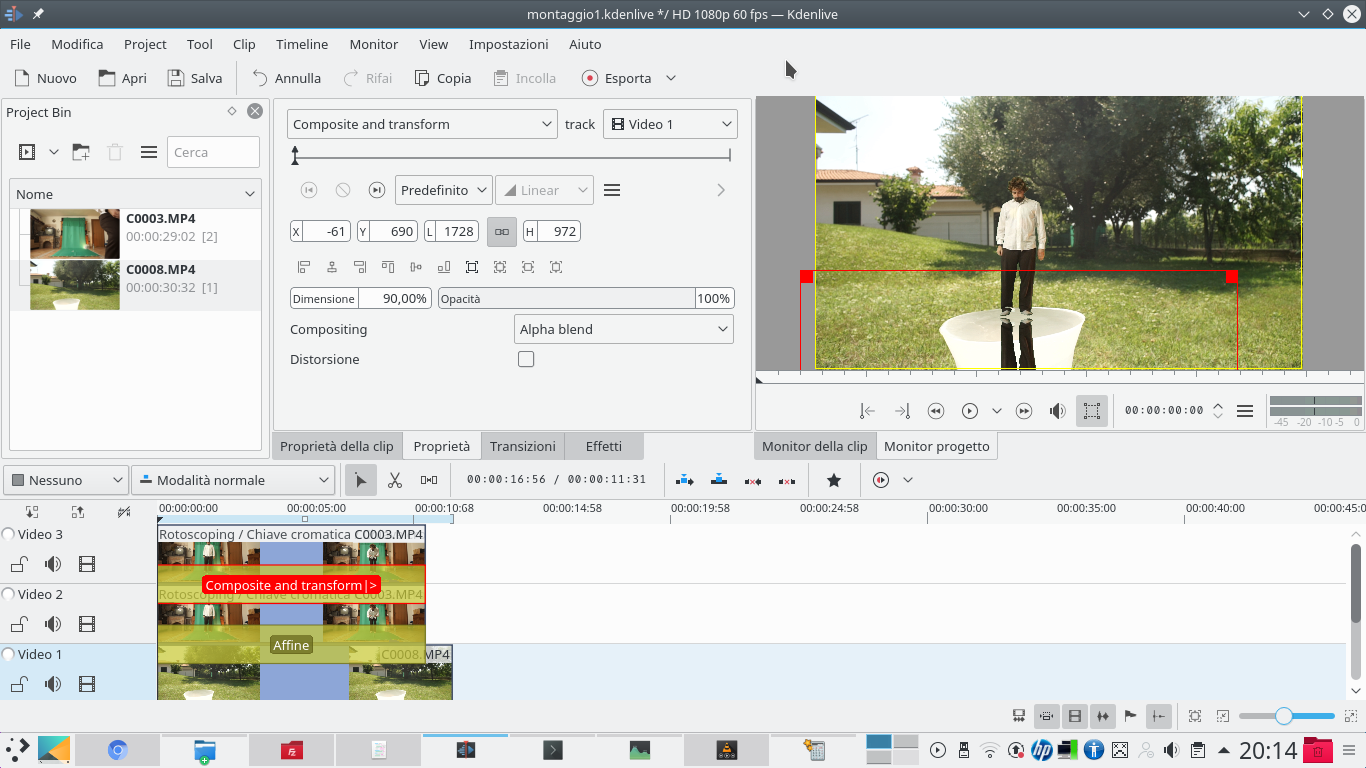 4 IN THE RIGHT PLACE – Now it is necessary to choose the starting position of this reflection on the actor’s water. Just go on the transition Composite and transform and choose the right position, so that the image looks really mirror.
 A more realistic reflection
Overturning the image is not enough: we must also take care of light and position
 1 ON THE MOVE – Now, staying on the transition, it is necessary to move forward until the actor stops walking. At this point, a new keyframe must be added, changing the position of the reflection so that it is aligned again.
 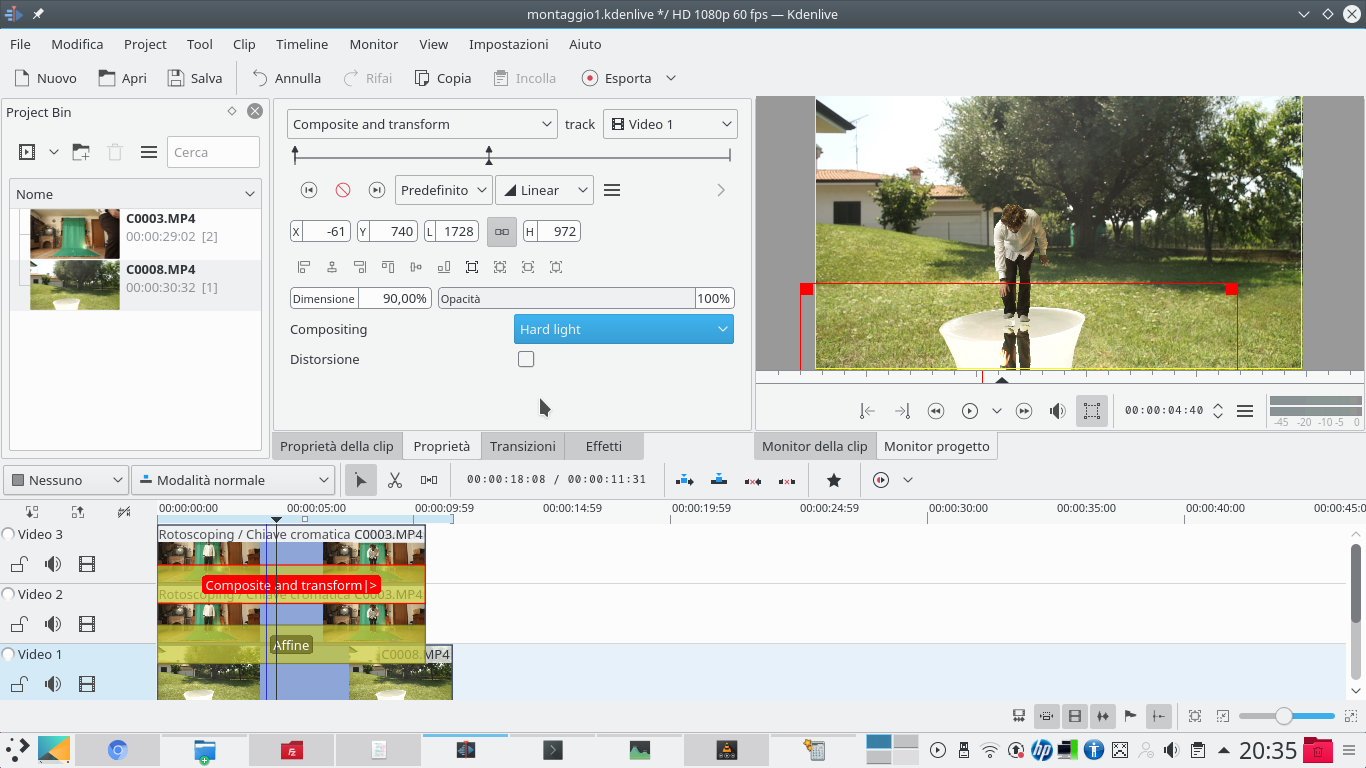 2 THE STRONG LIGHT – To transform the current image into a true reflection, superimposed on the water, the compositing of the transition must be set to Hard light . For a lighter overlay you can choose Soft light or Overlay .
  3 LESS CONTRAST – You will probably need to adjust the contrast by lowering it. So let’s add the effect to the reflection clip Contrast , bringing the value below 200 points. It is necessary to be able to see the movements of the water under the actor’s reflection.
  4 NEW TRACK – To complete the movie, we need a fourth track. We can add it by right clicking on the track Movie3 , and choosing Insert new track . The video track must be inserted above the Movie3 .
 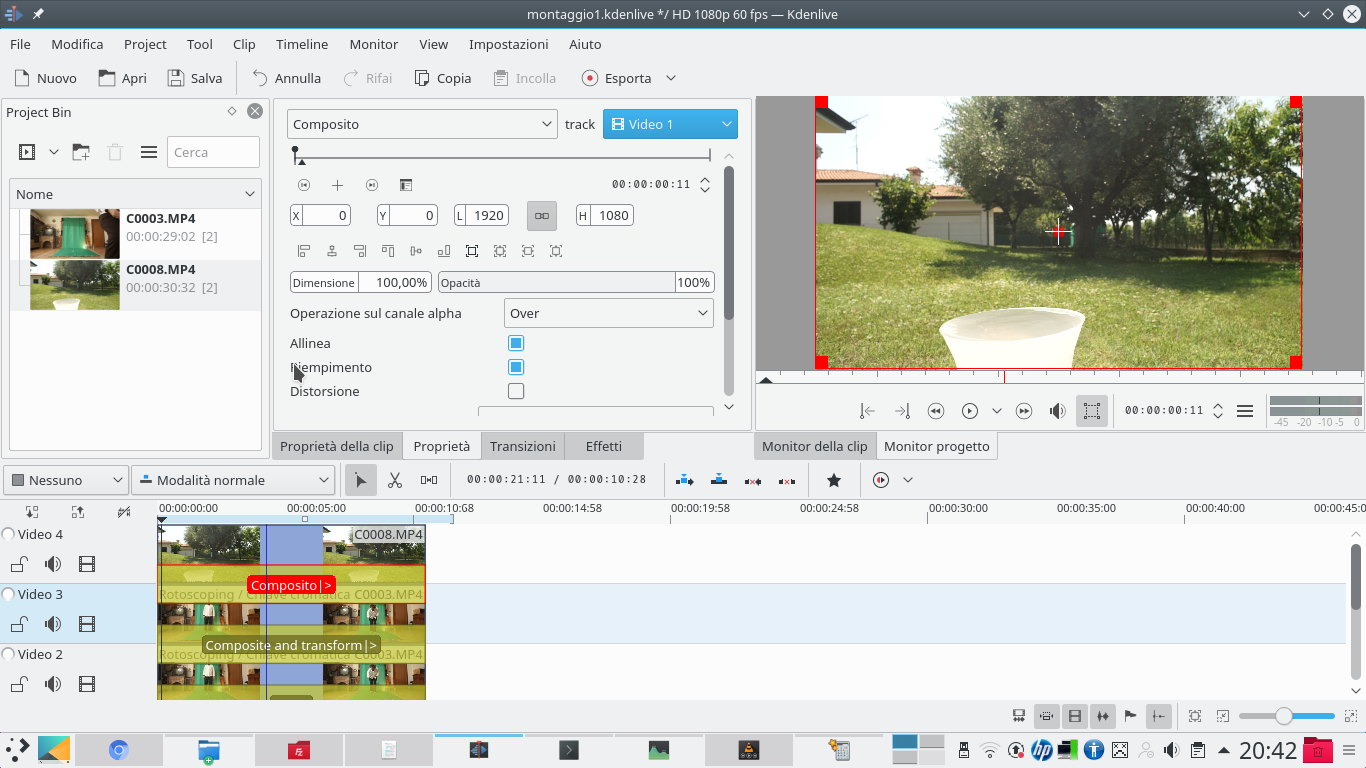 5 OVERLAPPED – In the track Movie4 all we do is insert the same initial background clip, the one with the basin of water. We also set up a composite transition for this clip that refers to the track itself Video1 , to have a perfect overlap.
 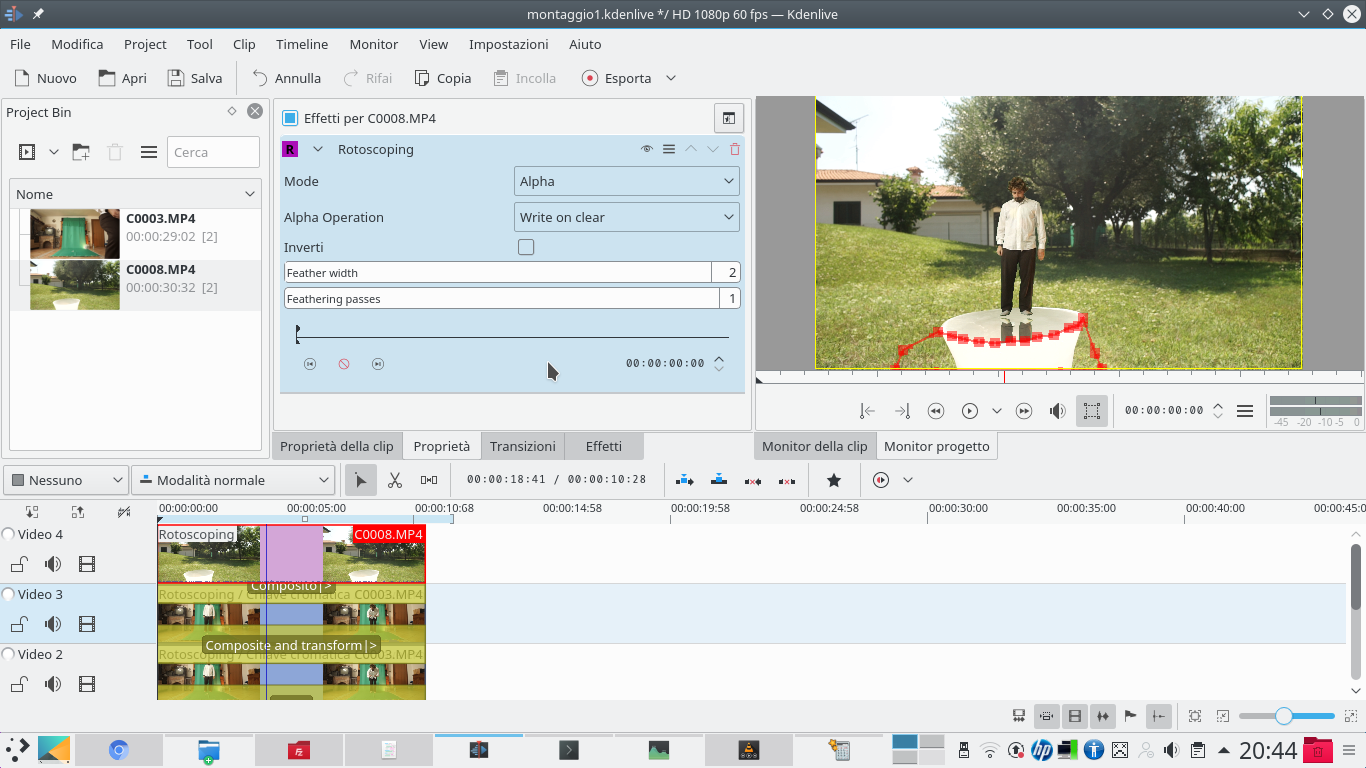 6 WITH A CUT – We add to the track clip Movie4 an effect rotoscoping by drawing the outline of the lower part of the basin of water, so as to make the part of the actor’s reflection disappear which would otherwise come out from the edge of the water.

