Even if you are not a professional basketball player, you can still manage to score in a basket with an “impossible” shot. Thanks to Kdenlive, of course, with makes it possible to draw the trajectory of a ball while editing the movie.
Sometimes the special effects are not needed to show something absurd or incredibly imaginative, but only something very realistic but difficult to obtain. For example, when launching an object into reality it is not really easy to imprint the trajectory we have in mind. It’s not that it’s impossible, it’s just that before getting the desired result it may be necessary to repeat the throw dozens of times. To make a metaphor, the illusionist Derren Brown a few years ago had presented a movie in which, without the camera ever changing the frame, he was seen throwing a coin in the air 10 times, obtaining for all ten consecutive times the side of head. The trick consisted in the fact that the movie, although authentic, was presented as an “experiment” made on the spot, while in reality the video was made after a week of shooting in which for several hours a day the illusionist did nothing else than tossing the coin until it got heads at least 10 times in a row. In short, just because something is difficult or improbable does not mean that it is impossible. It is precisely this type of event that, in the films, most affects viewers. In fact, surreal events are clearly fake and the brain of the spectators, deep down, cannot really believe it. Instead, a realistic event, though unlikely, can easily deceive the public’s brain, making them wish that what is seen has actually happened. One of the most common situations is the throwing of an object, for example a ball. How many times does it happen to see a film (usually American) in which a person manages to send a ball into a basket with an “impossible throw”? Maybe the actor is turned from behind or blindfolded, and must throw the ball without even being able to see the basket. But the ball will enter the net anyway, in order to carry on the story. How can we make this little magic ourselves? With Kdenlive, of course. All we need is a video in which the actor, in the position where he must actually be, throws the ball. Obviously, in this movie the ball will go haphazardly and will not enter the basket, but it does not matter. In fact, then we will make a second movie, with the exact same shot, but in which the actor is in a much more comfortable position to throw the ball exactly inside the basket. Kdenlive will then allow us to combine the two films so that the final result begins with the first of the two films: as soon as the ball begins to come out of the trajectory that we imagined, we will make the ball disappear by replacing it with that filmed in the second shot we made ( or the one where the ball really enters the basket). Of course there will be a couple of frames in which we had to completely erase the ball, because it was not possible to use his images from the first video or those of the second. In these frames, which should not take more than half a second, we can reconstruct the movement of the ball to join the two movies using the Kdenlive composite transition. As always, you can see the example video at the following address: https://www.youtube.com/watch?v=6ia2nDFlKGg
 A frame in which we drew the ball
  We have merged the two films: we see the actor from the first movie and the ball from the second movie
 Times for shooting moving objects
There are two possibilities when you want to shoot fast moving objects like flying basketballs. One consists in the use of very short times to perfectly capture the position of the ball, the other consists in the use of relatively slow times to obtain a blur effect of the object. In our case, the second is preferable: not only will the object appear faster, but it will also be easier to merge the two videos, because nobody will be able to recognize the differences between the ball between one movie and the other. Let’s not forget, among other things, that the international film standard provides 24 progressive frames per second (i.e. 24p digital). Eventually 25 frames, if we want to keep the PAL system, even if the distinction between 24 and 25 frames per second no longer has reason to exist today. So by filming at 50 or 60 fps and editing the video with one of these frequencies, we can then slow down the final result up to 50% to obtain a pleasant slow motion.
Let’s get help from a guide
Kdenlive allows us to fix a guide so as not to lose the reference on the timeline
 1 INTERMEDIATE TRACK – To begin with we need to load the original movie into the track Video2 by Kdenlive. We can load the movie into the track Video2 , cutting it so as to separate the initial part of the throw from the final part.
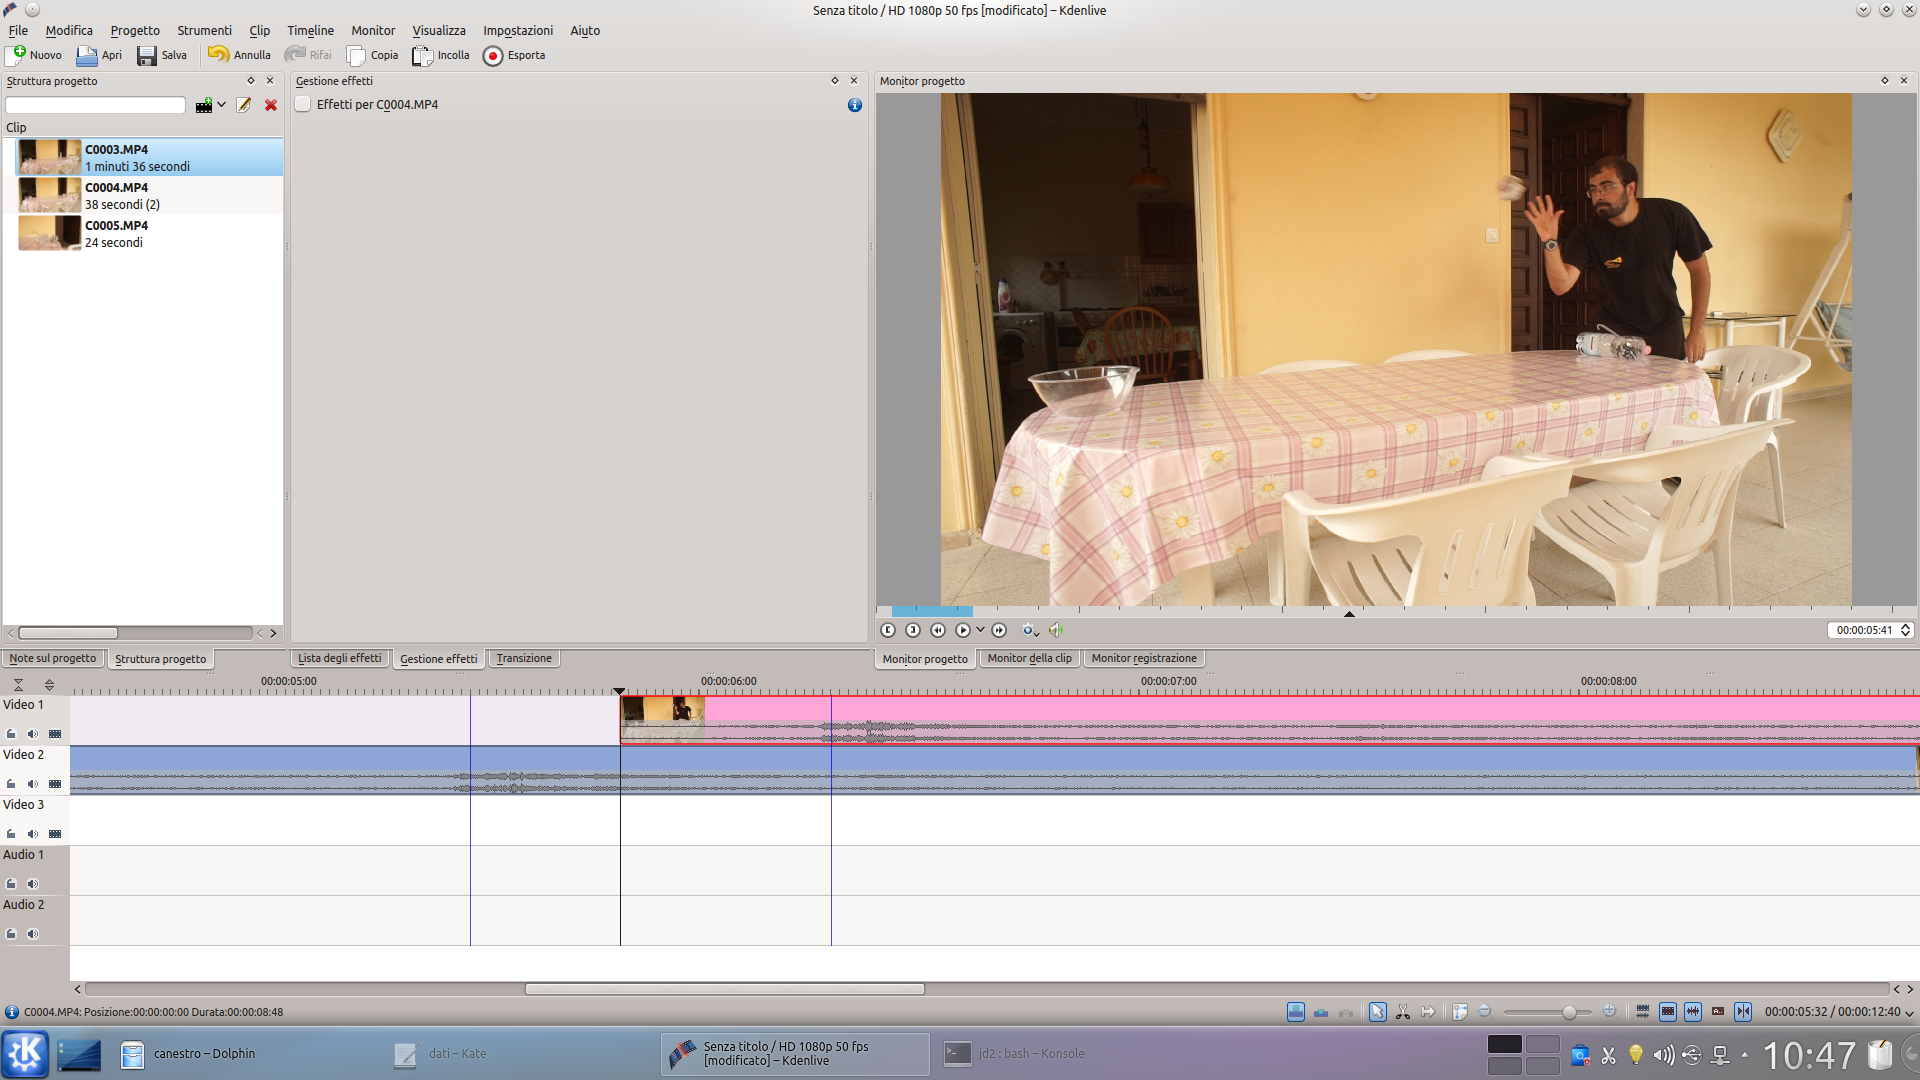
 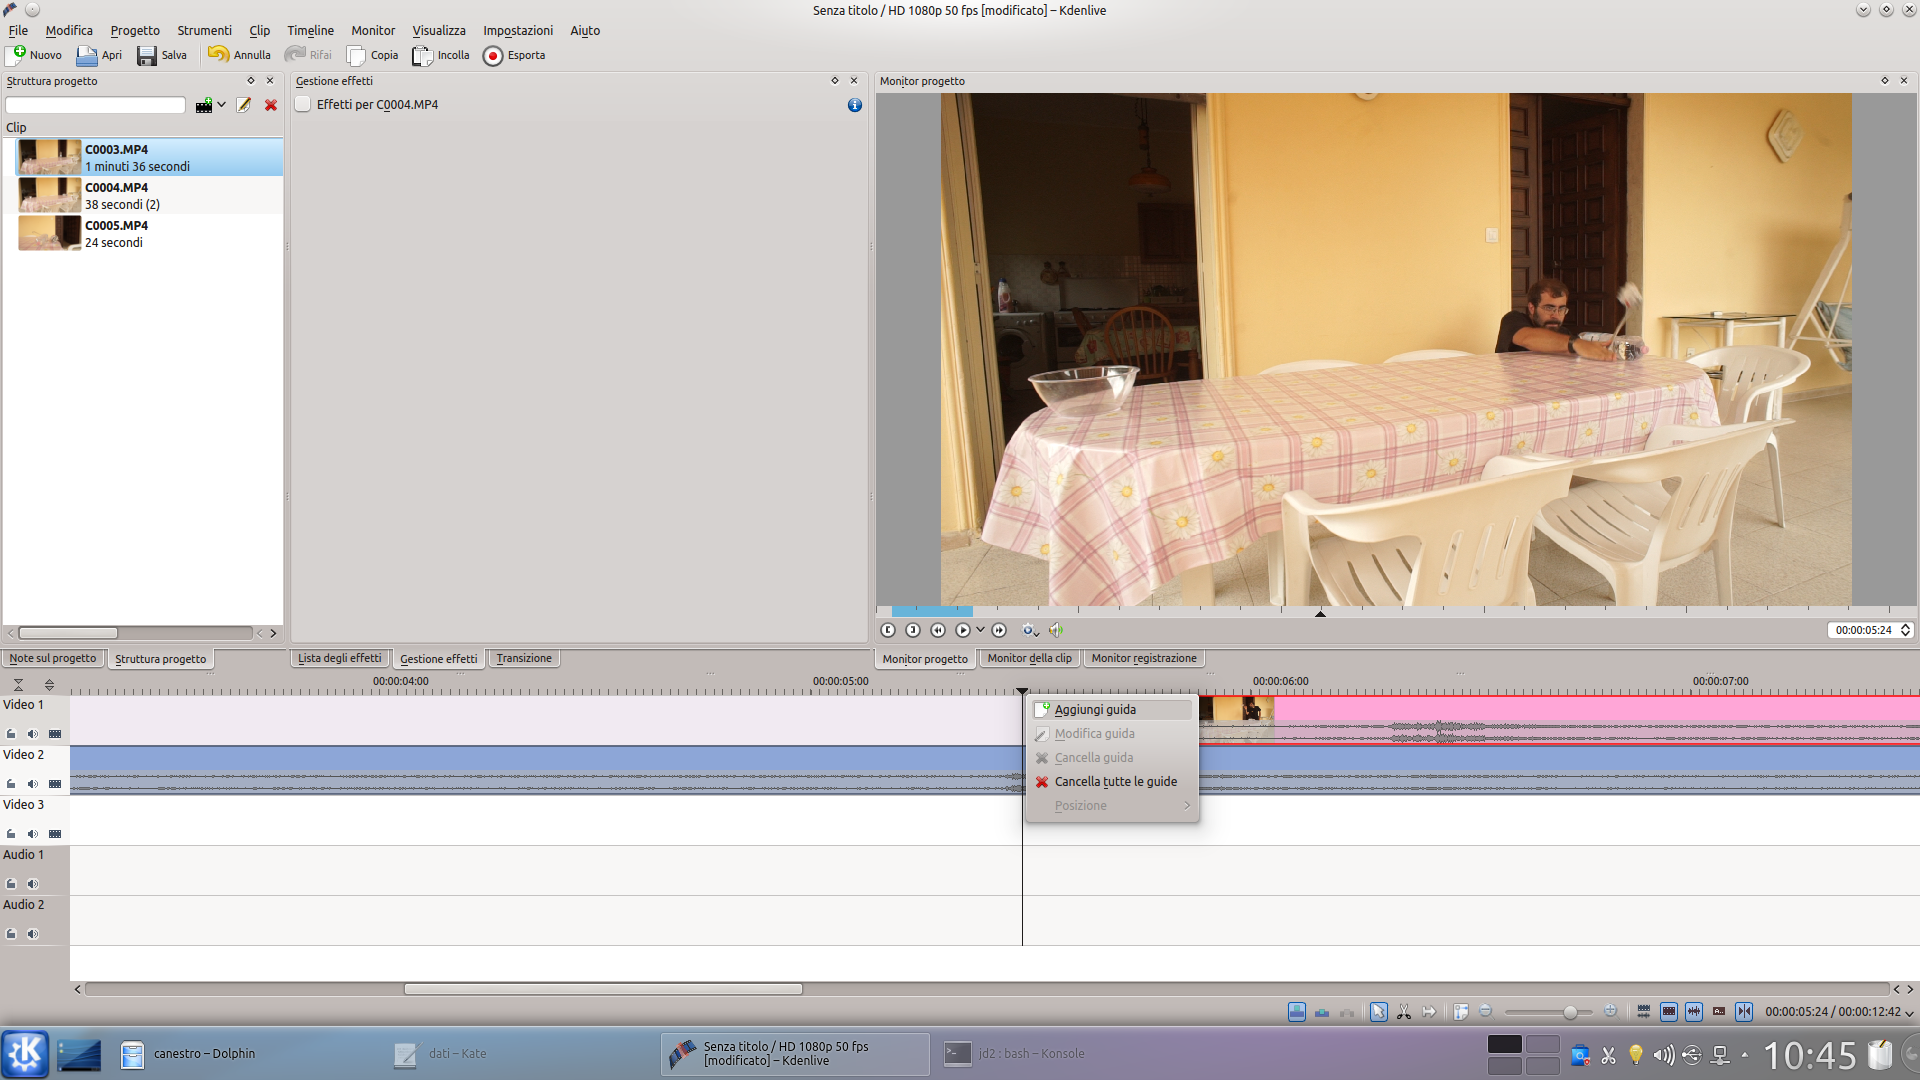 2 THE FIRST MOVEMENT – We move the clip with the final part of the launch into the track Video1 . To have a reference, let’s scroll the movie to the point where the movement of the ball must be stopped, and add here a guide by clicking on the timeline with the right button.
 Let’s prepare an image of the ball
We use GIMP to obtain a clean image of the ball that will have to fly
 1 THE HIGH TRACK – The clip with the final part of the movement of the ball must be positioned a few frames after the guide we have created. Before the guide we will keep the clip Video2 , after that of Video1 , and in the middle we will reconstruct the action.
  2 THE PHOTOGRAPH– Let’s move in the timeline to the frame where the track clip begins Video1 , and export the frame by clicking on the gear menu under the monitor. Let’s open the image exported with the GIMP program.
  3 LAZO SELECTION – We use the selection Lazo to select only the ball, then we press Ctrl + I to invert the selection e Delete to remove the background. We save the image and upload the file to the Kdenlive project.
  4 BACKGROUND CLIPS – Now we have to reconstruct the image between the point where we positioned the guide and the one where the track clip begins Video2 . In this range we have to position, in the track Movie3 , a clip that contains the background of the scene.
 Let’s hide the ball
Before redesigning the trajectory of the ball, we must clear it
 1 ANOTHER VIDEO – We put the background in Movie3 to hide the ball. But it may also be necessary to replace the actor’s face if the ball passes in front of it. To do this we need a new track, Movie4 , in which we insert a clip with the actor.
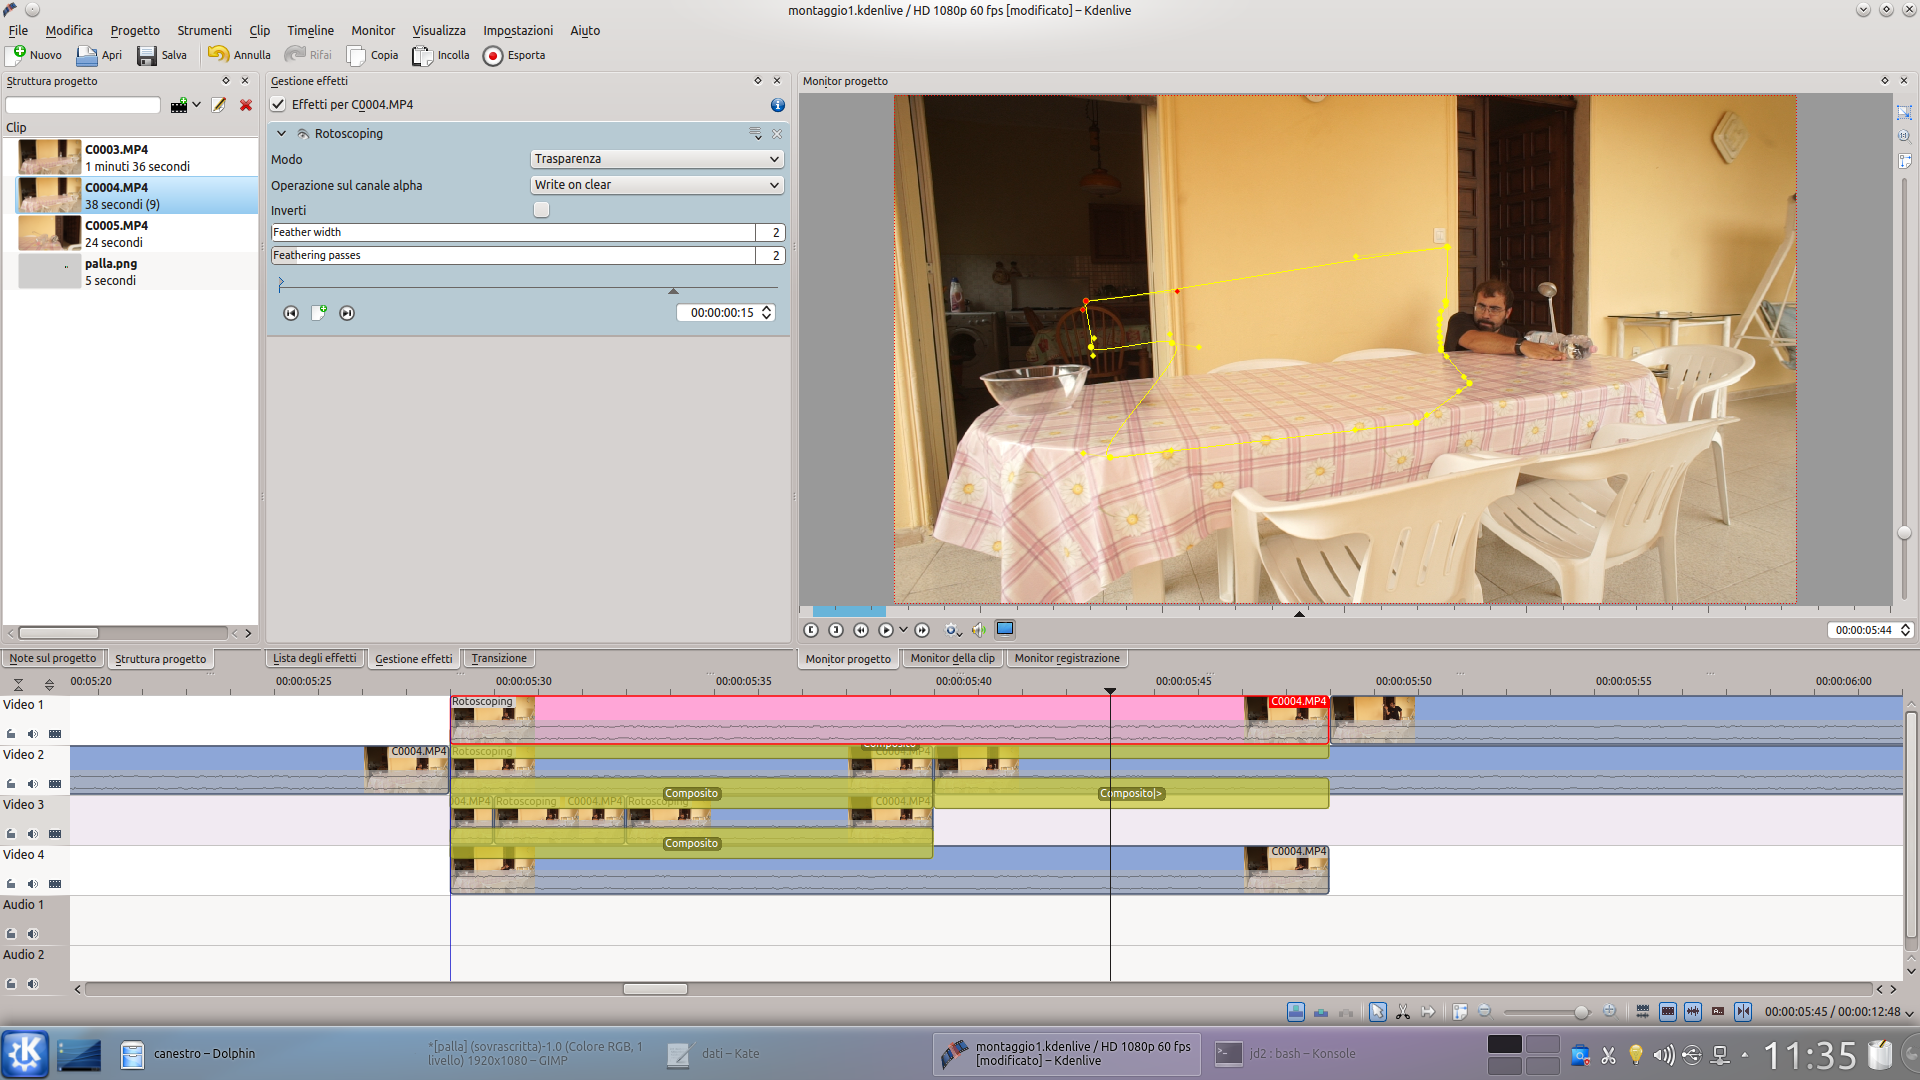
  2 THE ROTOSCOPING – The clips of the track Video2 and possibly also Movie3 they must have a composite transition. The clip of the track Video2 it must then have a type effect rotoscoping , designed to hide the ball after driving.
 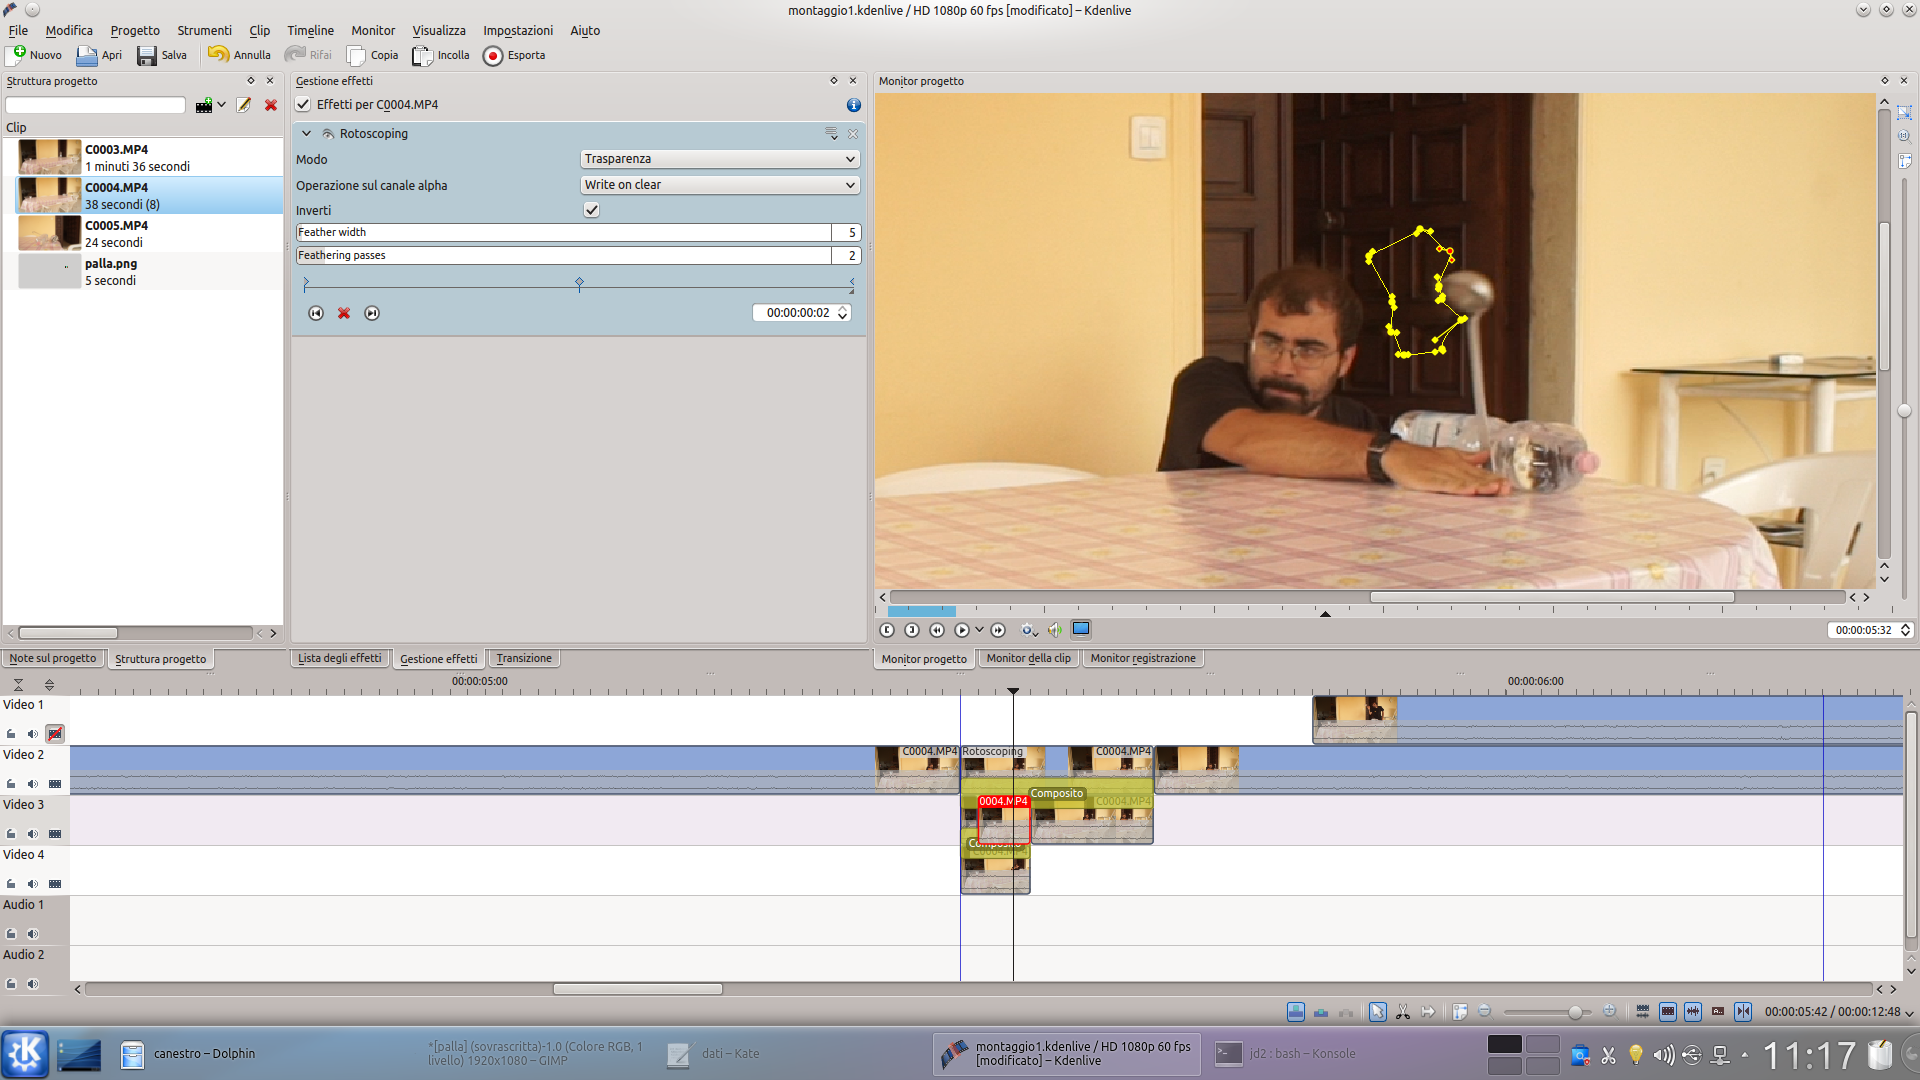 3 THE KEY FRAME – Of course we have to add to rotoscoping several key frames so as to follow the movement of the ball and hide it for as long as necessary to reach the beginning of the movie in the track Video1 .
 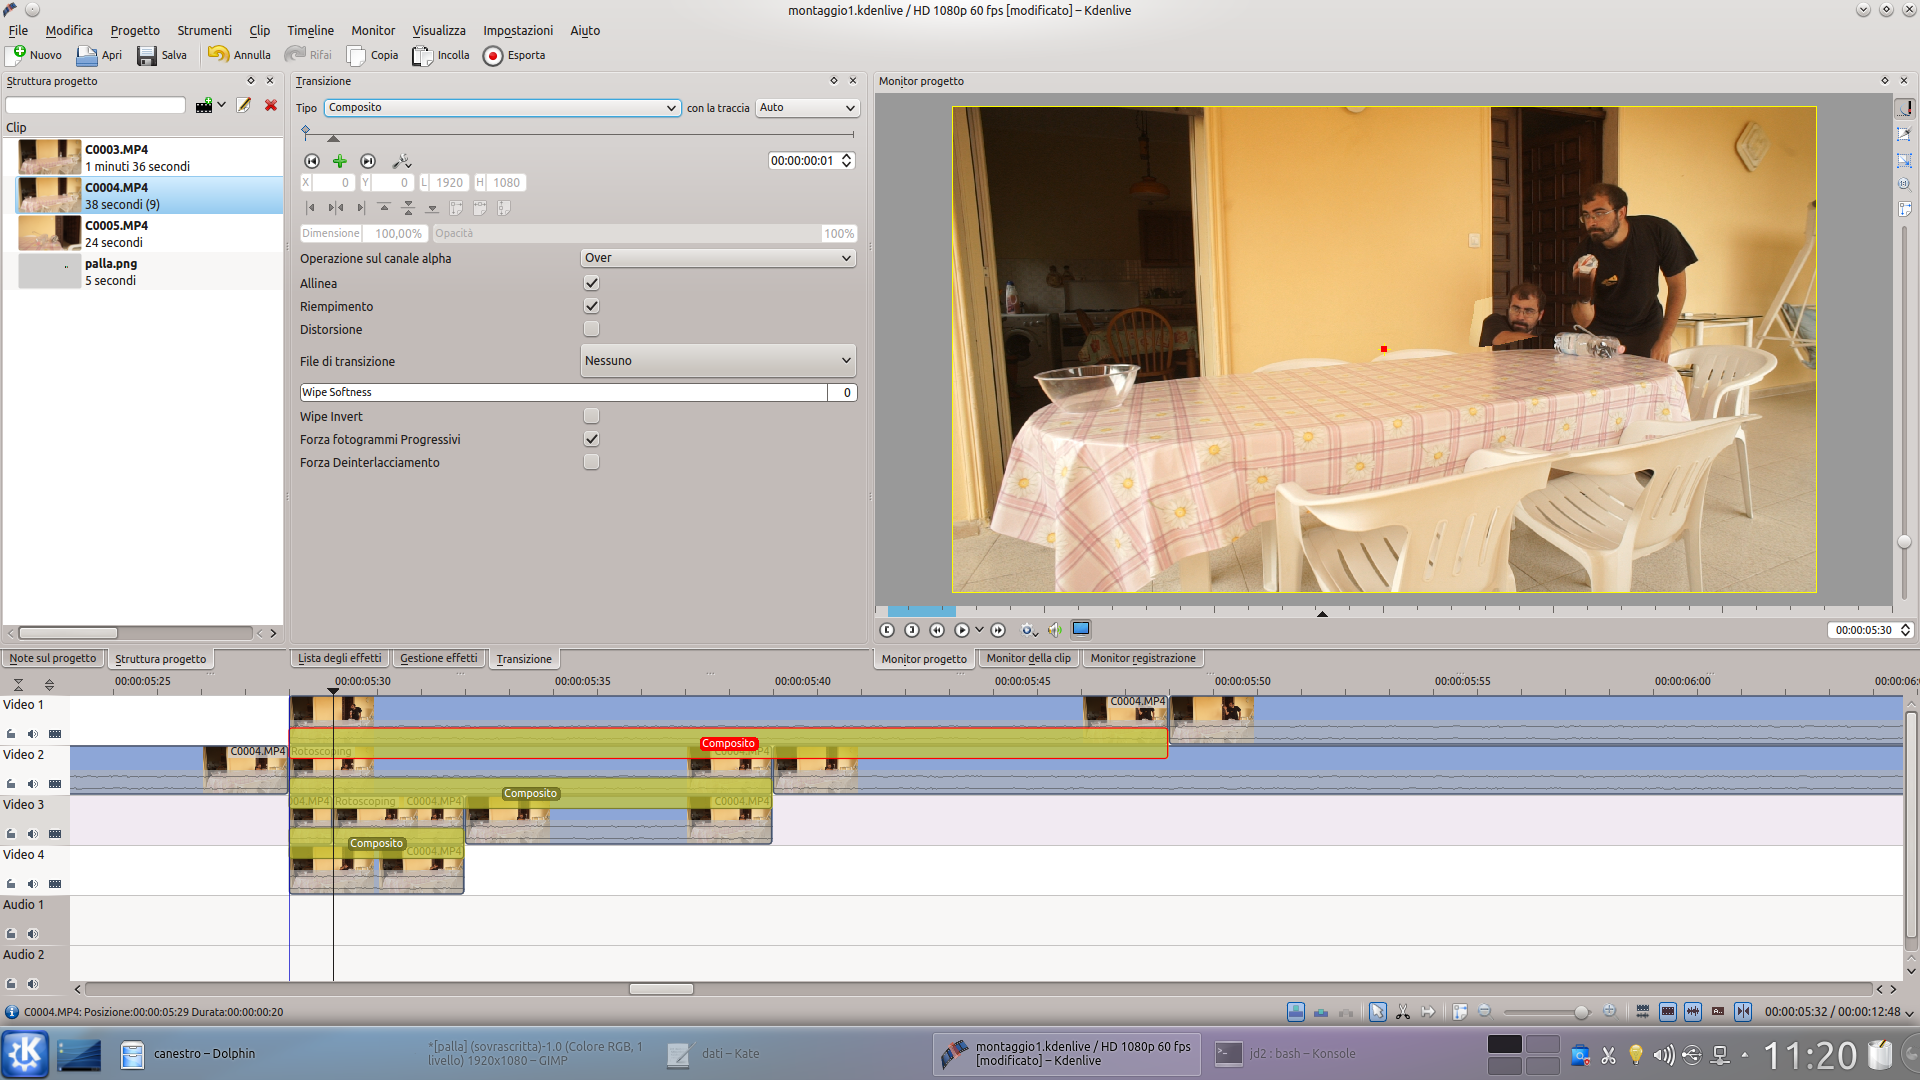 4 THE FIRST FRAME – With this effect we have hidden the ball in its first movements. But deleting it for the rest of its journey can be inconvenient: better to add a new movie containing only the background in the track Video1 , between the guide and the existing clip.
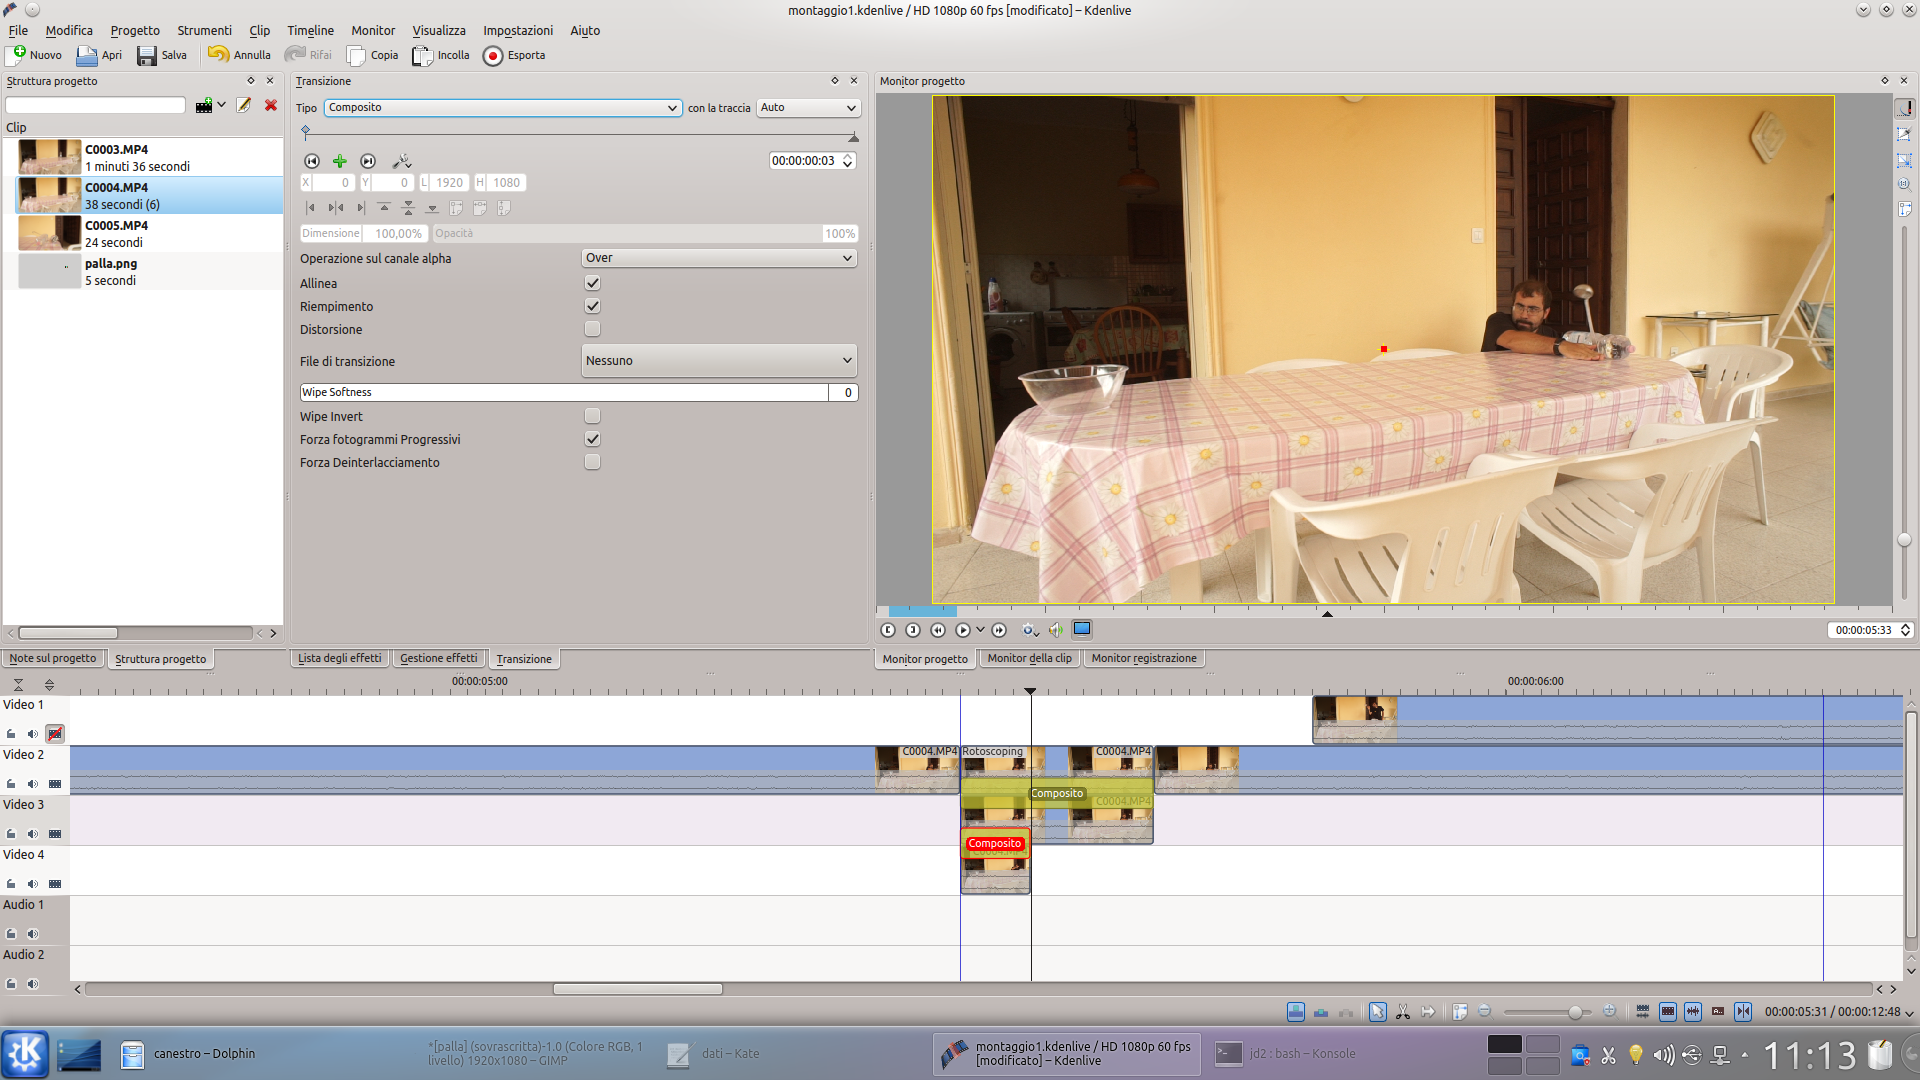
 Let’s merge the two routes together
We filmed two different trajectories of the ball: it’s time to connect them
 1 OTHER ROTOSCOPE – This background clip must also have a composite transition. Then we add an effect rotoscoping to replace the background the entire path of the ball, until the next clip begins.
  2 THE COMPOSITION – Now let’s add a transition Composite to the second clip in the Video1 track, with an effect rotoscoping which cancels the actor and shows only the second part of the movement of the ball.
 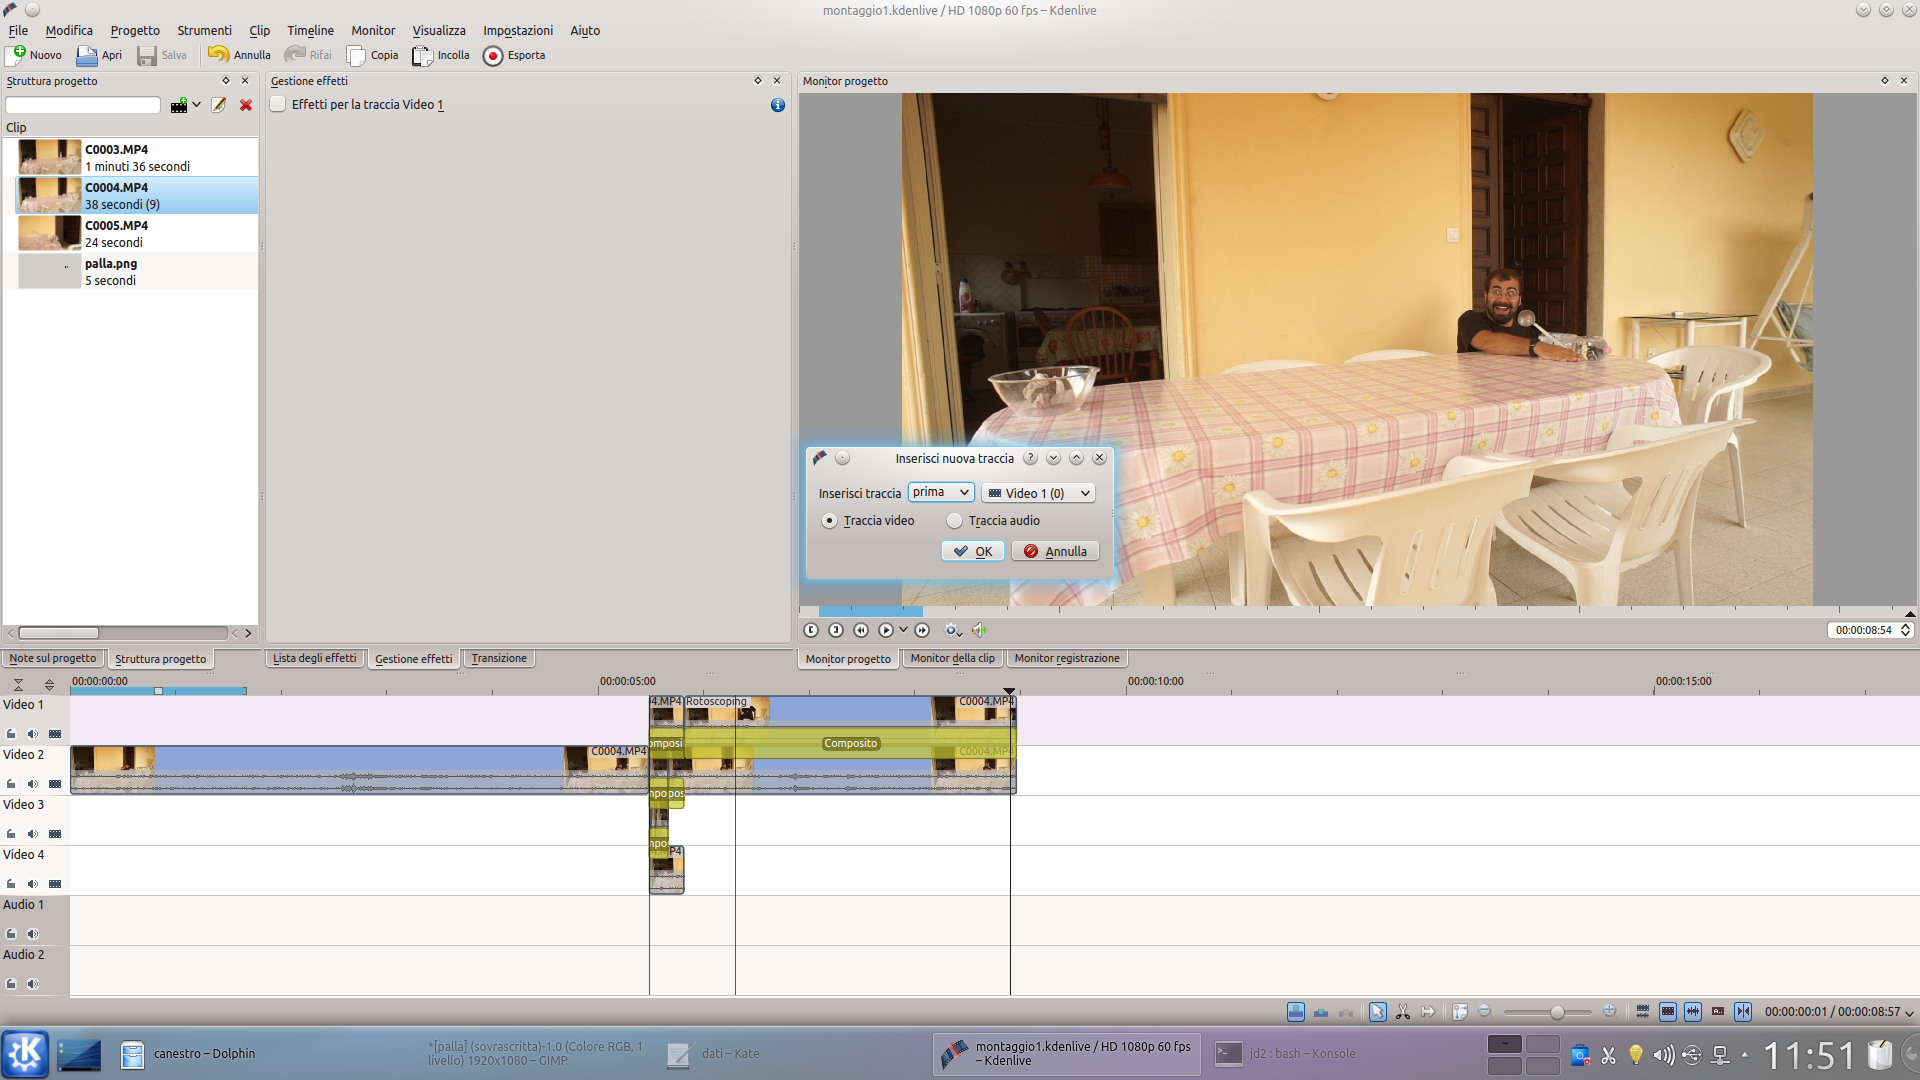 3 A NEW TRACK – Now, our project has a portion of the movie with the first movement of the ball, then the ball disappears, and a few frames later reappears at another point continuing the second part of the movement. We need a new track above Video1 .
  4 THE PHOTOGRAPH – In the new track Video1 insert the image of the ball we made with GIMP, making it start from the guide and end one or two frames after the beginning of the second clip of the current track Video2 .
  5 THE FINAL FRAME – We add to the track clip Video1 a transition Composite , relative to the lowest possible video track. Let’s move to the last frame, and create a key frame by positioning the ball in the same position where the video is located.
 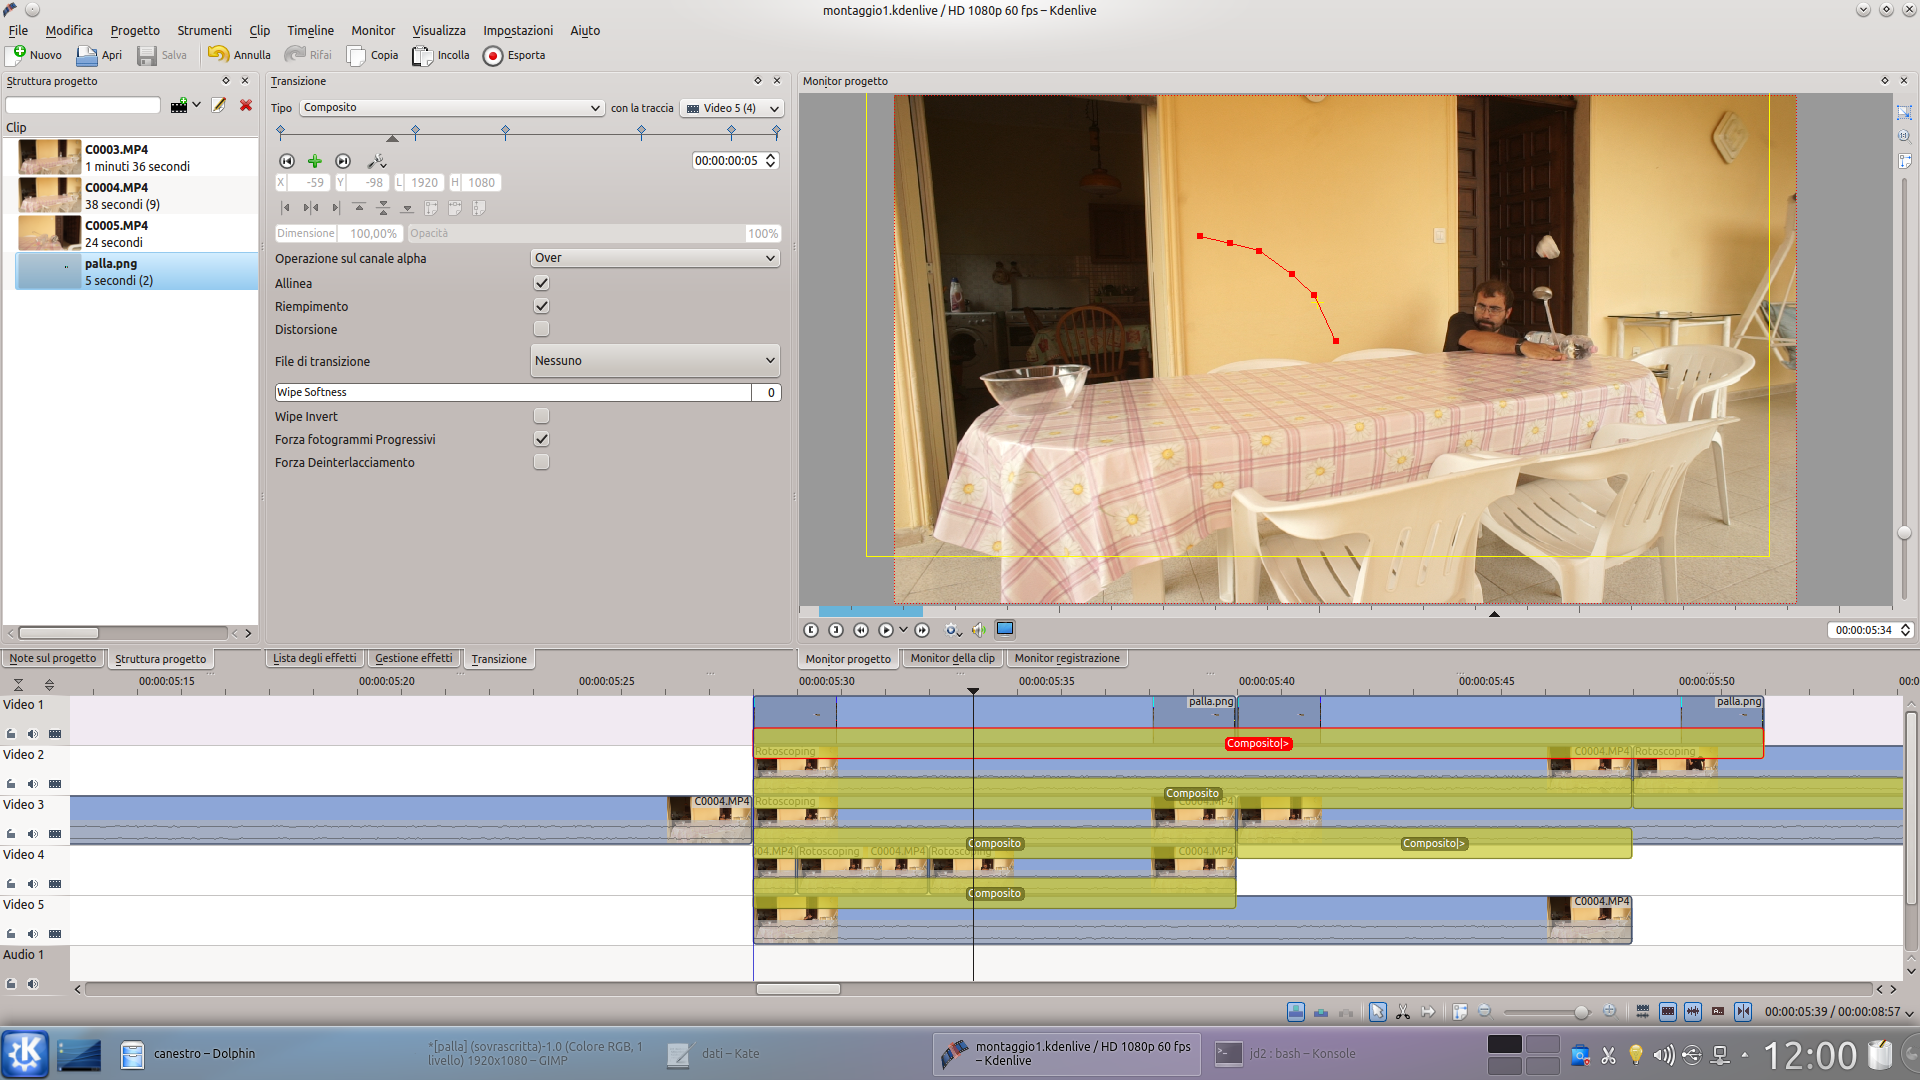 6 THE TRAJECTORY– Let’s move between the various frames of the transition to add key frames in order to stop the ball in a natural way, forming a realistic trajectory, typically a parabola.

