We use Kdenlive to design a time bomb display with a countdown timer: not only it is simpler to build a fake bomb but, since the numbers are added in post production, we can easily synchronize them to the actors’ acting.
Can you make an action movie without a bomb to defuse? Yes, of course, but it would be boring. Of course, making a fake explosive device with the classic timer is more complicated than you might imagine. Not so much for the bomb itself: you can easily fake one by gluing a couple of cardboard rolls, plasticine, or a pack of lithium batteries together. The difficult part is to make the timer, both because they are not easily found, and because during the shooting we will need to coordinate the countdown (the countdown, in English) with the actions of the actors, and it may not be very easy, especially if we have to shoot from multiple angles and if an act must perfectly coincide (for example, the countdown must stop exactly when the actor cuts a certain electric cable). The solution, as always, comes from Kdenlive, and consists in creating the timer in postproduction. The idea is therefore very simple: we will make a fake bomb with a display, the classic screen on which the numbers for the countdown will appear. The screen, however, will remain off during shooting. We will bring up the numbers thanks to Kdenlive. All we need is a movie containing numbers running in a countdown, drawn with a nice bright color on a black background. We can then superimpose this movie on the original shot using a transition of type screen . The screen transition, in fact, simulates a screen, so it is perfect for our purpose. To have control over the position of the numbers, which obviously must be adapted to the position of the display in the filmed footage, we will use two transitions. In fact, we will not apply the countdown directly above the original video: we will superimpose the countdown to a completely black clip, using the transition of type Affine , or Composite , which allows us to correctly position the numbers in the frame. Then, we will superimpose this completely black clip over the original shot using the screen transition. Among other things, we can choose between screen is addition : the second transition has a brighter result. Of course, the fact that the intermediate clip is completely black is not a problem, because this type of transitions makes the black color completely transparent. The advantage of these transitions, instead of directly using the Affine , lies in the fact that these two transitions transfer the color as if it were a light, while maintaining a part of the color and shape of the original shot, with an obviously more realistic result. In fact, this means that if in the original shot we have a display with dust, the result will still reveal the dust. The point, therefore, is: how to easily make a countdown with a black background? Of course we can make every single frame with a drawing program like GIMP. This offers us the important advantage of having everything under control and making the numbers exactly as we want. However, if we want something simpler, we can take advantage of a special Kdenlive generator, which produces countdown movies automatically: all we have to do is indicate the settings we want, such as the fact that the countdown reaches 0 and that the account in reverse is represented by a single number or by the classic format hours: minutes: seconds: tenths. Kdenlive will do the rest for us, and we will only have to make some changes to the video produced to obtain the color we want. As always, you can see the example video at the following address: https://www.youtube.com/watch?v=zwxk2cLM-Cg
 The number really appears to appear on the bomb display
 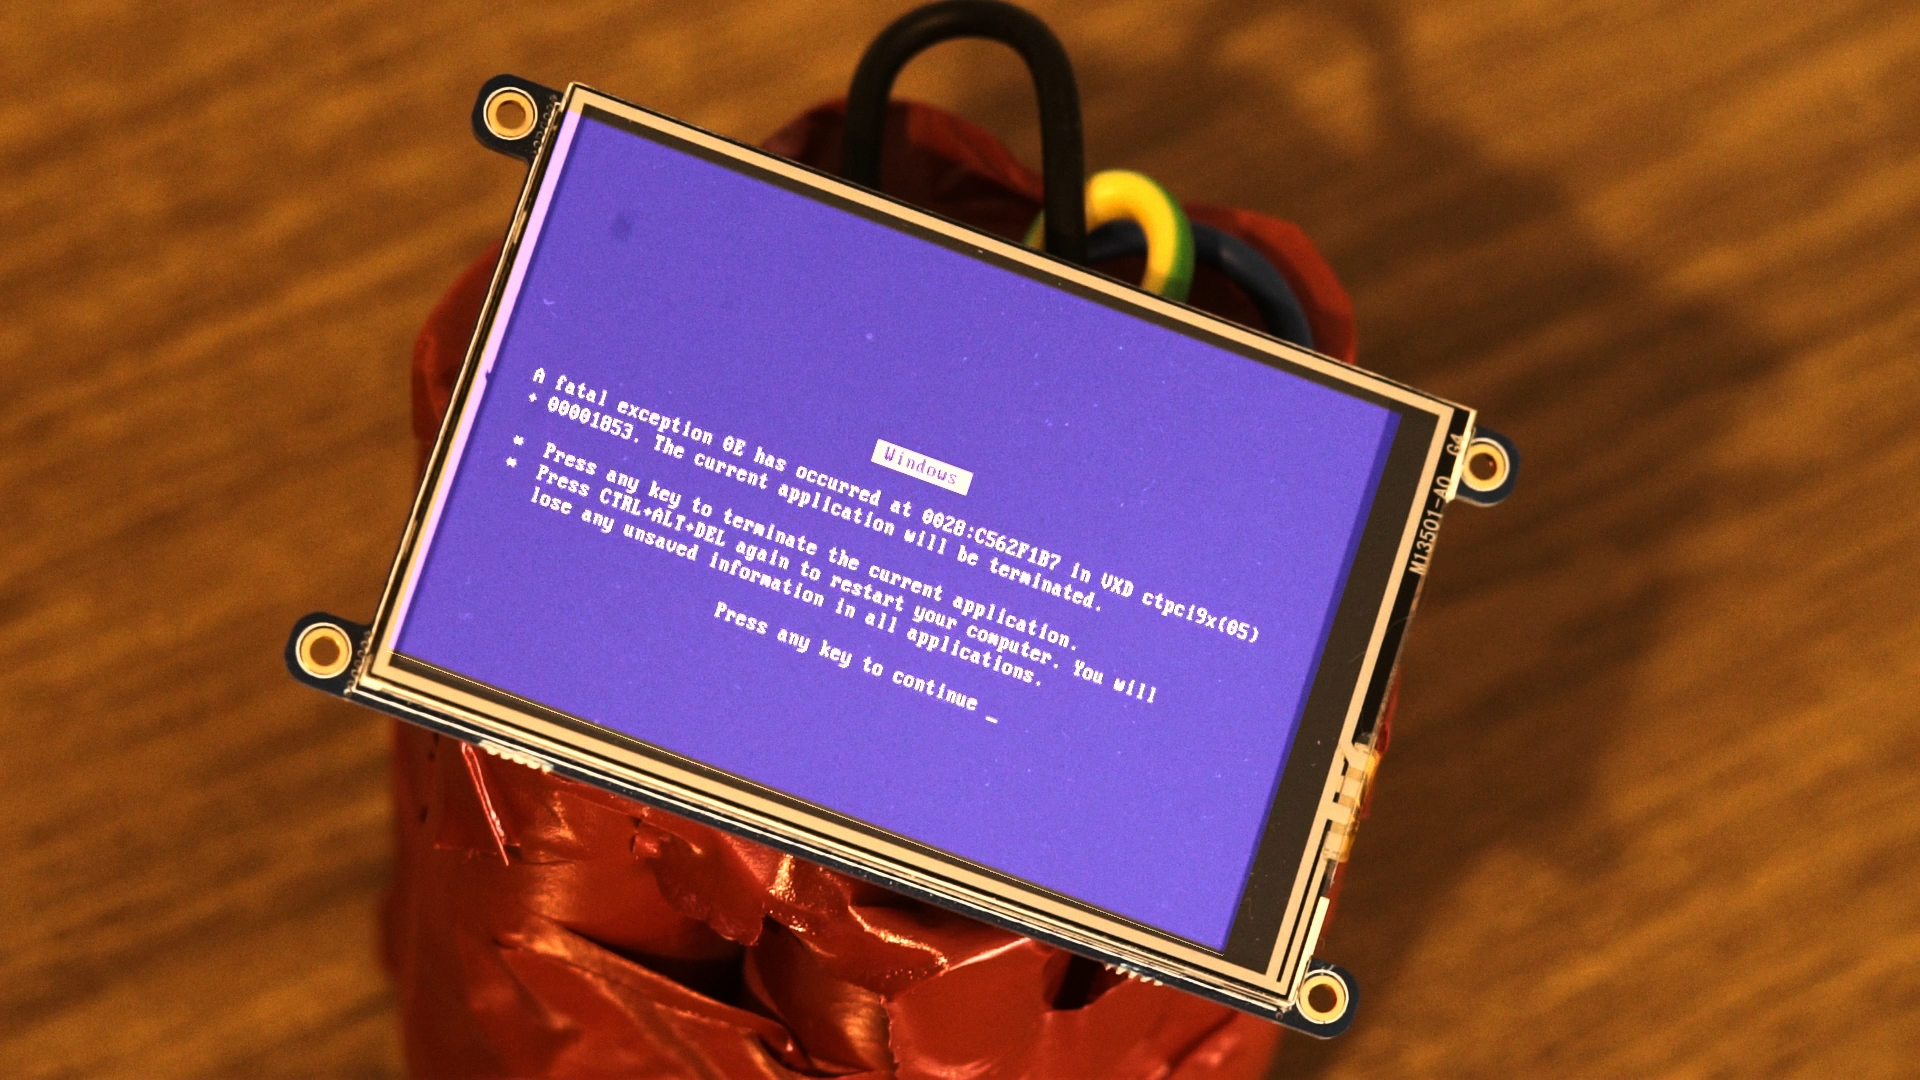 Using this technique we can also make images appear on the display
 The orange-blue lighting
The majority of action films, today, tend to present a very specific color: a mixture of orange and blue. It is not a coincidence, nor a technical problem. The fact is that it has been noticed that these two colors are highly emotional for the public: blue conveys a feeling of frost, fear, and sadness. Orange conveys warmth, tranquility and happiness. In action films these two colors are often used together, applying colored jellies in front of the lamps: for example, orange is used to illuminate the characters’ faces, and blue for the background. This allows to induce a certain tension in the spectator, typically due to the predominance of blue (since the background often occupies most of the frame). But there is also an emotional bond with the protagonist, who being illuminated in orange immediately appears as a positive character, and as a point of reference for escaping from the coldness of the rest of the scene. Color photography is used precisely to build the emotions that the viewer will have to feel while watching the film.
An automatic counter
Kdenlive automatically produces our countdown timer
 1 THE GENERATOR – We will start the production of the movie by preparing the bomb counter. To prepare the counter video, we have to click on the menu Projects / Generator / Counter . We will choose one without a background.
  2 HOW MANY SECONDS? – The window that opens allows us to choose many options. This procedure was created to create the classic count that is inserted before the start of a film, but is very adaptable. First, we need to indicate the length of the movie in seconds.
 Change the color
The Kdenlive counter is gray: for our diplay we have to color it
 1 YOU GET TO ZERO – Kdenlive offers us several possibilities for our counter: we can have a simple countdown to 1 or up to 0 (which is the best option for a bomb display). But you can also indicate the time in hours, minutes and seconds
  2 SAVE THE FILE– Once you have indicated our settings, Kdenlive asks you to save a file: it represents the countdown just programmed. The file is then integrated into the current project, but it is not how we want it.
 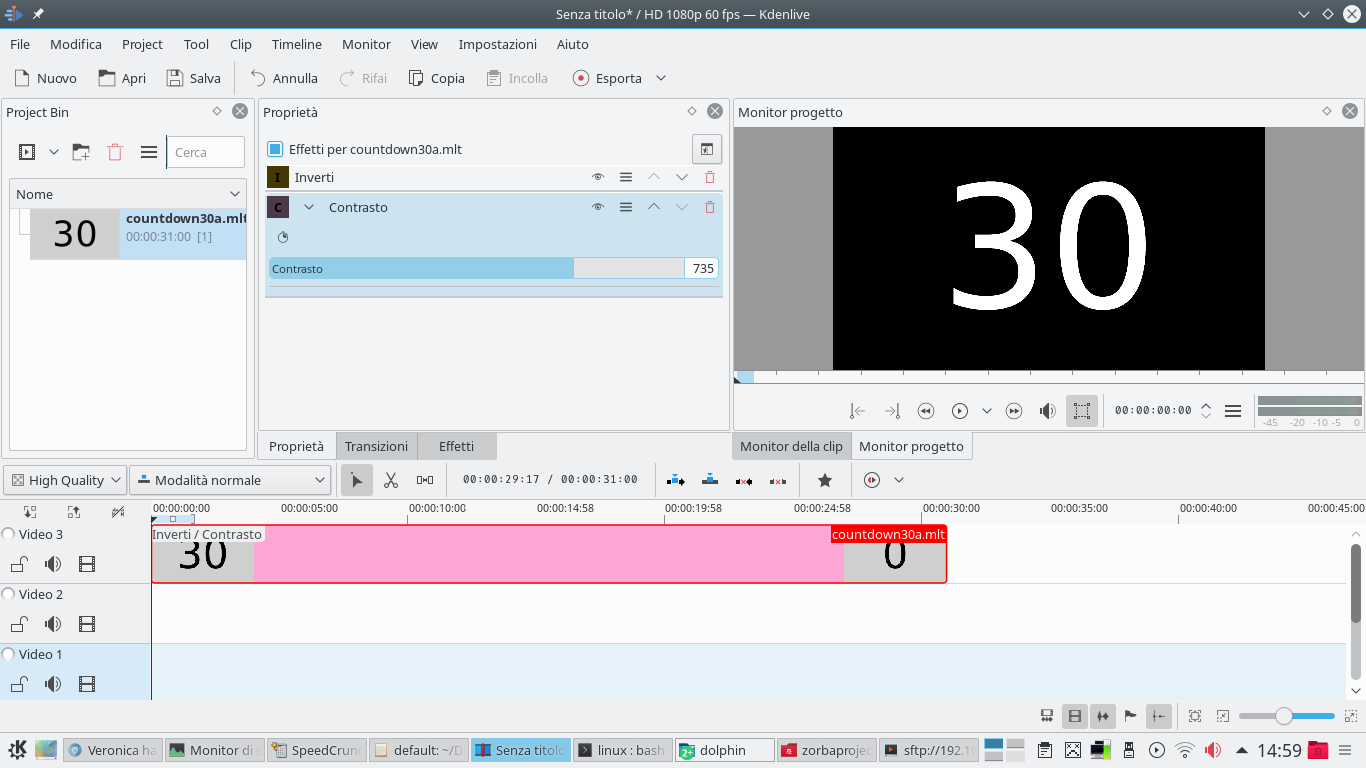 3 A PAIR OF EFFECTS – We put it in the track Movie3 , adding the effect Invert . We also need the tool Contrast , increasing the value until the background appears completely black and the number appears white.
 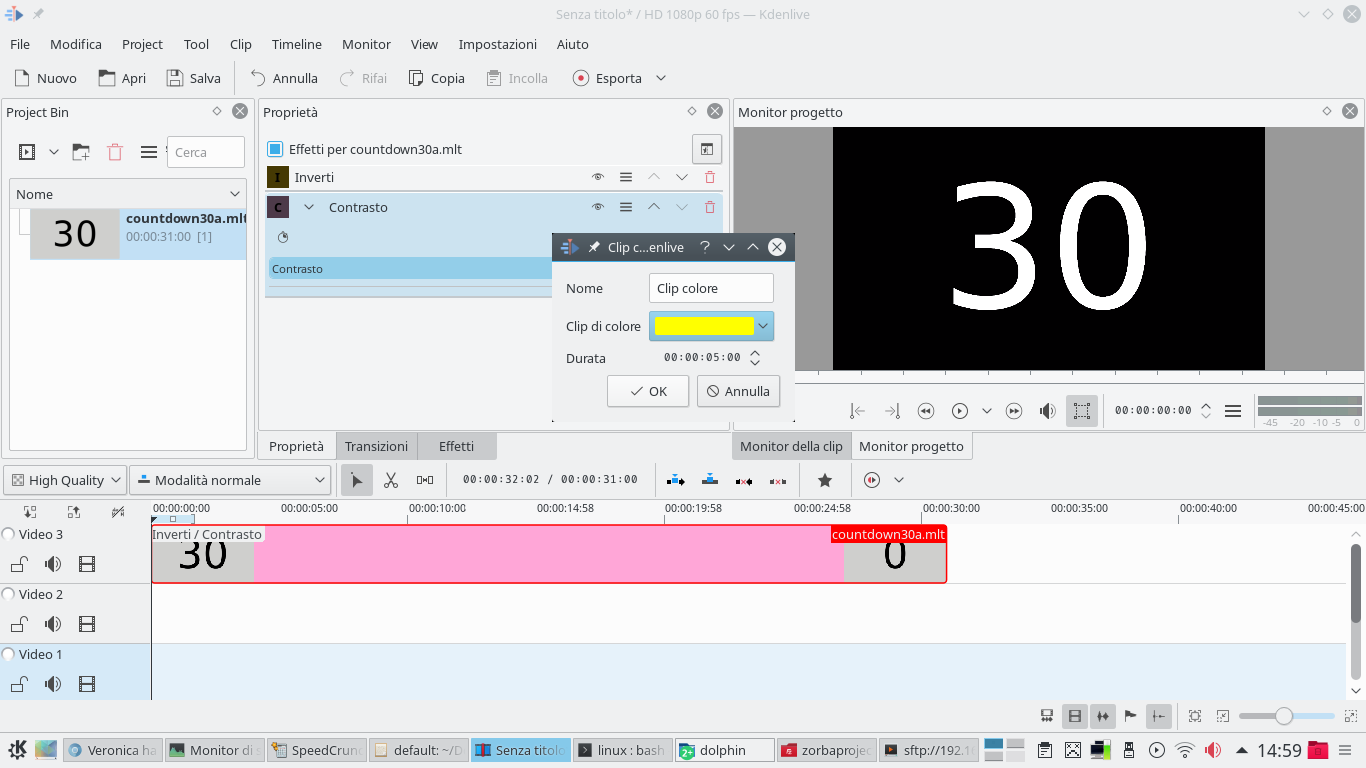 4 THE COLOR CLIP– Now we need a color clip: we can add it through the menu Project / Add color clip . The color is at your discretion, but it will be the one with which the number is painted, so you need a bright yellow or red, to give the impression of a display.
 Superimpose the countdown on the display
Using the various video tracks of Kdenlive, we can overlay the clips
 1 DARKEN TRANSITION – Now we just have to insert the color clip into the track Video2 , exactly below the countdown clip. In addition, we must give the color clip the same length as the other clip. Between the two we apply a type transition darken .
 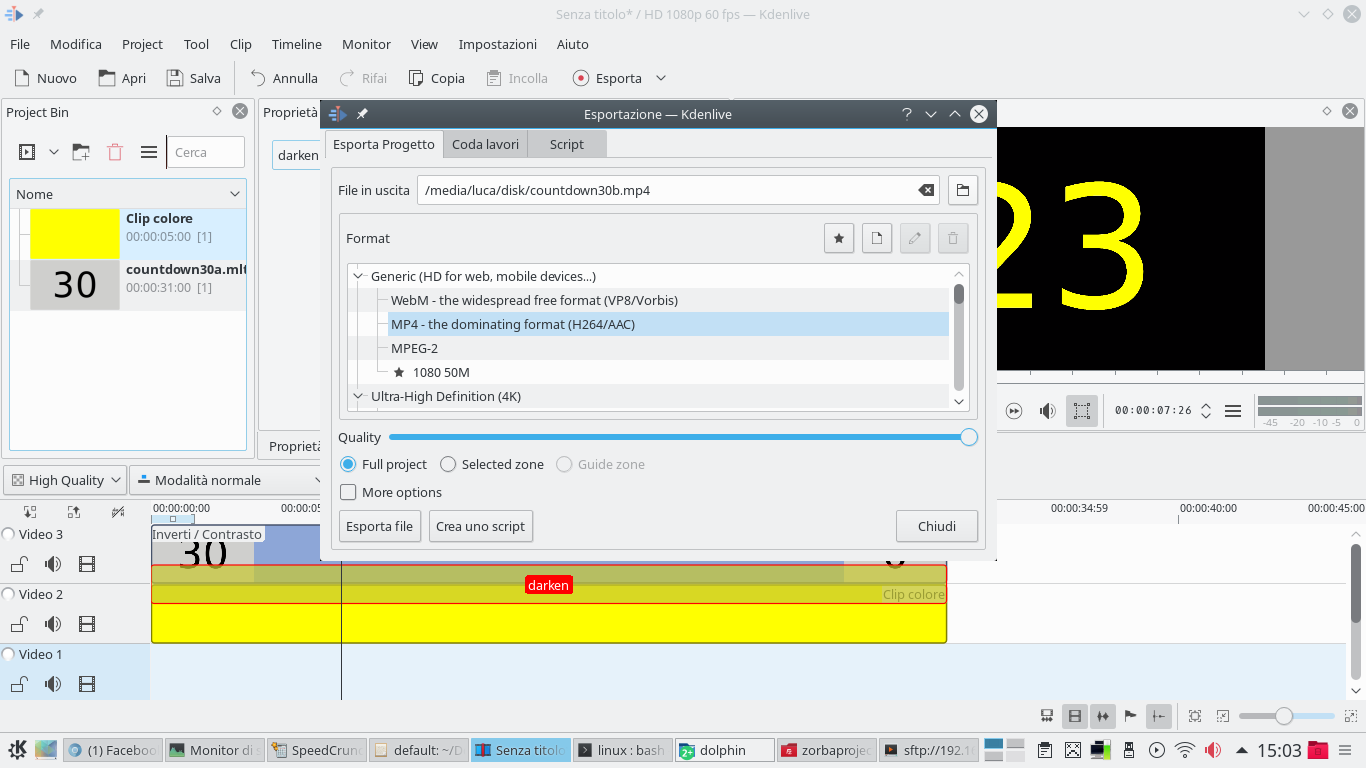 2 EXPORT CLIP – We can try the clip to evaluate the effect obtained. If we like the result, we can export it to a video file. To do this, just click on the button Export . Since the video is very simple, we can use any format.
  3 THE REAL PROJECT – The time has come to open the Kdenlive project for the editing of the actual video: we will have to insert in it both the clip shot with the video camera, and the clip just made with our countdown.
 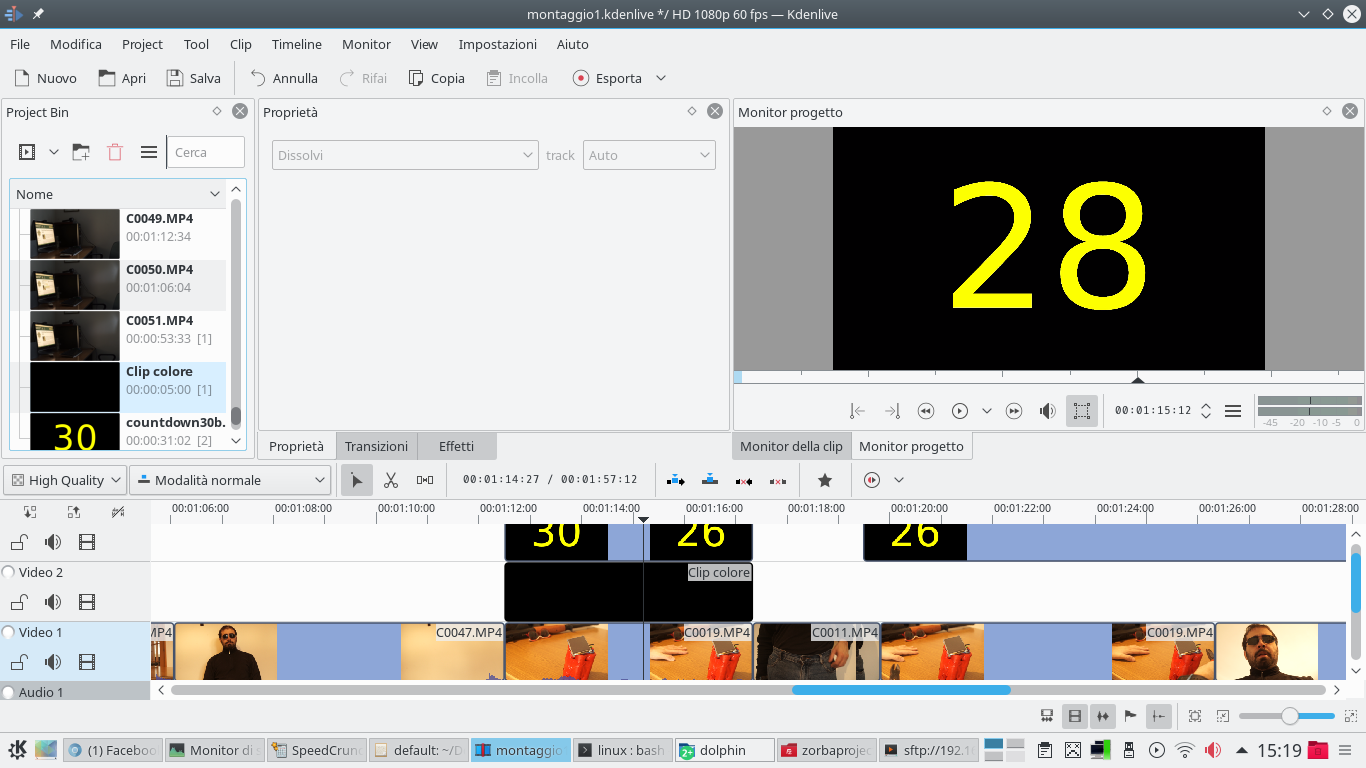 4 WE USE 3 TRACKS – The clip with the movie must be positioned in the lowest track, the Video1 . In the highest track, the Movie3 instead, we must insert the clip containing the countdown. Finally, between the two tracks, in the Video2 , we have to enter one color clip , black in color.
 The right transitions
To achieve the “screen” effect, we need a special transition
 1 SCREEN EFFECT – Between the color clip and the clip with the video of the video camera we have to insert a transition of type screen . In fact, what we want to simulate is a screen, and this transition allows us to make black transparent and make other colors bright.
  2 THE COMPOSITION – Between the countdown clips and the black one (therefore track Video3 and Video2) we must insert a transition of type Affine . Thanks to it we can position the proper number in correspondence of the display.
 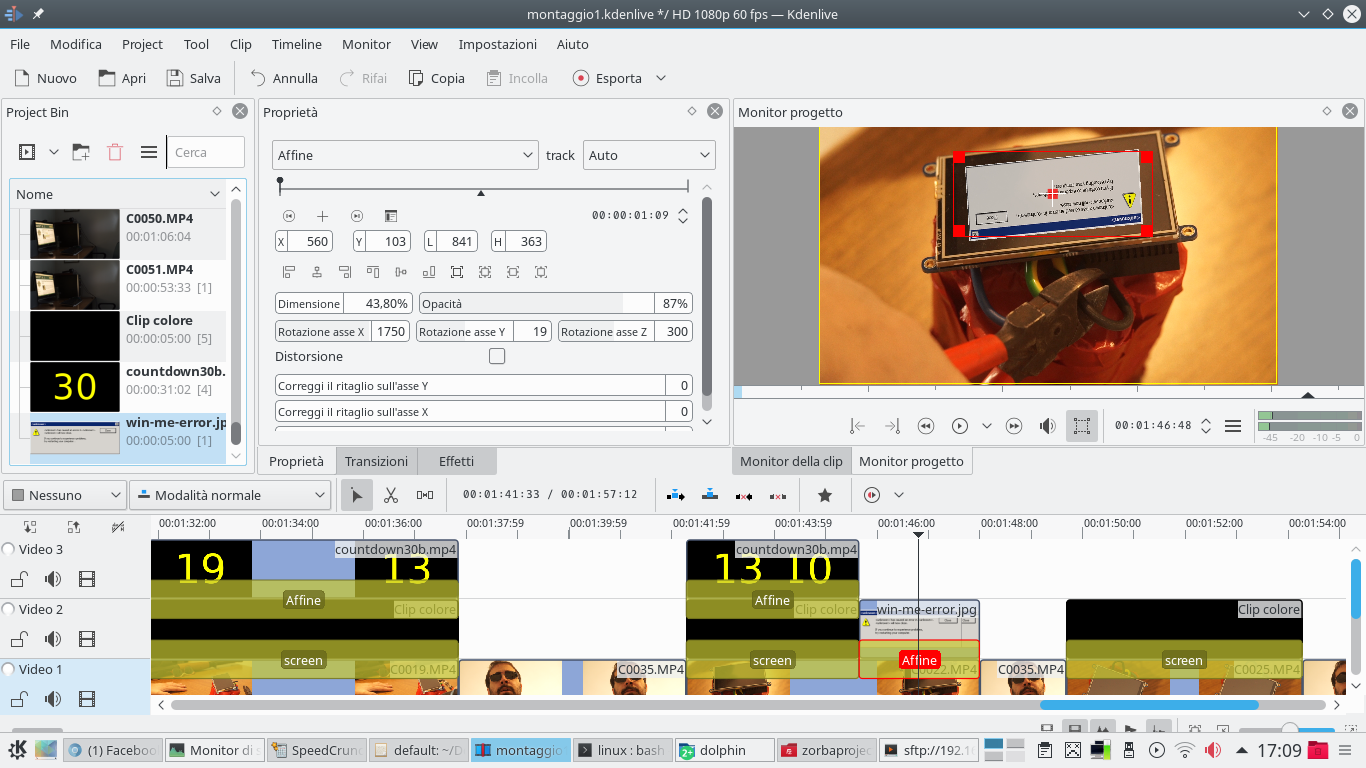 3 ROTATION X, Y, Z – Very useful, even if not very intuitive, are the rotations in the three axes of space: if we have a simple countdown, rotation on the axis is enough X , but if we have more complex images we can correct perspective axes Y is Z .
  4 THE FRAMES WITH GIMP – If, however, we want to create an animation, to make things appear in sequence on the display, just prepare all the frames of the animation with GIMP. The frames must be saved in the same folder, each with a progressive name (1,2,3,…).
  5 PRESENTATION CLIP – The various frames can then be loaded into Kdenlive as animation using the menu Project / Add presentation clip . Just choose the folder where the various frames of the animation are saved, and indicate the duration of each frame.
  6 THE SAME THING– For example, if we indicate 1 second as duration, each frame will be shown for one second before moving on to the next. The presentation clip can be used like the countdown clip, with transition Affine and then transition screen or addiction .

