Kdenlive as GIMP: the video editing program includes incredibly powerful tools to correct the colors of the movies, treating them as if they were simple photographs. We will try to achieve the bleach bypass effect and the lomo effect.
Among the figures of great importance in the production of a film there is the color corrector. It is a profession still little known to the public, because it is relatively new. In fact, the possibility of adjusting colors in post production was born with digital cinema. Previously, in fact, the task was carried out by the director of photography. In fact, when working with film, a filter was applied to the camera lens to change the color rendering. If you have ever used super8 films, you will remember that Kodak colored positives were supplied with a rather precise indication on the packaging: the filter model to be used when shooting with tungsten lights. The films were in fact calibrated for sunlight, and if you wanted to use a lamp with a different color temperature, you had to affix a colored filter to the lens (many cameras had integrated it, and it could be applied by moving a lever). With digital images, of course, white balance correction can be done in postproduction, before or after editing. There is, however, something more: beyond the simple color balance, some special color effects can be created with the film, to give the image a different tone from what it would normally have. These effects were mainly achieved in the negative development phase. Perhaps the most famous example is the so-called bleach bypass. This effect consists of skipping the step of bleaching the colored negative (in the 6-step Kodak development process). The result is an image with a very high contrast and desaturated colors even if they have not completely disappeared. The effect is very popular because it lends drama to action or horror scenes. Another quite famous effect is the so-called “lomo”, which is very reminiscent of the amateur photographs of the 70s. In this case, the colors are very saturated and the image is bright enough, but has a vignetting on the edges. This is due to the fact that lomo images are always taken with a very wide-angle lens to be able to “seize the moment” without having to waste too much time framing the subject and focusing it. Even today, the lomo effect is very useful in movies to give the idea of a “family memory”, to provide a nostalgic or melancholy tone to a scene. Can these effects be simulated with digital movies? Of course, using Kdenlive and one of its most incredible features: the photo editing tools. Among the editing programs out there, Kdenlive is the most advanced not only among the free programs but also among the mid-range ones as regards color correction. In fact, it has tools that are very reminiscent of GIMP: we will use color curves, levels, and overlapping modes such as overlay and hardlight. Keep in mind that the lomo effect is better when shooting outdoors, on a very bright sunny day. Instead, the bleach bypass is better suited to low light conditions, such as the interior of a building, at night, or on a cloudy or even rainy day. As always, you can see the example video at the following address: https://www.youtube.com/watch?v=2T6Ch-4KKnQ
 The lomo effect (below)
  The bleach effect (below)
 The unsharp mask
Lomo photographs had the characteristic of making the edges of the various objects very evident. To obtain this result digitally we can use a “unsharp mask”. Many editing programs offer a ready-to-use one, and until a few versions ago it was also present in Kdenlive (now temporarily removed due to conflicts with some dependencies). In our tutorial we explain, however, how to make a professional, fully configurable unsharp mask. This effect is important because it can also be useful in other cases: basically, wherever it is necessary to put the image “a little more in focus”. For example: if we film when there is a lot of humidity in the air, the images will be covered with a matte patina, slightly blurred. In this case, the unsharp mask will allow us to get a perfect movie. Of course, the “strength” of the unsharp mask depends on the effect Square blur : its kernel value should not be too low or too high.
One color track, the other in grayscale
We place the same clip in two overlapping tracks
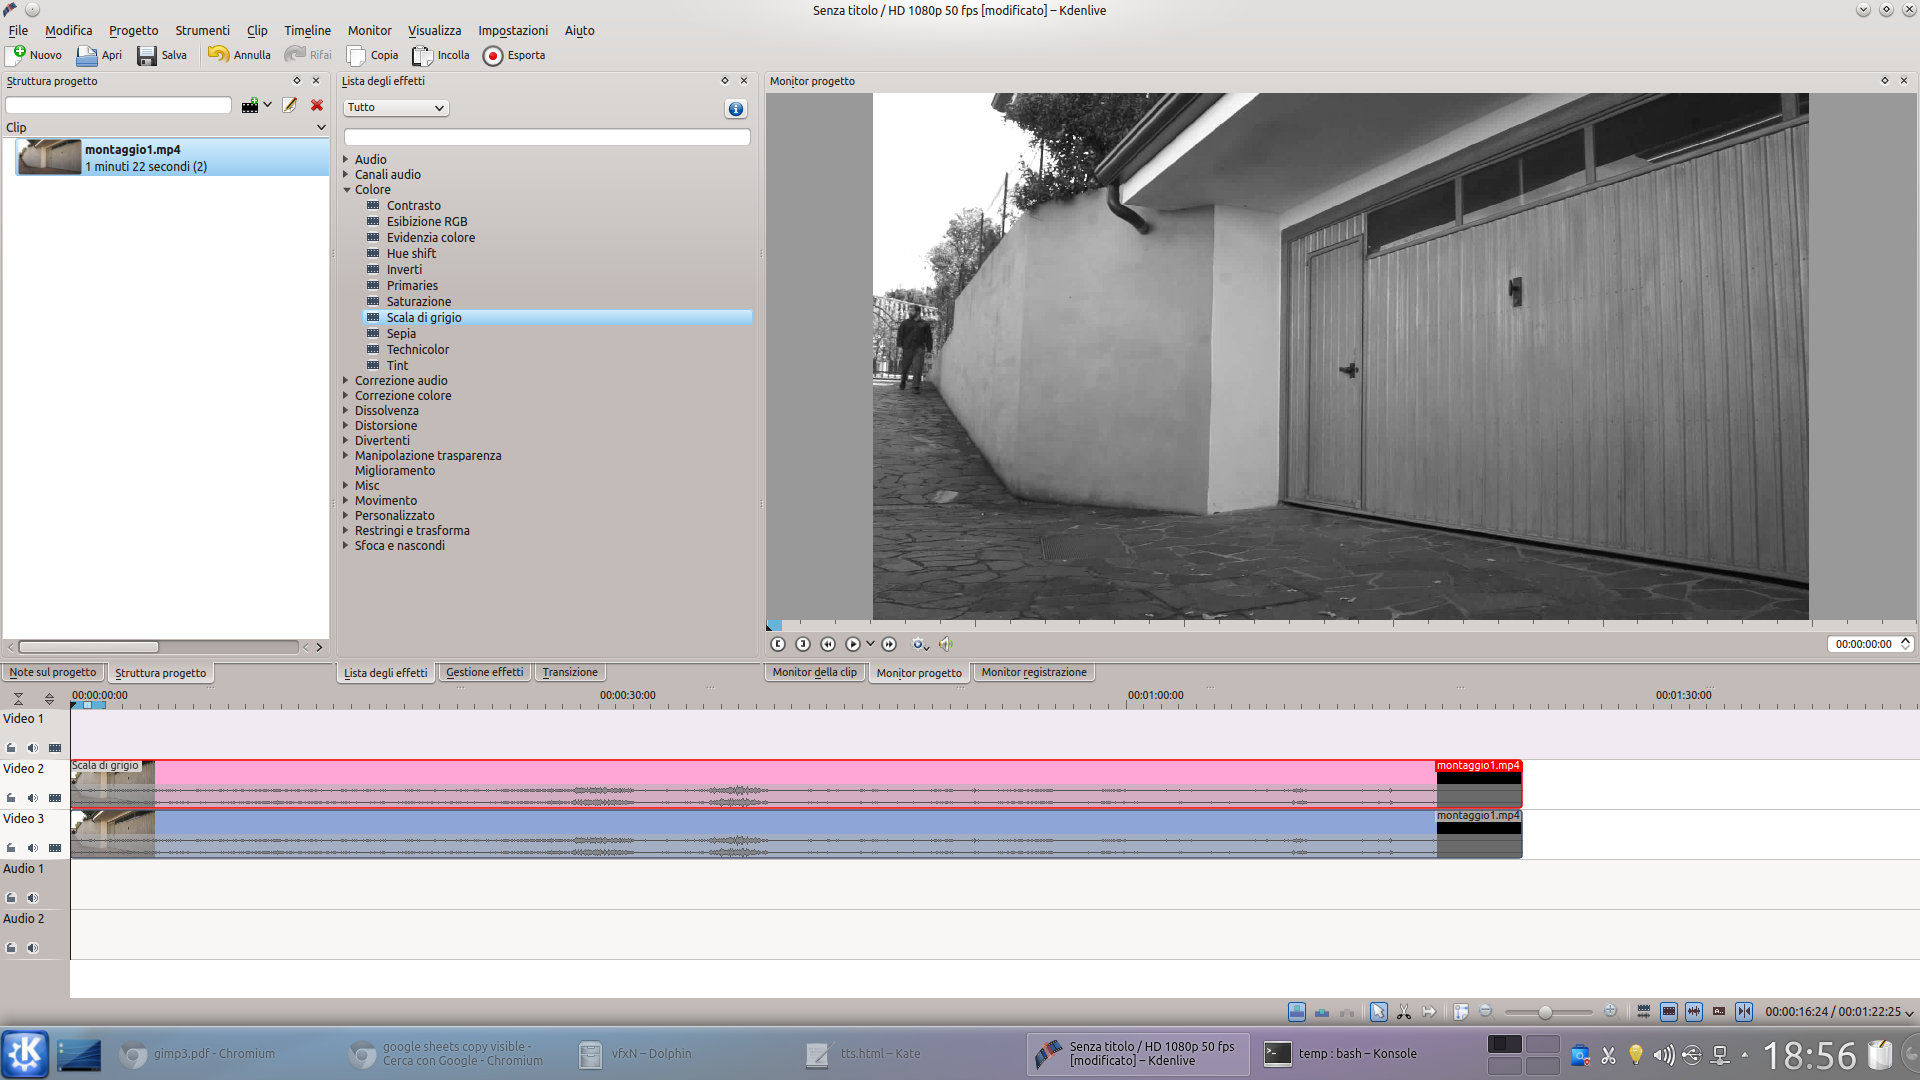 1 TWO DIFFERENT TRACKS – To start, let’s open Kdenlive by loading the clip we want to work on into the project. Then, we have to drag the clip into two different video tracks, for example Movie3 is Video2 . The two tracks must be perfectly superimposed.
  2 A SCALE OF GRAYS – We apply to the track clip Video2 the effect Gray scale . By clicking on the bottom left corner of this same clip, we add a transition between the track 2 and the 3 . The transition must be extended over the duration of the clip.
 Without bleach
We perform the bleach bypass, that is the “lack of bleach”
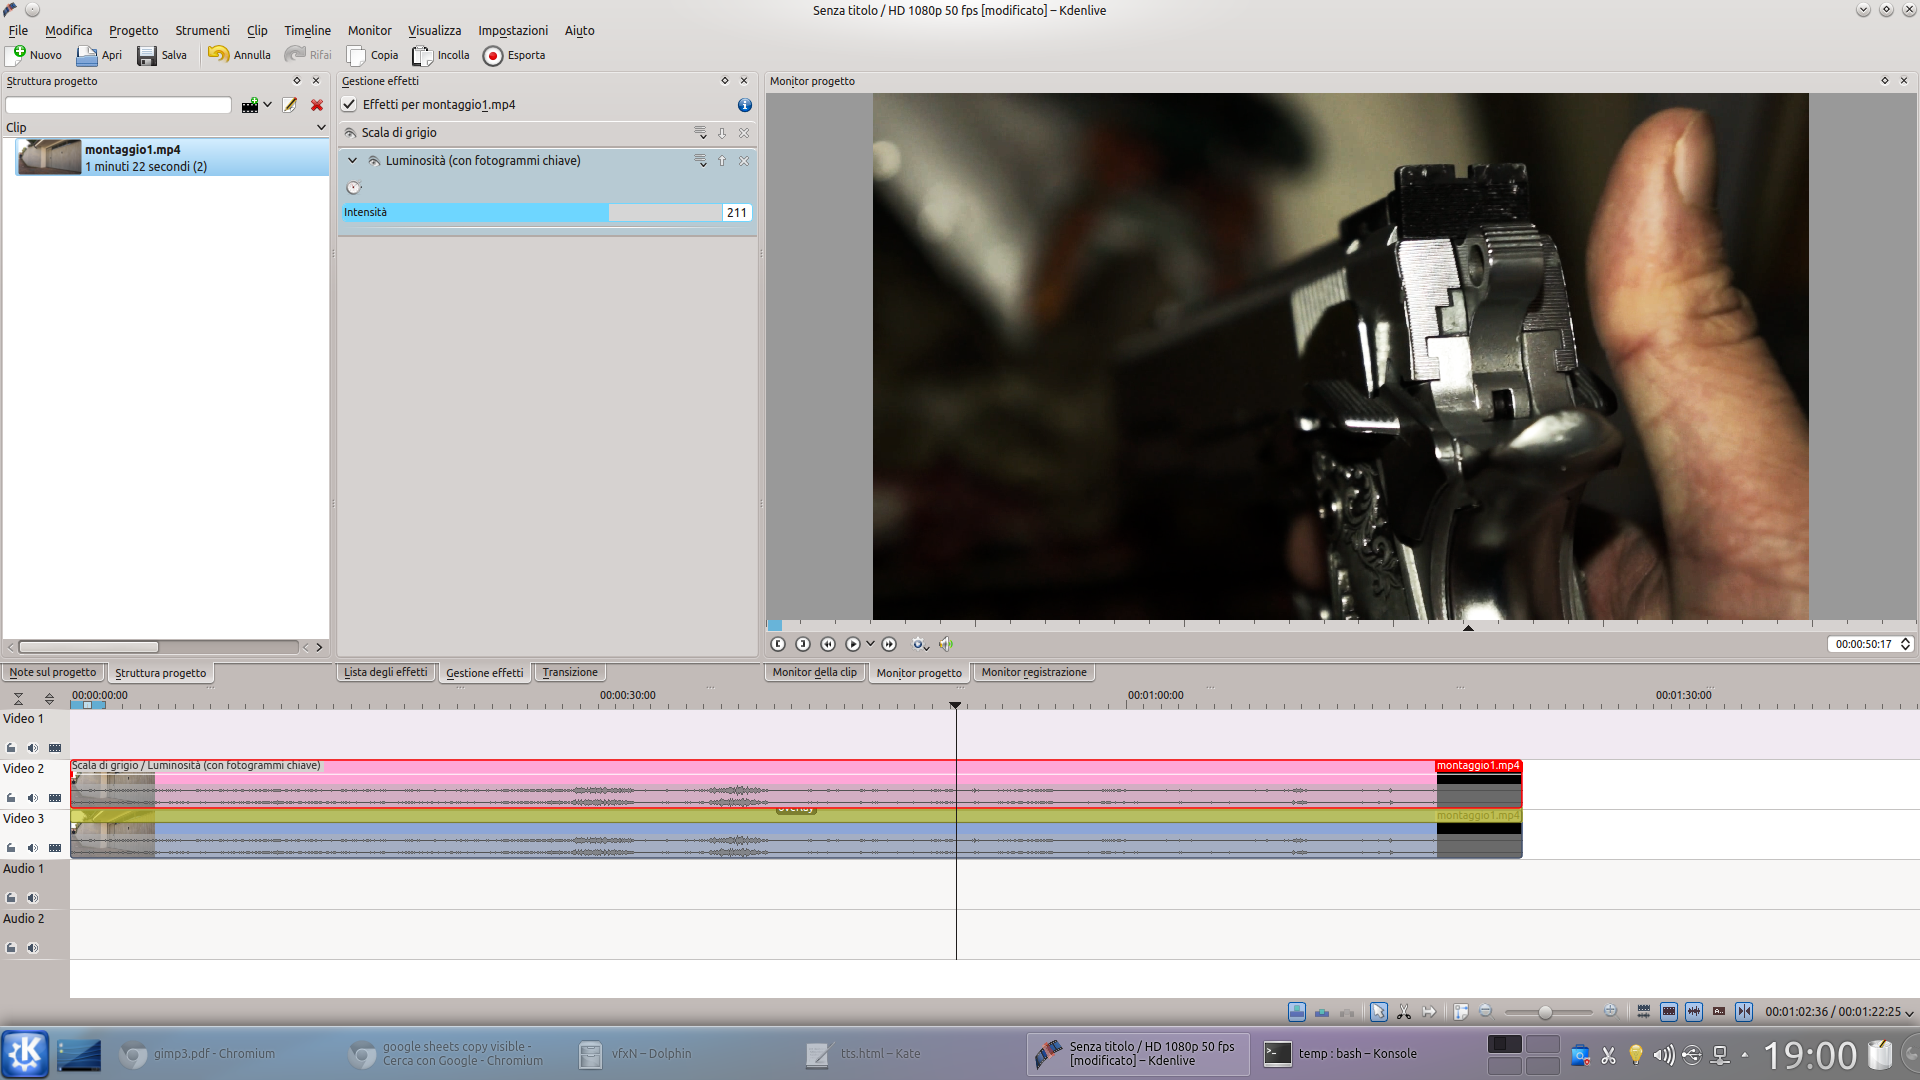 1 WE NEED MORE LIGHT – The transition we just entered must be of type overlay . The image will now be very dark, so let’s add it to the track clip Video2 the effect Brightness , increasing its value as long as we consider it appropriate ( 200 , about).
  2 BUT LESS COLOR – Now, let’s apply the effect Saturation to the track clip Movie3 . We have to make the colors less saturated. So let’s bring the saturation to a value like 80, which isn’t too low. In fact, the colors must not disappear completely.
  3 HERE IS THE CONTRAST – Let’s add the effect to this clip Bends . Let’s set it on the channel Luma , in order to manage brightness and contrast. Next, we increase the brightness of the highlights and lower the shadows only slightly.
  4 THE RIGHT WHITE – As a last act we apply, always to the clip of the track Movie3 , the effect White balance . Using the appropriate dropper, we select from the image the color that in our opinion should be white.
 The curves of color in lomo style
We use the “curvature” tool to saturate the colors between highlights and shadows
 1 LEVEL CONTRAST – After having, as usual, loaded our clip into a track (Video3, for example) let’s apply the effect Layers . We need to increase the contrast, so we can choose a black value of about 50 , and for the whiteness of approx 750 .
 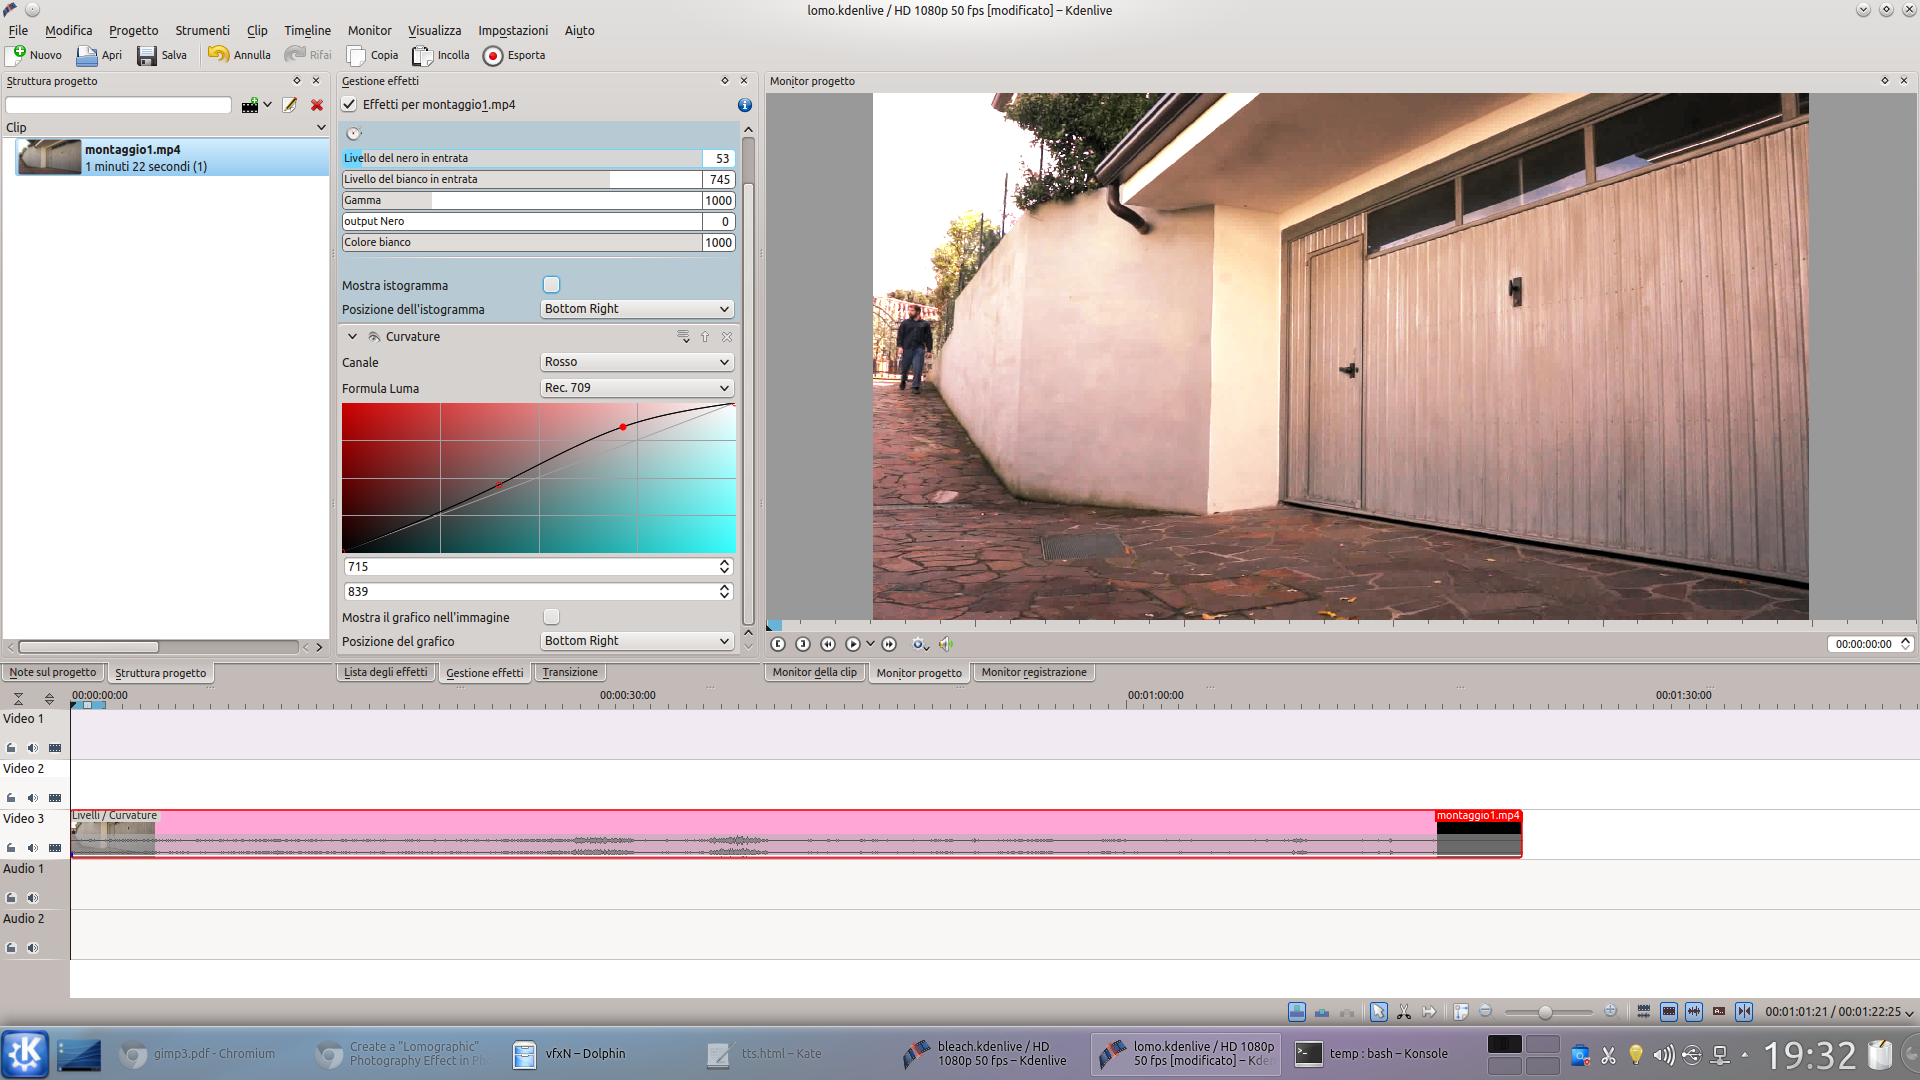 2 CHANGE THE RED – Then add the effect Bends , set on the channel Red . To draw the curve, we set a point in the center, so that it is only slightly higher than the diagonal line. Then, we increase the highlights, but always without exaggerating.
 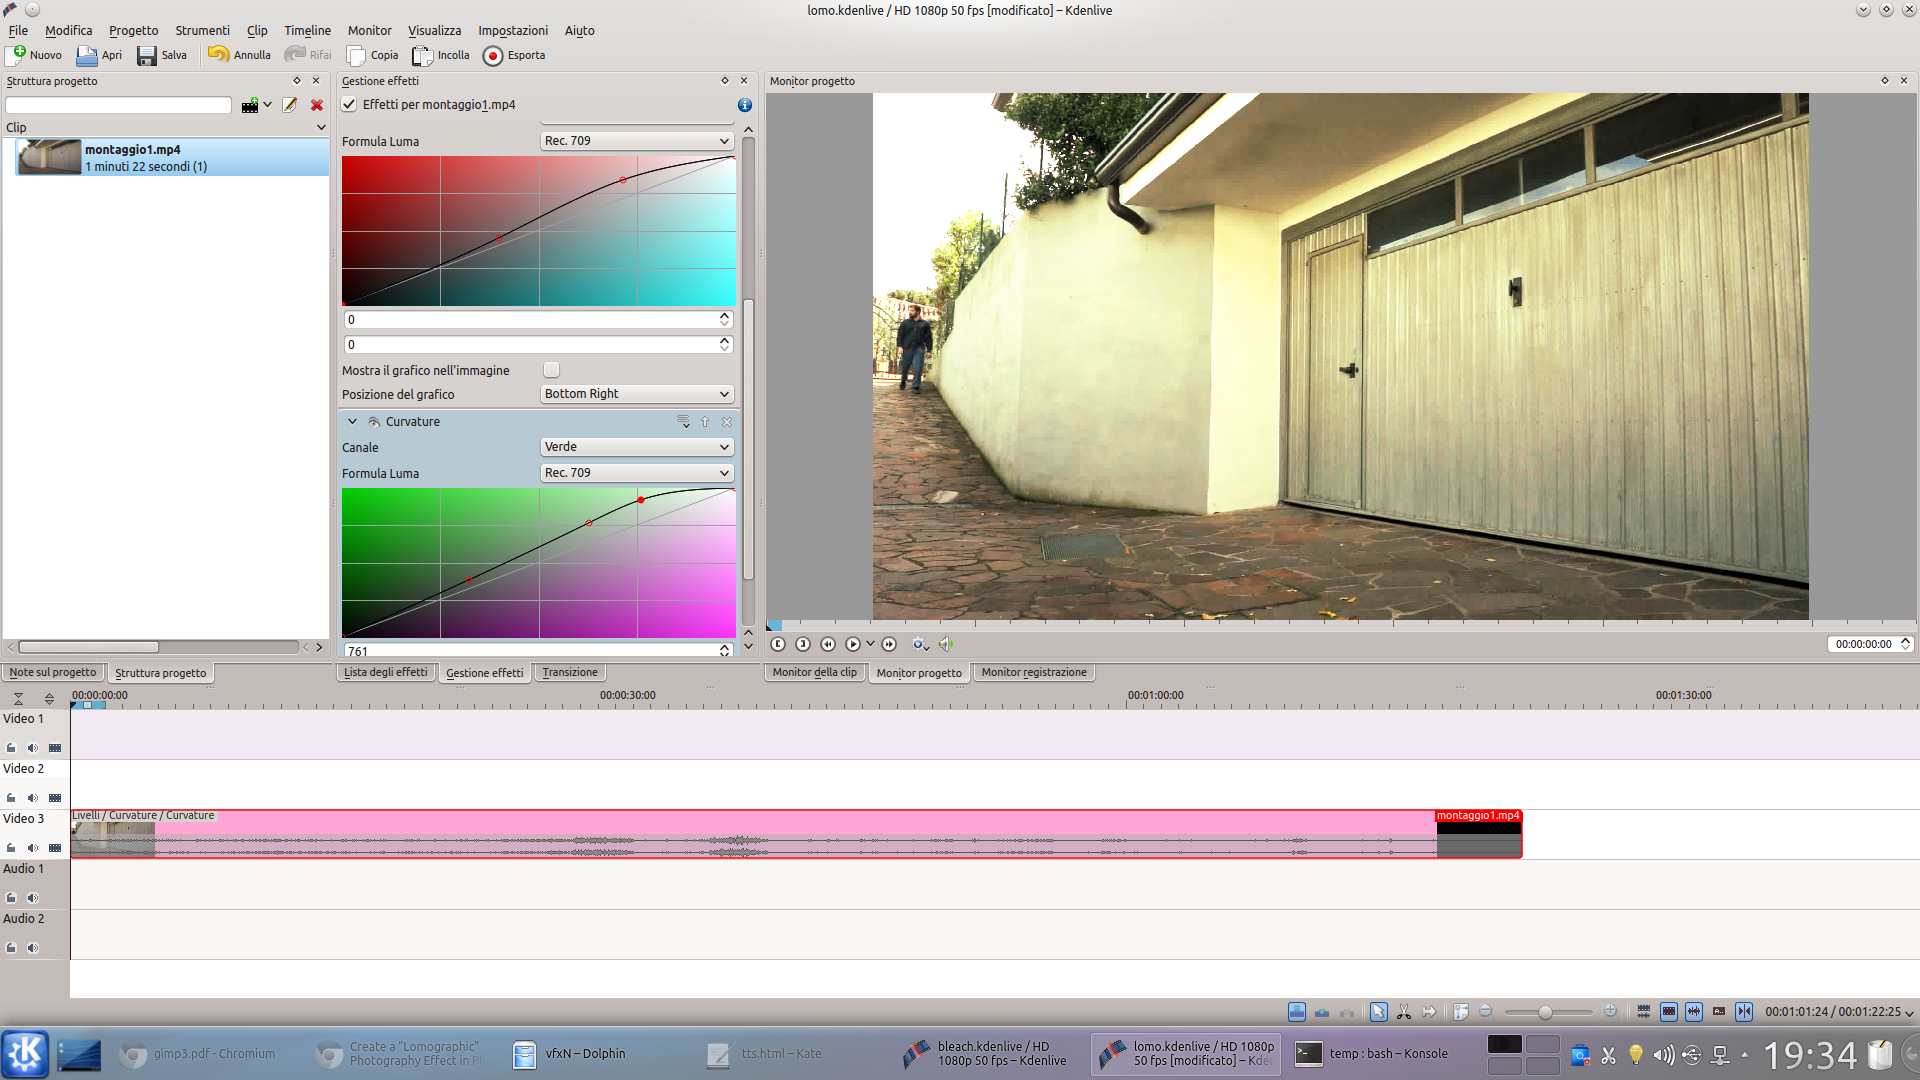 3 NOW THE GREEN TONES – Similarly, we add a new Curvature effect to the same clip, which this time will have to be set on the channel Green . The curve to be drawn must have the same shape as the previous one, only more pushed upwards (almost double).
 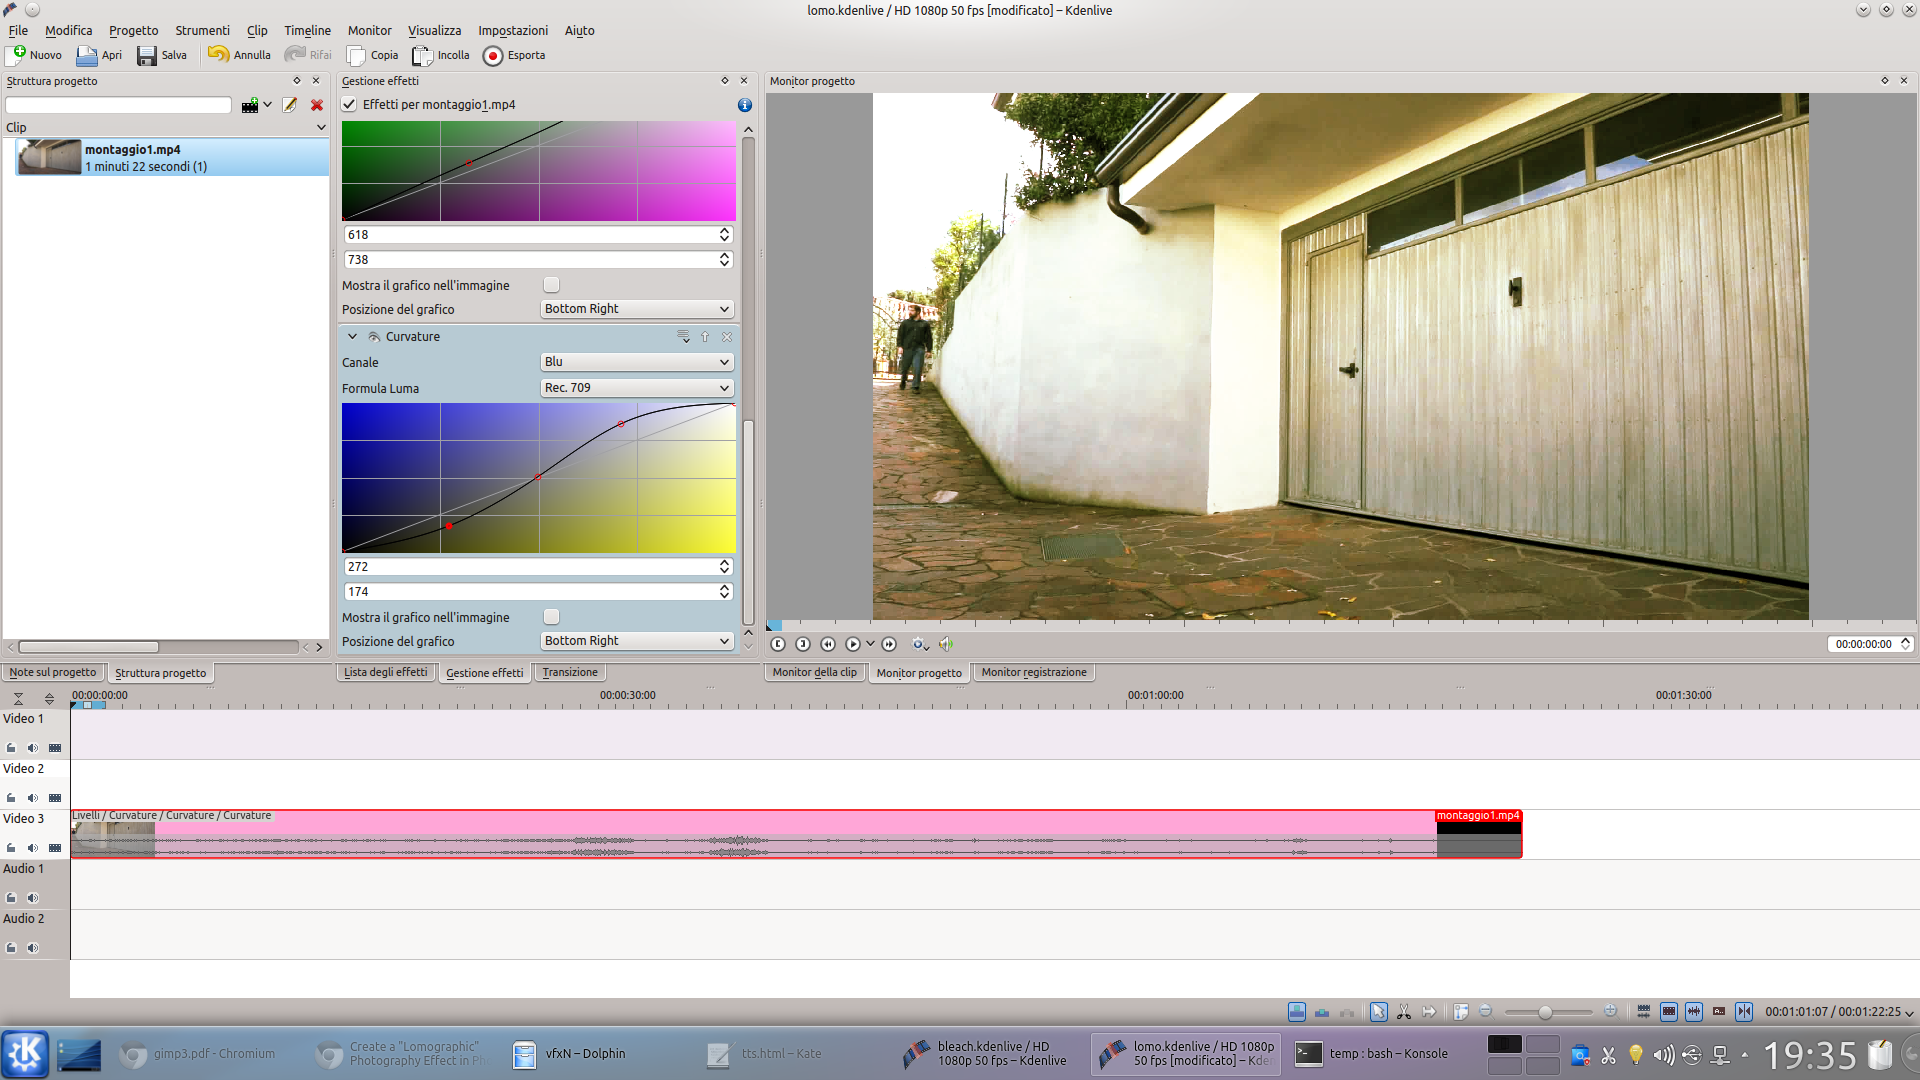 4 THE BLUE IS THE LAST – By now, only the blue color is missing. So, let’s add one last effect Bends , setting it on the channel Blue . Here we have to draw an “S” shape, raising the highlights a lot and lowering the shadows almost as much.
 Unsharp and vignetting mask
We complete the lomo aspect of the image to remember the 70s films
 1 BLURRED AND INVERTED – Now let’s add the same original clip to the tracks Video2 is Video1 , so that the three clips coincide. Then, to the clip of Video1 , add the effect Square blur , to blur the image, and the effect Invert to bring the colors in negative.
 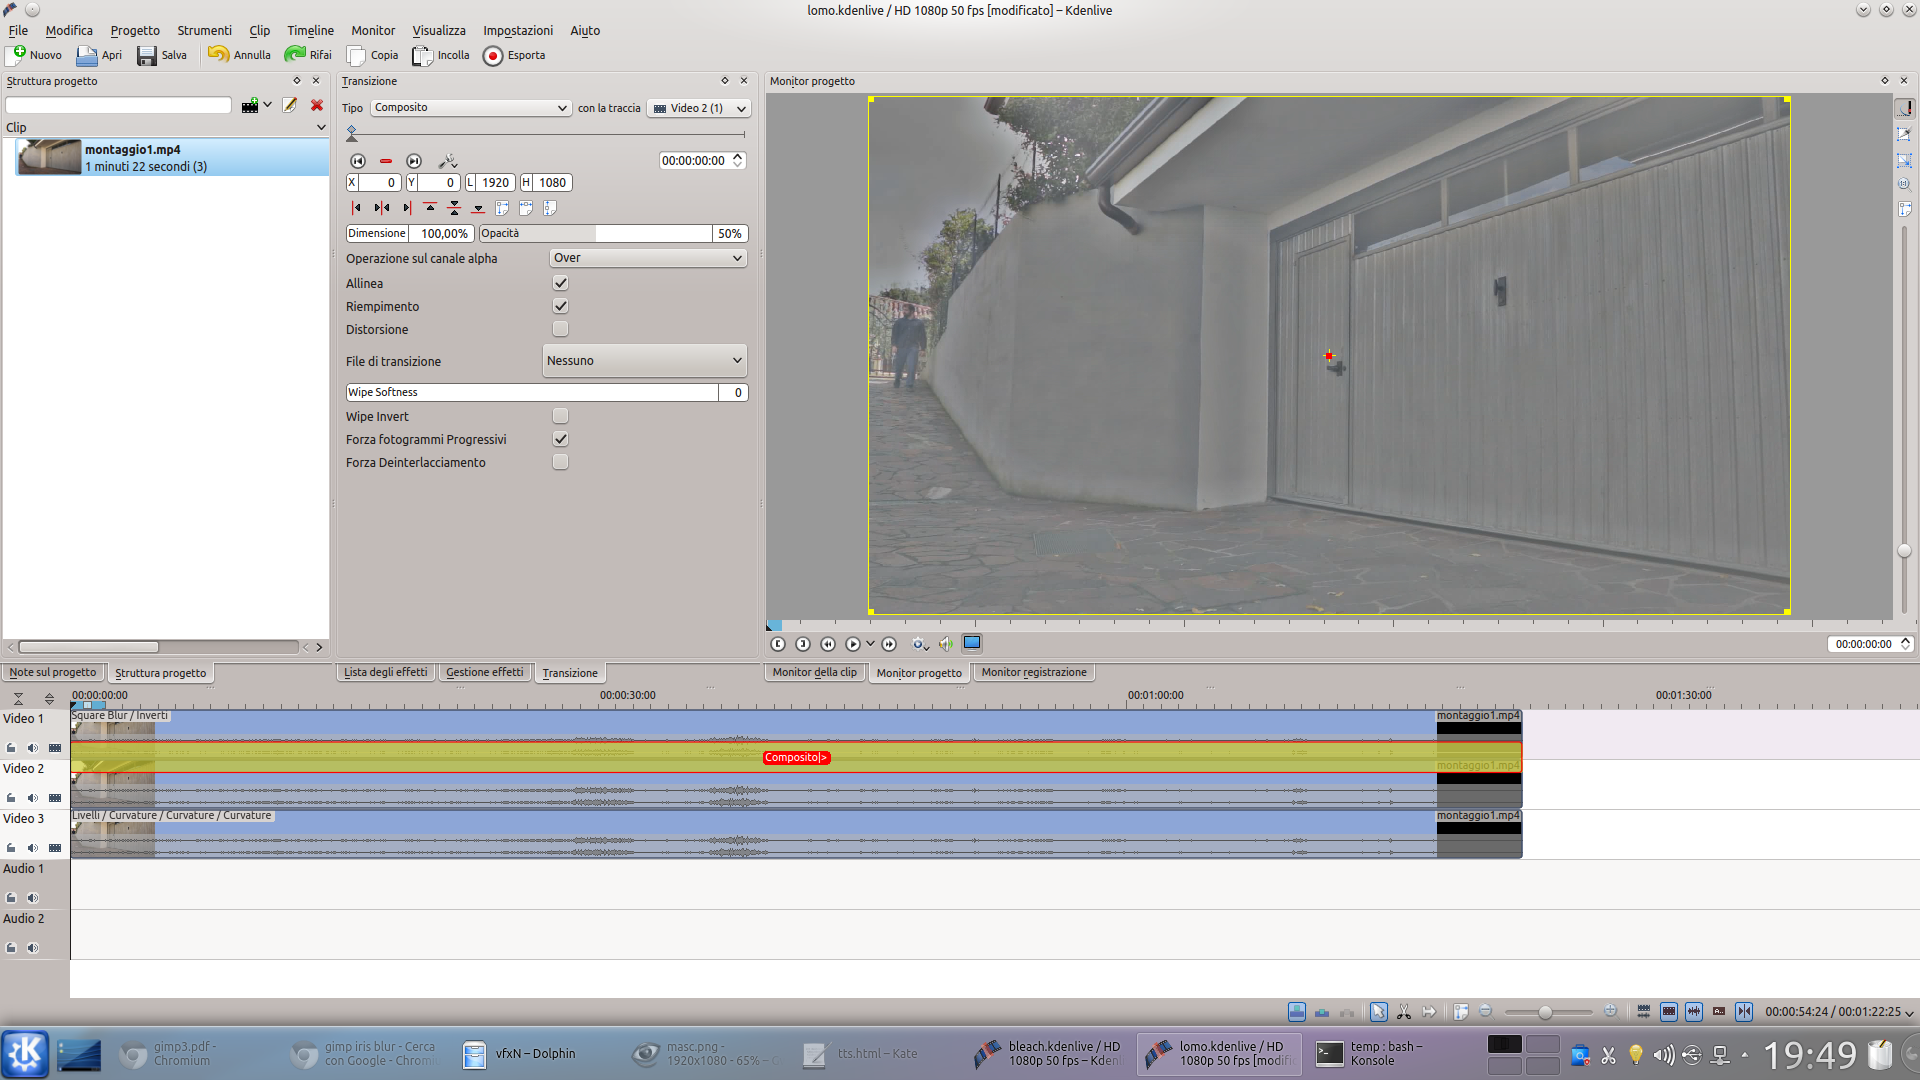 2 SUPERIMPOSED AT 50% – Now let’s add a type transition composite between the clips of Video1 is Video2 , extended along their entire length. The opacity of the transition must be set equal to 50% . We should get a gray image of those reminiscent of the original.
 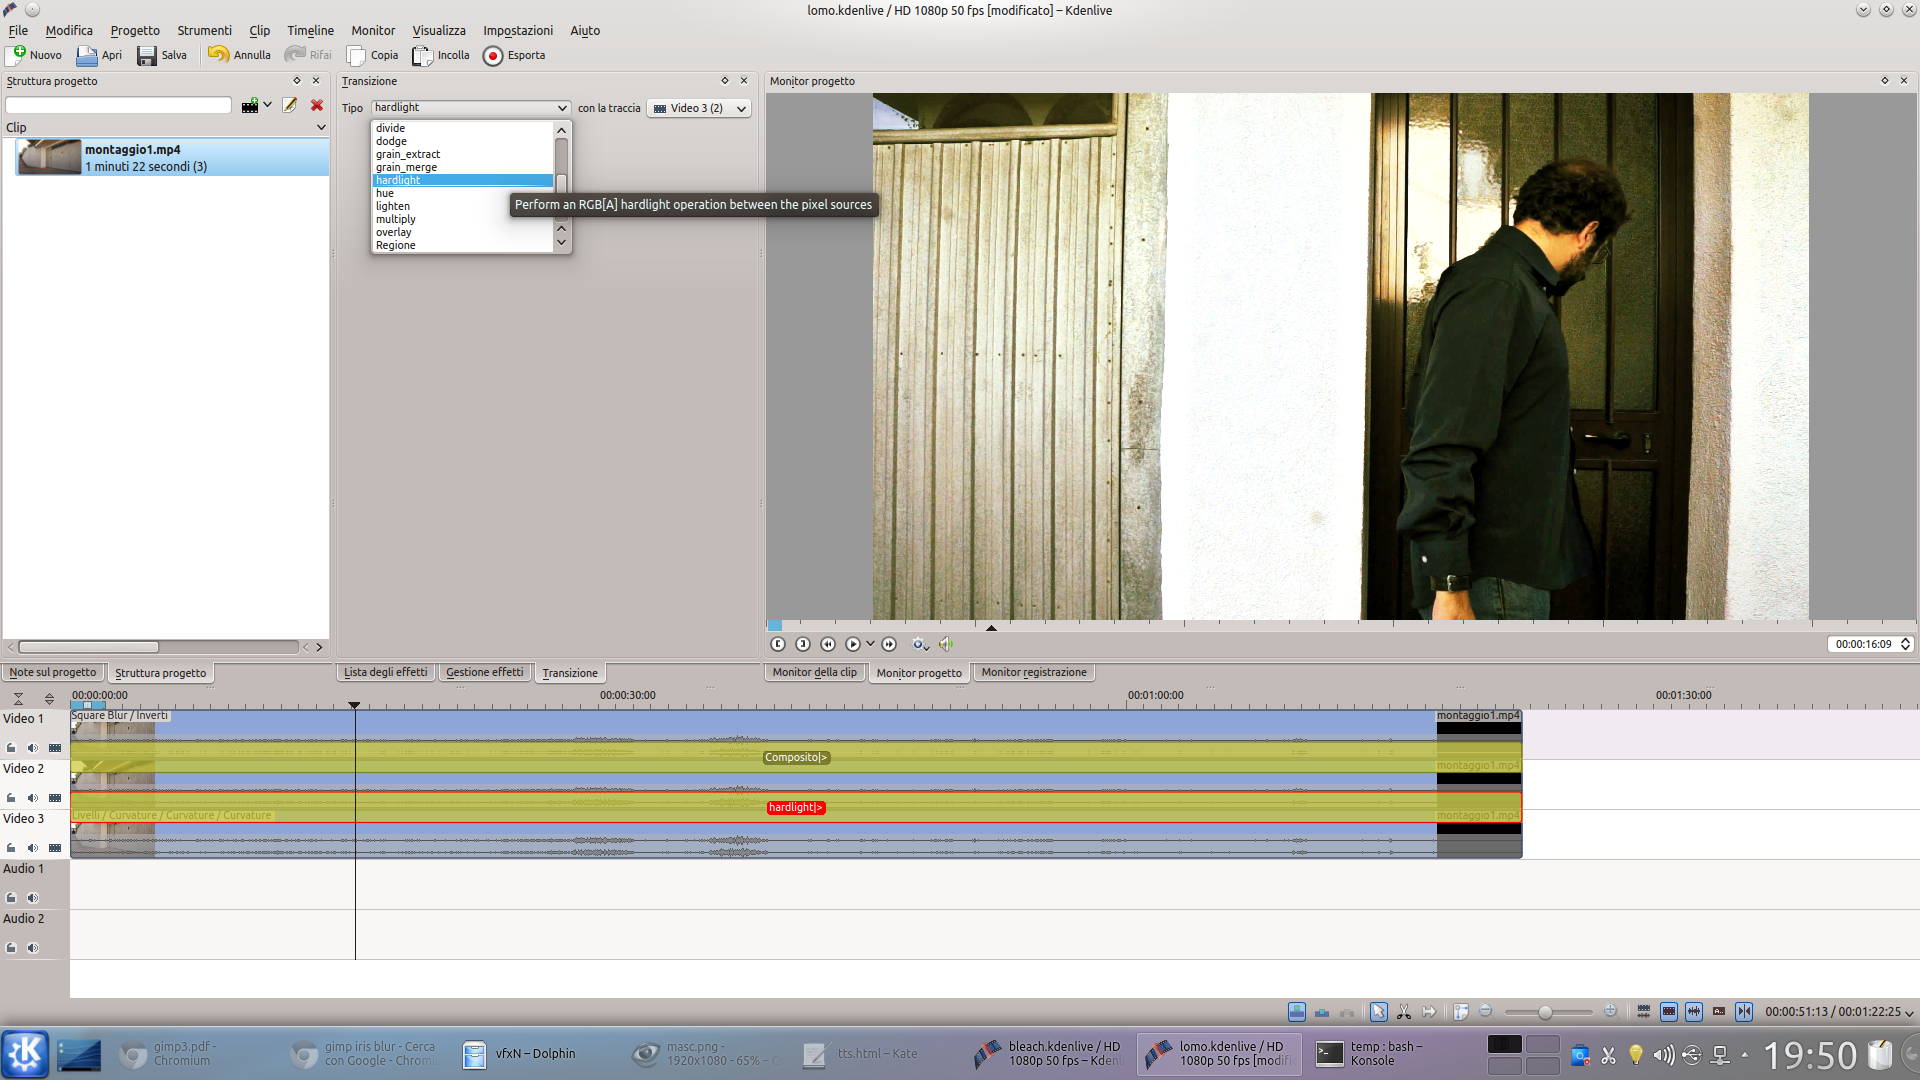 3 WITH STRONG LIGHT – Now, let’s add another transition: this time, between the track Video2 and the Movie3 . This transition will have to be of type hardlight . We have just made a contrast mask, which accentuates the edges of the objects.
 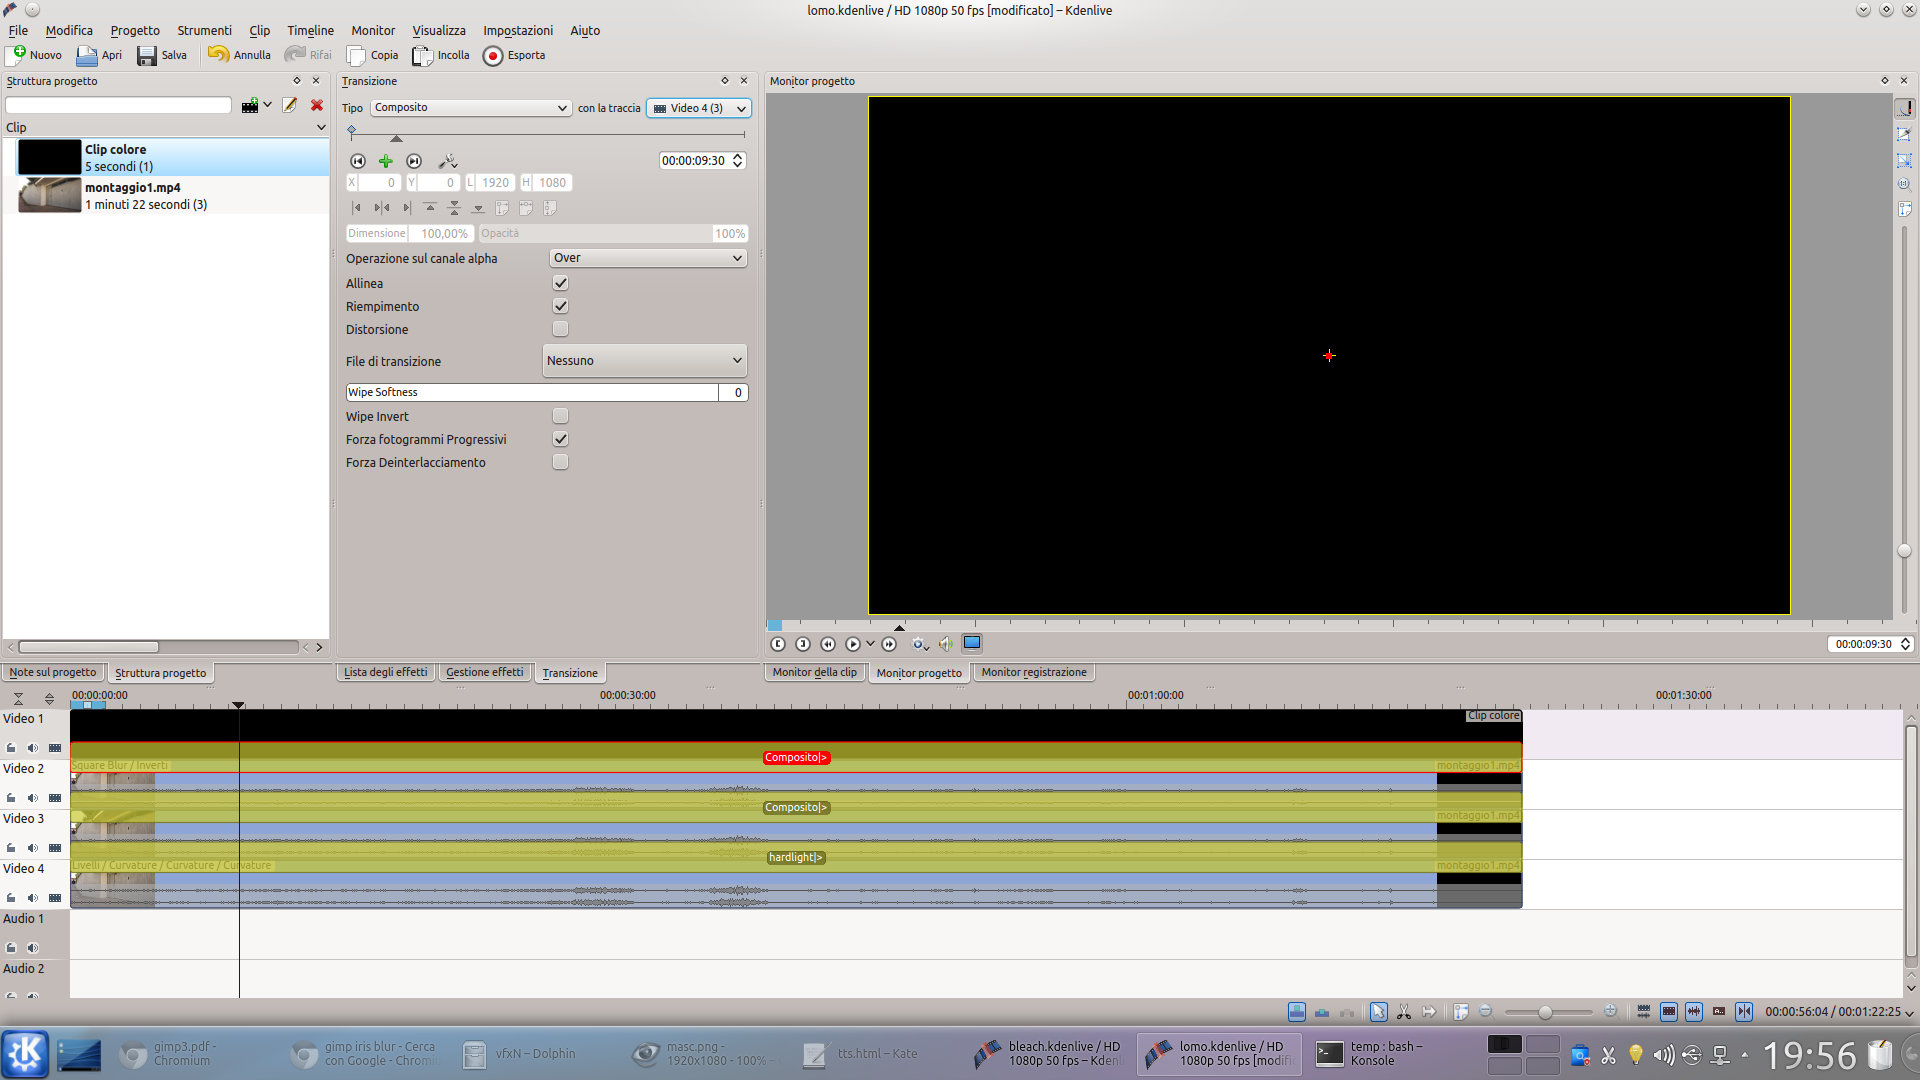 4 A NEW TRACK – To achieve the classic vignetting, we insert a new video track before Video1 . In it, we insert a black color clip extended to the end of the movie. You will also need to add a transition Composite for the duration of the clips.
  5 ROUND RECTANGLE – It is important that the transition Composite is referred to the track Movie4 and not automatic. Let’s add the effect to the color clip rotoscoping , drawing a sort rectangle with rounded corners using four points.
 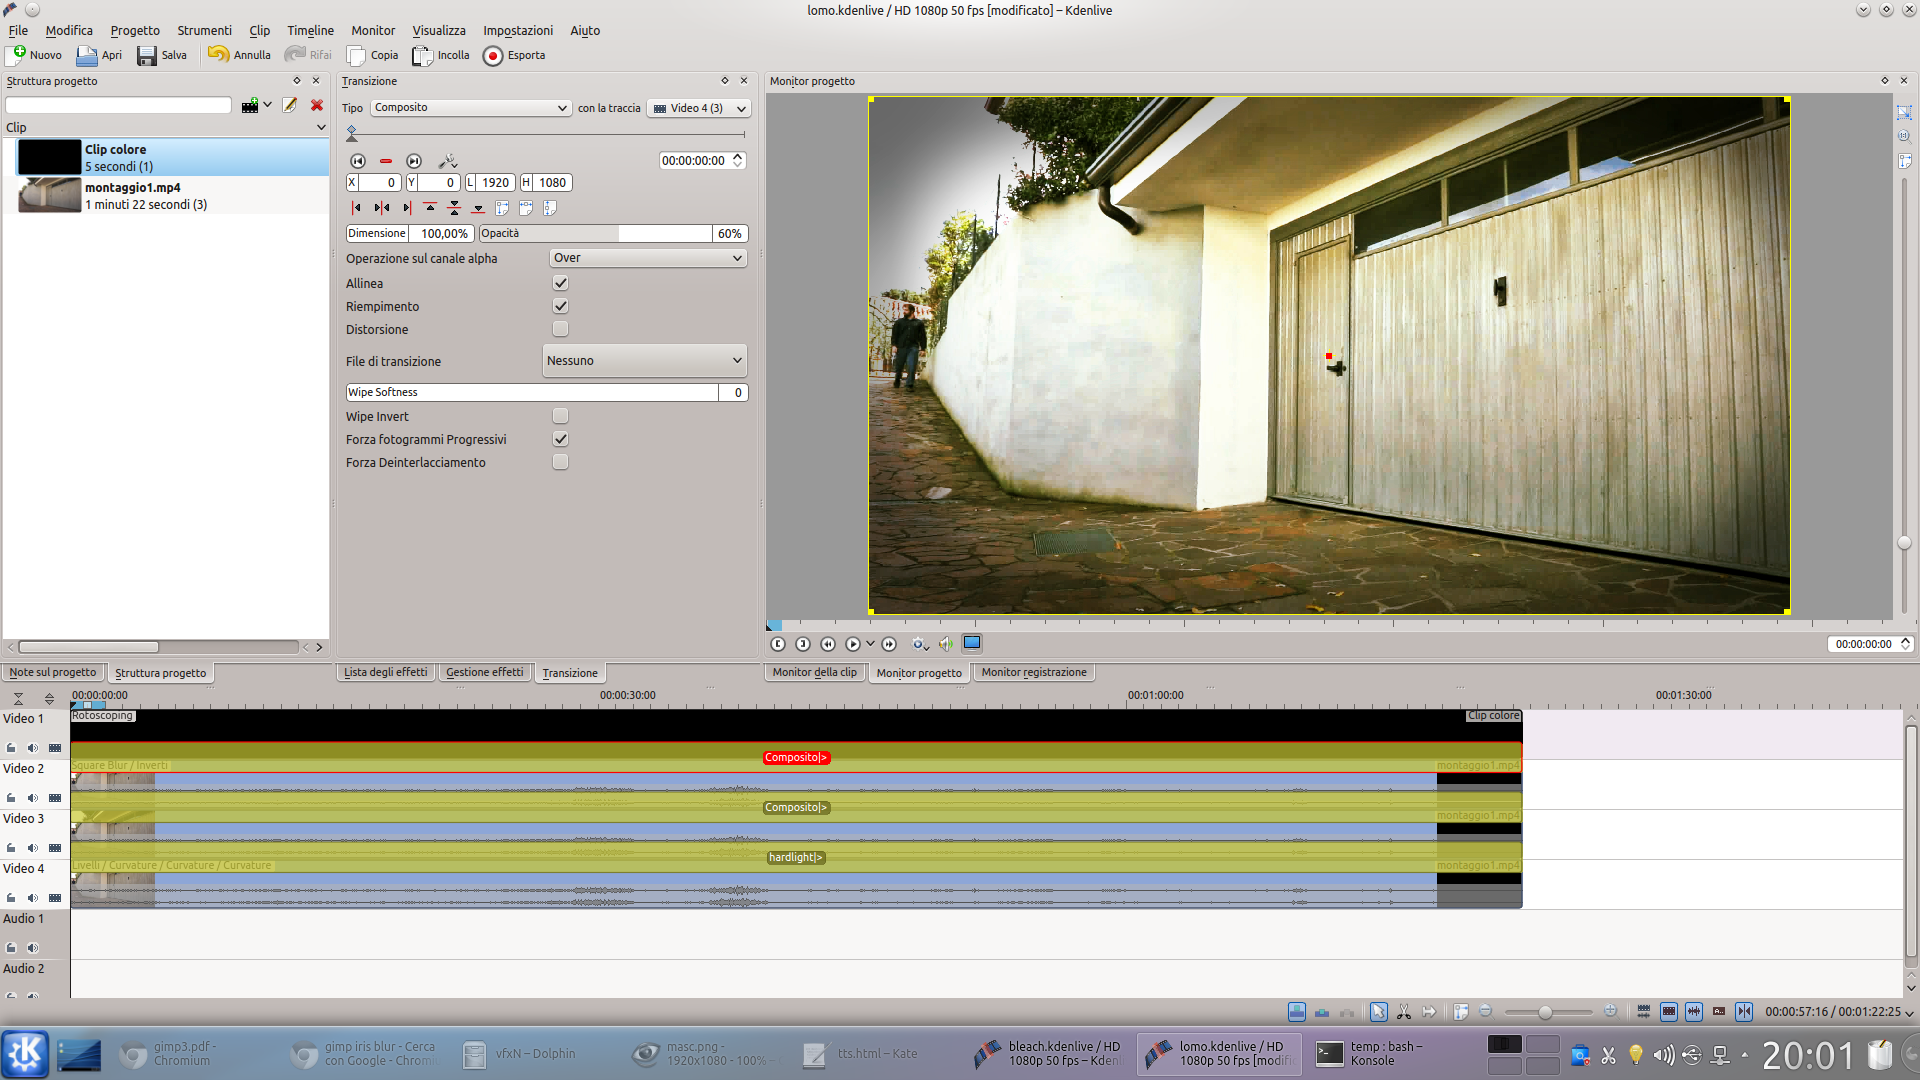 6 VERY SHADED– We set the feather width of the rotoscoping at a value of 50, while the feather passes it must be more or less 5 . Finally, returning to the transition settings Composite , we indicate the opacity equal to 50 or 60% .

