The “time freeze” effect, typical of action films, can offer exceptional results. And it can be made without expensive equipment: a modern camera, GIMP, and of course our trusty Kdenlive are enough.
Those sequences, typical of action films, in which the action stops in a precise moment and the camera scrolls along the scene while the actors and all the objects are immobile, they are very beautiful. In large film productions, these sequences are made with high speed cameras (for example the Red Epic, which reaches 300 frames per second, or the Phantom Flex, which reaches 10,000 frames per second with a reduced resolution) mounted on a dolly programmable, like the Kessler CineDrive (which allows you to program the movement of the camera and run it repeatedly in the same way). The problem, for a low budget filmmaker, is that Red costs around $ 30,000, while Phantom costs nearly $ 50,000. In addition, the programmable motorized dolly costs nearly $ 10,000. And however beautiful a scene may be, it is not worth spending a minimum of forty thousand dollars to make it. Fortunately, we have a zero-cost alternative: all we need is a reflex camera (even mirrorless, but with a crop factor of less than 1.8) that is capable of making movies. The trick we will use is the following: we will shoot the first part of the movie in one place. This will then be interrupted, and we will extract a frame from it (in which, therefore, the actors appear immobile). We will take photographs along the entire path that the camera should take: the convenience of using photographs, instead of videos, is that it is possible to stop the action in particular moments, difficult to capture otherwise. Then the extracted frame and the photographs will be glued together with GIMP in order to obtain a sort of “panoramic” photo which we will then scroll with Kdenlive as if we were passing the camera on a “virtual” dolly. In our example we decided to return the camera to the starting point, before continuing the action. But it is also possible to start it from a different point: it is sufficient that in that position, instead of taking a photograph, a movie is produced. A frame used to compose the entire landscape is then extracted from it and, when the “virtual” camera arrives in that position, the video can continue from that frame. What matters, in order to obtain an appreciable result, is to choose the times correctly. The scrolling of the panoramic photo, for example, should not be too fast, otherwise the details of the image would not be seen (which make it more realistic). But it doesn’t have to be too slow either, otherwise viewers would get bored. Even the trick that we suggest in our tutorial, that is not to go directly from one end of the panoramic photo to the other but to use an intermediate key frame to make the last phase of the movement slower, is just to give the correct rhythm to the sequence. Perhaps, “rhythm” is the most appropriate word: because the choice of the times depends above all on the rhythm of the soundtrack associated with the movie. To find the right times it is sufficient to carry out several tests, until the correct combination is found. You can see the example video at the following address: https://www.youtube.com/watch?v=8NbO0eP5aPw
 The “panoramic” photo we made
  The frame where the action is stopped
 The exposure time
Realizing this effect correctly is not too complicated, and does not require expensive equipment. We used a mirrorless digital camera, with a 50mm Zeiss lens, so that we could shoot the movie with an extremely reduced exposure time (about a three thousandth of a second). In this way, the various frames did not suffer the “blur” effect. Obviously it is not necessary to use such a short time: if the objects do not move too fast, even a time of 1/500 of a second may be sufficient. In our example the object in question was water, so we preferred a very low time to be able to accurately capture all the droplets.
We choose the frame
First of all, we need to decide where to stop the image
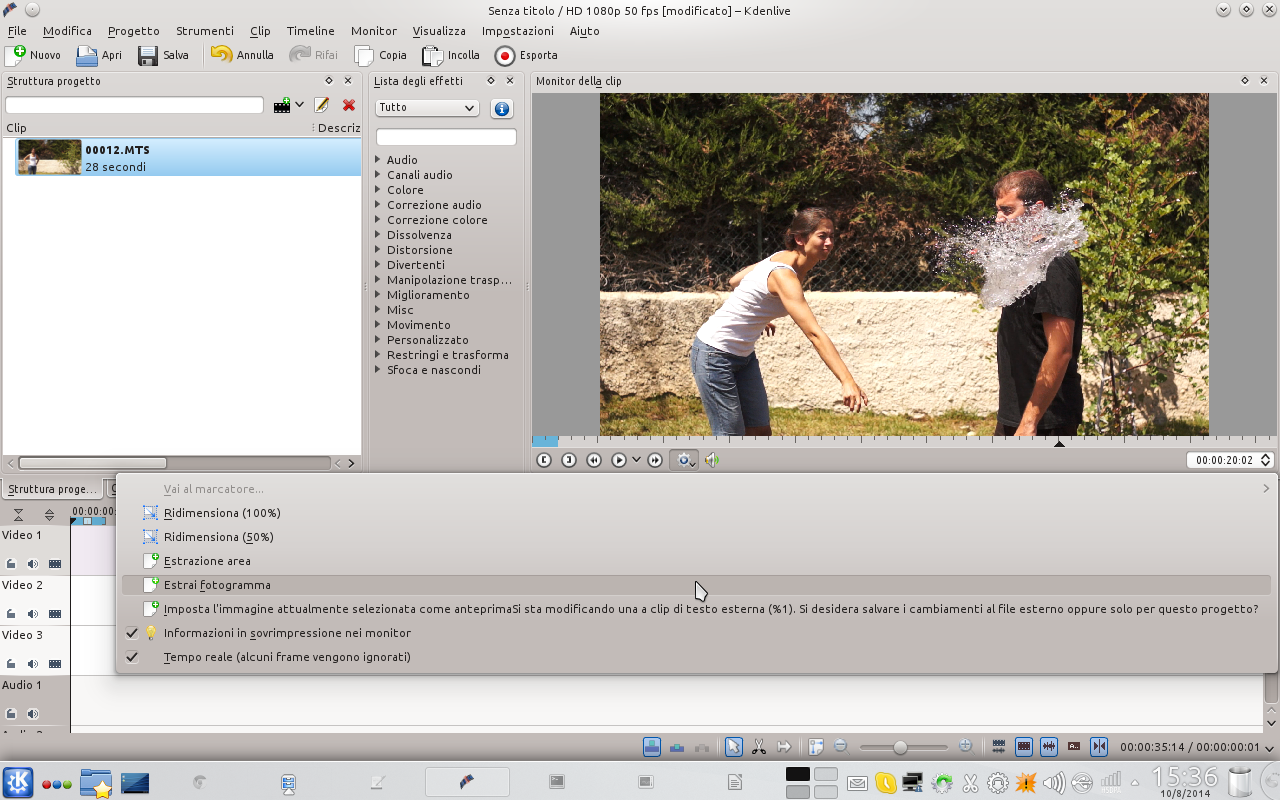 1 STOP THE VIDEO – We start by viewing the basic movie in Kdenlive: moving frame by frame along the timeline, we identify the frame where we want to stop the action. When we find it, we click on the gear wheel choosing Extract frame .
  2 OVERVIEW PHOTOS – We save the frame in a folder, like a normal image. Then we open GIMP by building an image ( File / New ) with 1080 pixels in height and a multiple of 1920 in width (for example 5760). The width can be corrected later.
 A little photo editing
The various photographs taken must be merged together
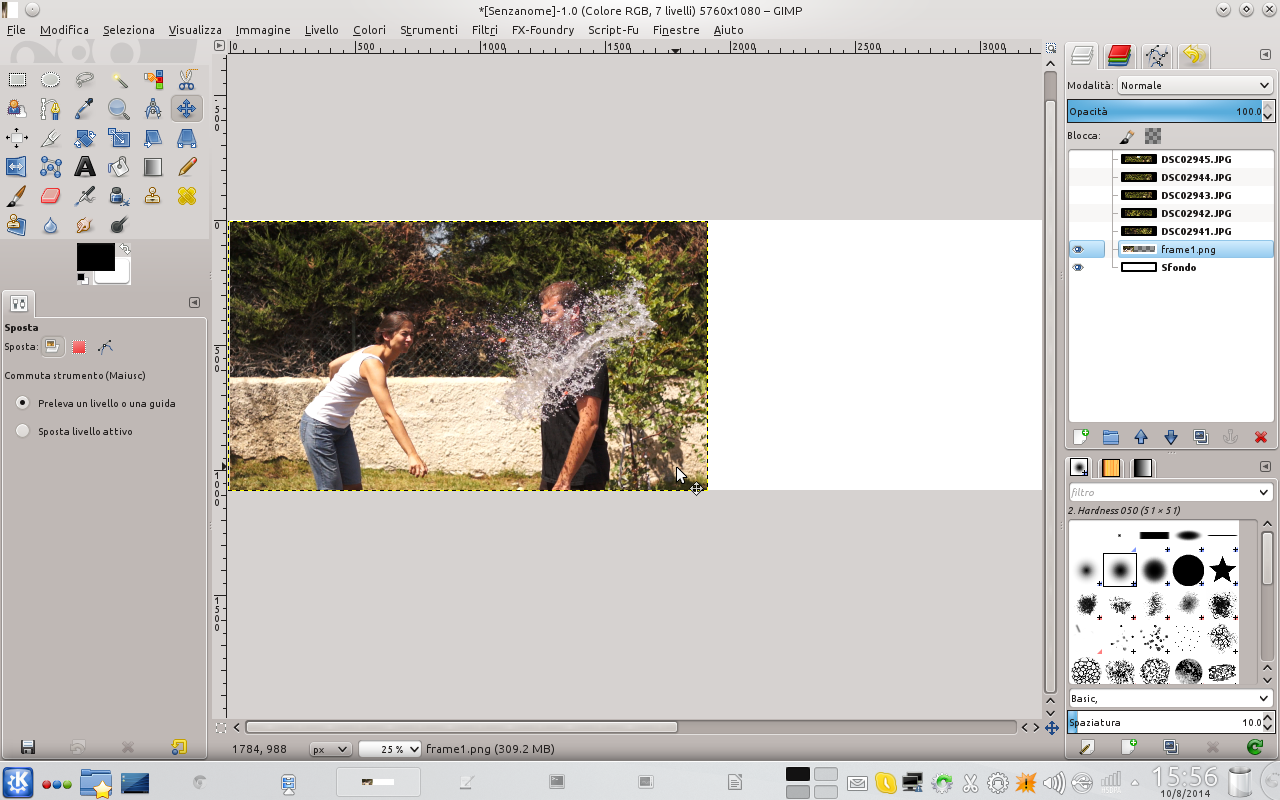 1 PHOTOS AS LEVELS – First of all, we need to load the frame we extracted a little while ago with Kdenlive into the new image. This can be done via the menu File / Open as Layers . Then we also add the photos taken to make the overview.
  2 FULL HD DIMENSION – Proceeding with one photograph at a time, we must resize each image with the tool Ladder . The width of the photo should be set at 1920 pixels, while the height must be calculated by GIMP keeping the proportions.
 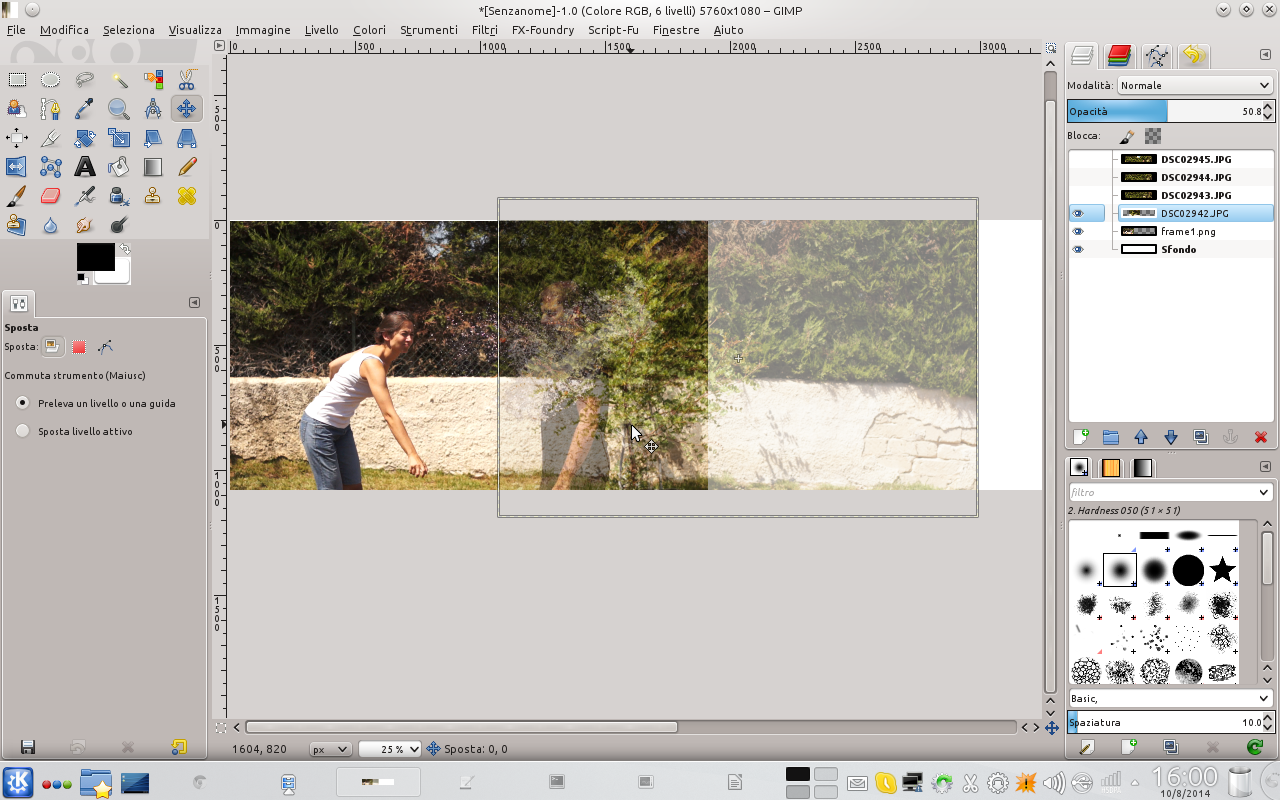 3 THE RIGHT POSITION – Using the tool Move then, you have to position the photograph in order to correctly overlay it on the already existing frame. This may be simpler if we temporarily set the opacity of the level above 50%.
  4 PERFECT MELTING – It is also necessary to add a layer mask to the layer of the newly positioned photograph, so that the overlapping part can be hidden. Just right click on it and choose Add layer mask .
 From GIMP to Kdenlive
We finish the work on the photos and bring the result to Kdenlive
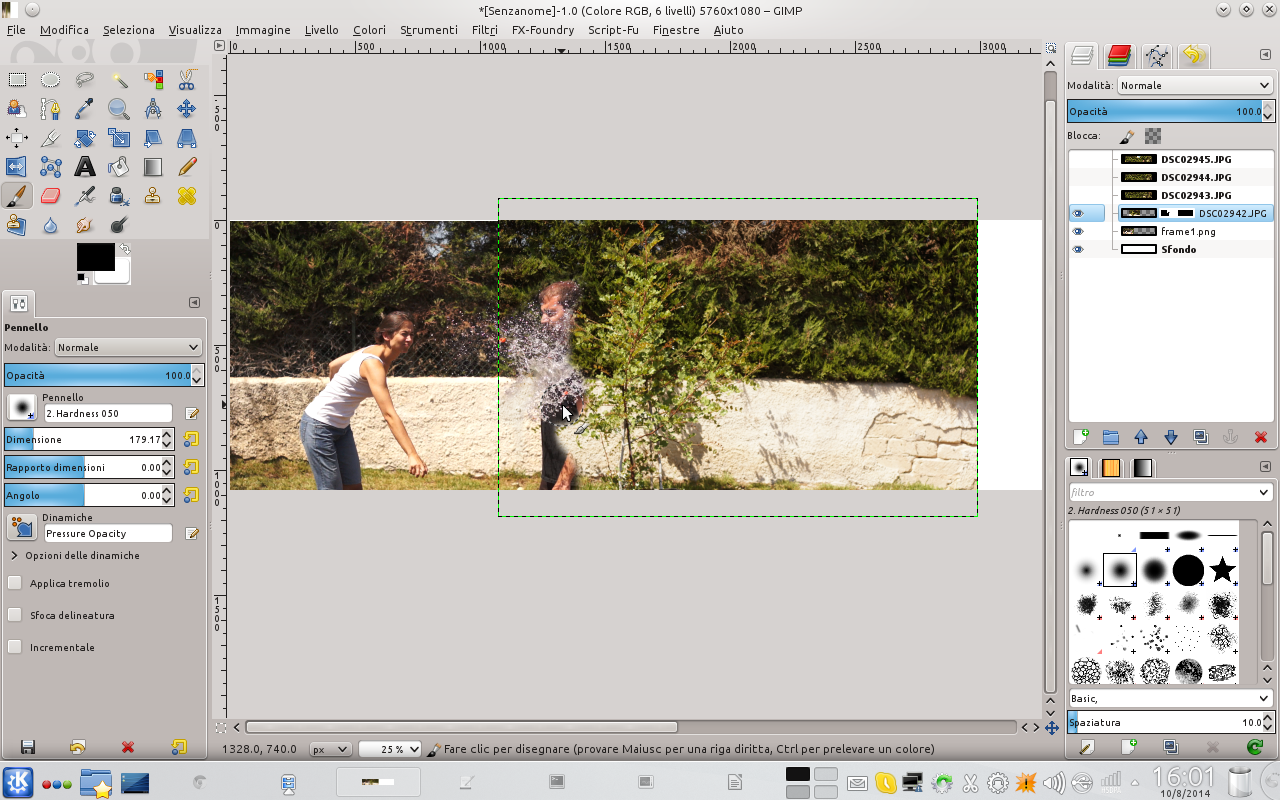 1 LEVEL MASK – Using the tool Brush , in black color, we can paint the layer mask, in order to eliminate portions of the image. Our goal, of course, is to be able to blend the current image with the previous one in a perfect way.
 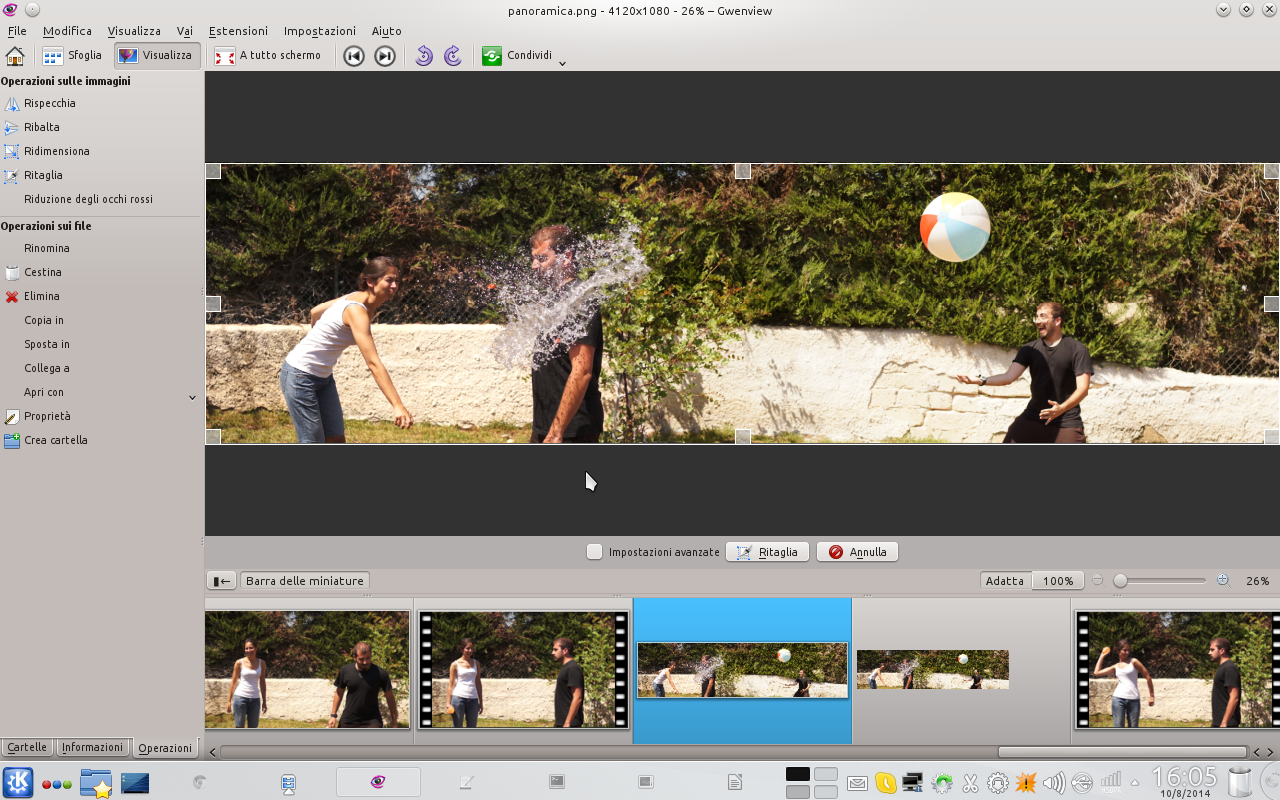 2 WE SEE THE RESULT – We perform the same procedure for all the other images, up to compose the panorama. Then just save the image and open it with a viewer such as Gwenview: if there is white space left we can crop it with the same Gwenview
 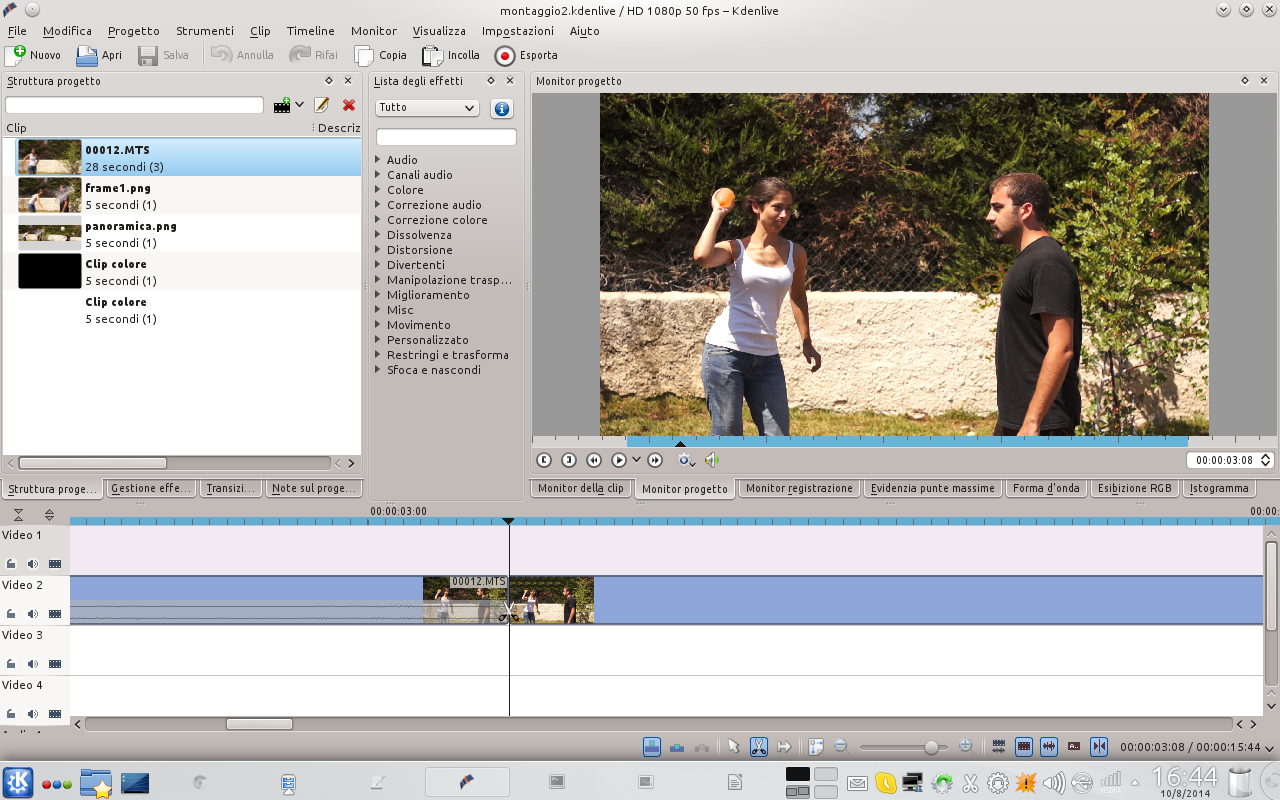 3 CUTS, WHERE NEEDED – Let’s go back to Kdenlive: if we have not already done so, we position the original movie in the timeline and cut it to the frame where the action must stop. In addition, we can cut the clip even a few seconds before that frame.
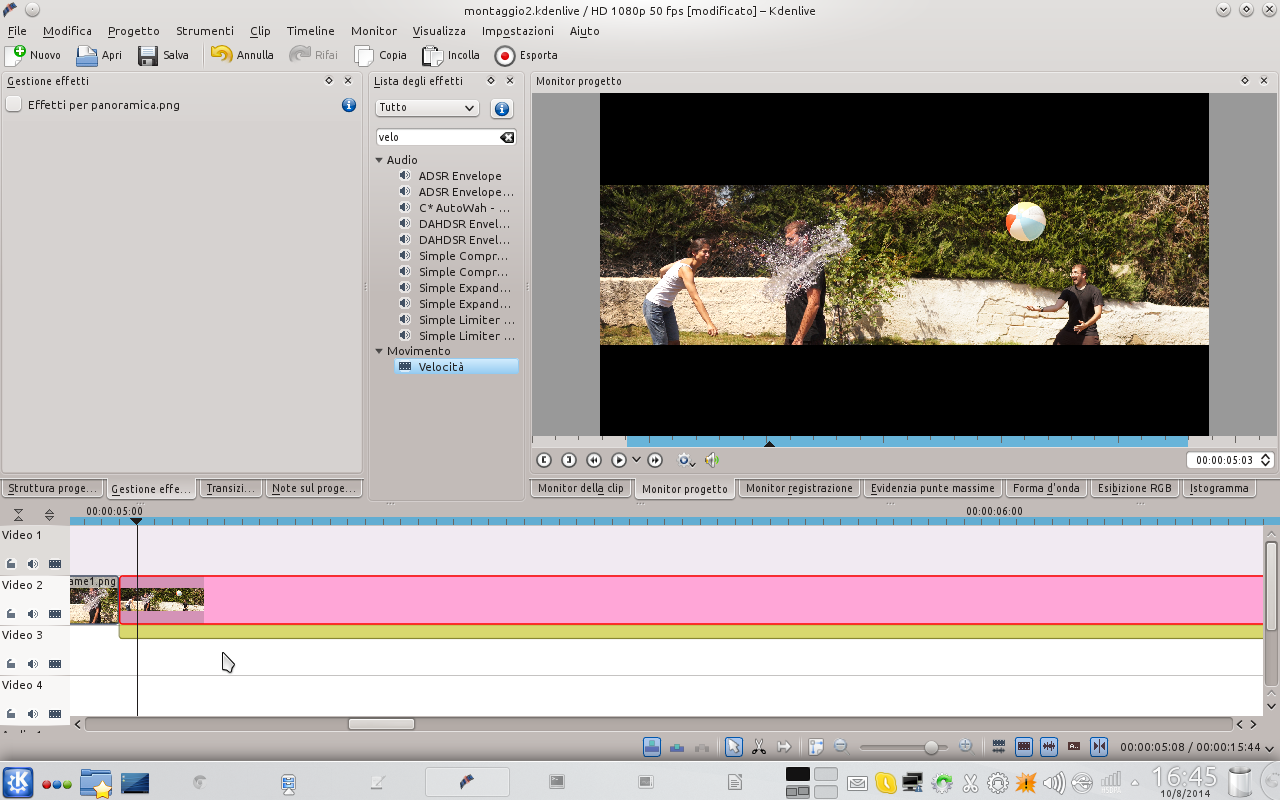
  4 A SLOW CLIP – We are now with a clip that begins a few seconds before the future “block” of the action and ends with it. To this we can apply the effect Speed , with a percentage of 25% .
 Forward for keyframes
We move the panoramic photo using the keyframes of the Composite transition
 1 THE TRANSITION – We move the last clip away from the rest, so that it doesn’t get in the way. Then, we position the panoramic image immediately after the clip that goes in slow motion. We must also add one to this image transition , placing one under it color clip Black.
  2 TYPE COMPOSITE – At this point we make the transition type Composite and set the size so that the height of the image covers the entire frame. Moving a few frames further, we add another keyframe with the same characteristics.
  3 YOU GO FROM ONE SIDE… – We continue along the timeline, until we believe it is time to insert another keyframe: in this the panoramic photo must be translated so as to reach almost the end, but not completely (a hundred pixels less).
 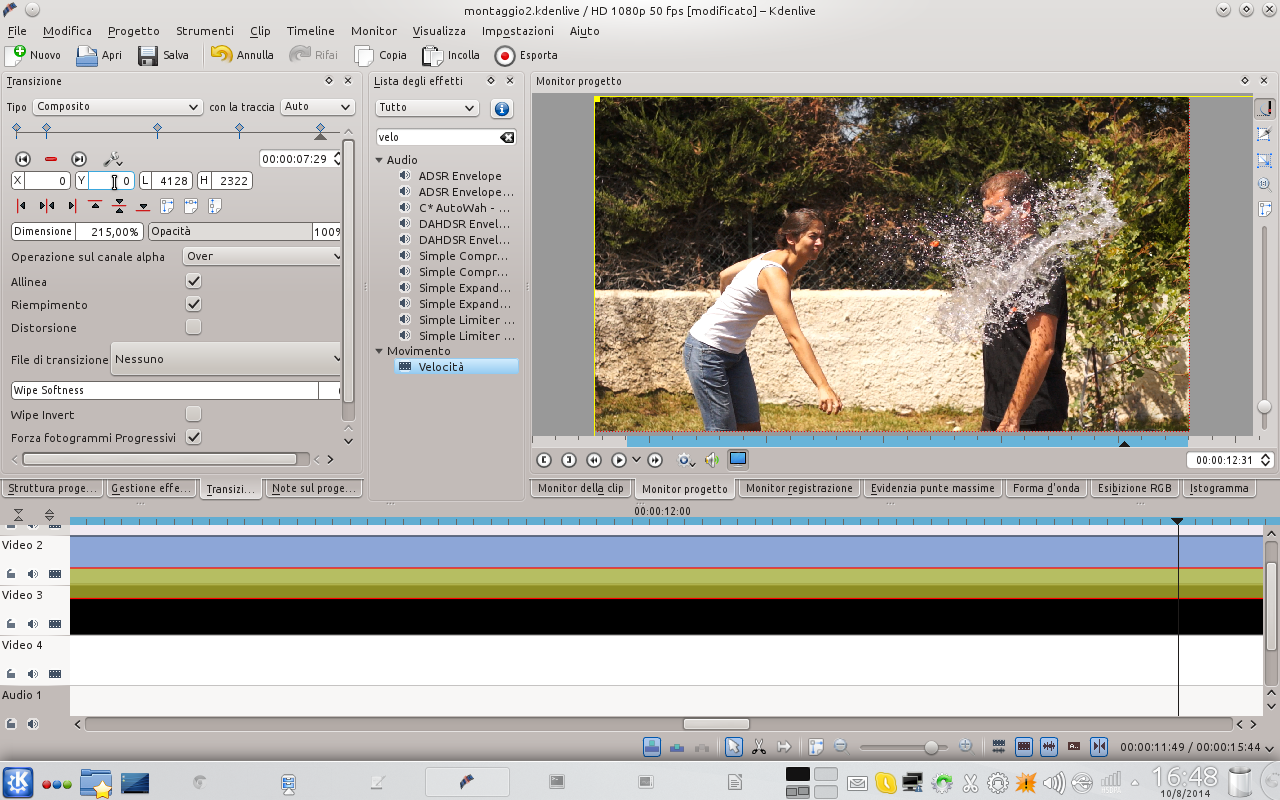 4 …TO THE OTHER ONE – Shortly after we add another keyframe, in which the panoramic photo must be moved to its maximum edge. Finally, we add a last keyframe, at the end of the clip, where the image must be positioned again as in the first key frame.
  5 WITH THE RIGHT TIMES – Once the work on the image clip is finished, we position at the end of it the remaining part of the original movie, so that the action can start again from where it stopped. It is crucial to choose the timing correctly, and for this you only need a little practice.
  6 SIMPLE FLASH– Finally, you can also insert a “flash” immediately before the start of the panoramic image. Just add one color clip white, superimposing it on the others, with a very rapid fade in and one output .

