In many films we see a character “magically” changing connotations, transforming himself into another person. The most famous example is the polyjuice potion in the Harry Potter series: using Kdenlive we can replicate the effect at no cost.
Among the main films that are produced in an amateur way we find categories such as horror and science fiction, and more recently also fantasy. Horror films have obviously always been the most popular among independent producers because they require very little effort: a good horror movie can also be shot with just one camera and with effects created in the room, without having to worry too much about editing and computer graphics. In the last decade, thanks to the appearance of free, open source, and free tools for the digital post production of movies, science fiction and the fantasy genre have also taken hold. Among the various effects that it has become possible to achieve very easily there is the transformation of one actor into another: in science fiction futuristic devices are often imagined capable of changing the characteristics of a person by pressing a button, while in the fantasy world it is rather frequent think of a magic potion capable of transforming people. The most frequent example in mass culture is the polyjuice potion of the Harry Potter saga, which allows you to transform yourself into other people. Realizing a similar effect with Kdenlive is quite simple: we suggest a generic method, which you can then adapt to your needs. We will begin with two shots of the actors: the first will obviously be the actor who drinks the potion and who turns into the second actor. These two shots must be made with the actors in front of a green sheet, in order to then perform the chroma key effect ( Chromatic key ) so you can easily remove the background and then move the actors where needed in the scene. Obviously then you need a photograph or a shot of the background: on this background you can position the actors. The effect itself is a simple fade between the two clips: only the film with the first actor must be seen first and, at a certain point, the second actor’s clip must appear. We will not, however, use the classic opacity fade transition. Instead, we will use a custom fade, which Kdenlive calls Wipe . They are fades built on the basis of specific grayscale images: they can be created specifically, but there are already many included in the program. In particular, the one that interests us makes the second clip appear above the first with a series of spots that gradually become larger, until the complete transition from one clip to another is obtained. By exploiting the transitions and the effects of Kdenlive we will be able to align the two actors and the background, to create a plausible image. It is essential to make the two faces coincide very well, in particular the eyes of the two actors must be superimposed perfectly. The attention of the spectators will in fact probably be directed precisely towards the eyes and the rest of the face, during the transformation, so it is important that this part is well overlapped. For the rest of the body, however, there are no particular problems, precisely because the attention of the public is always turned towards the face of the actors. As always, you can see the example video at the following address: https://www.youtube.com/watch?v=N8e2fASxxy0
 The first actor will turn into the second
 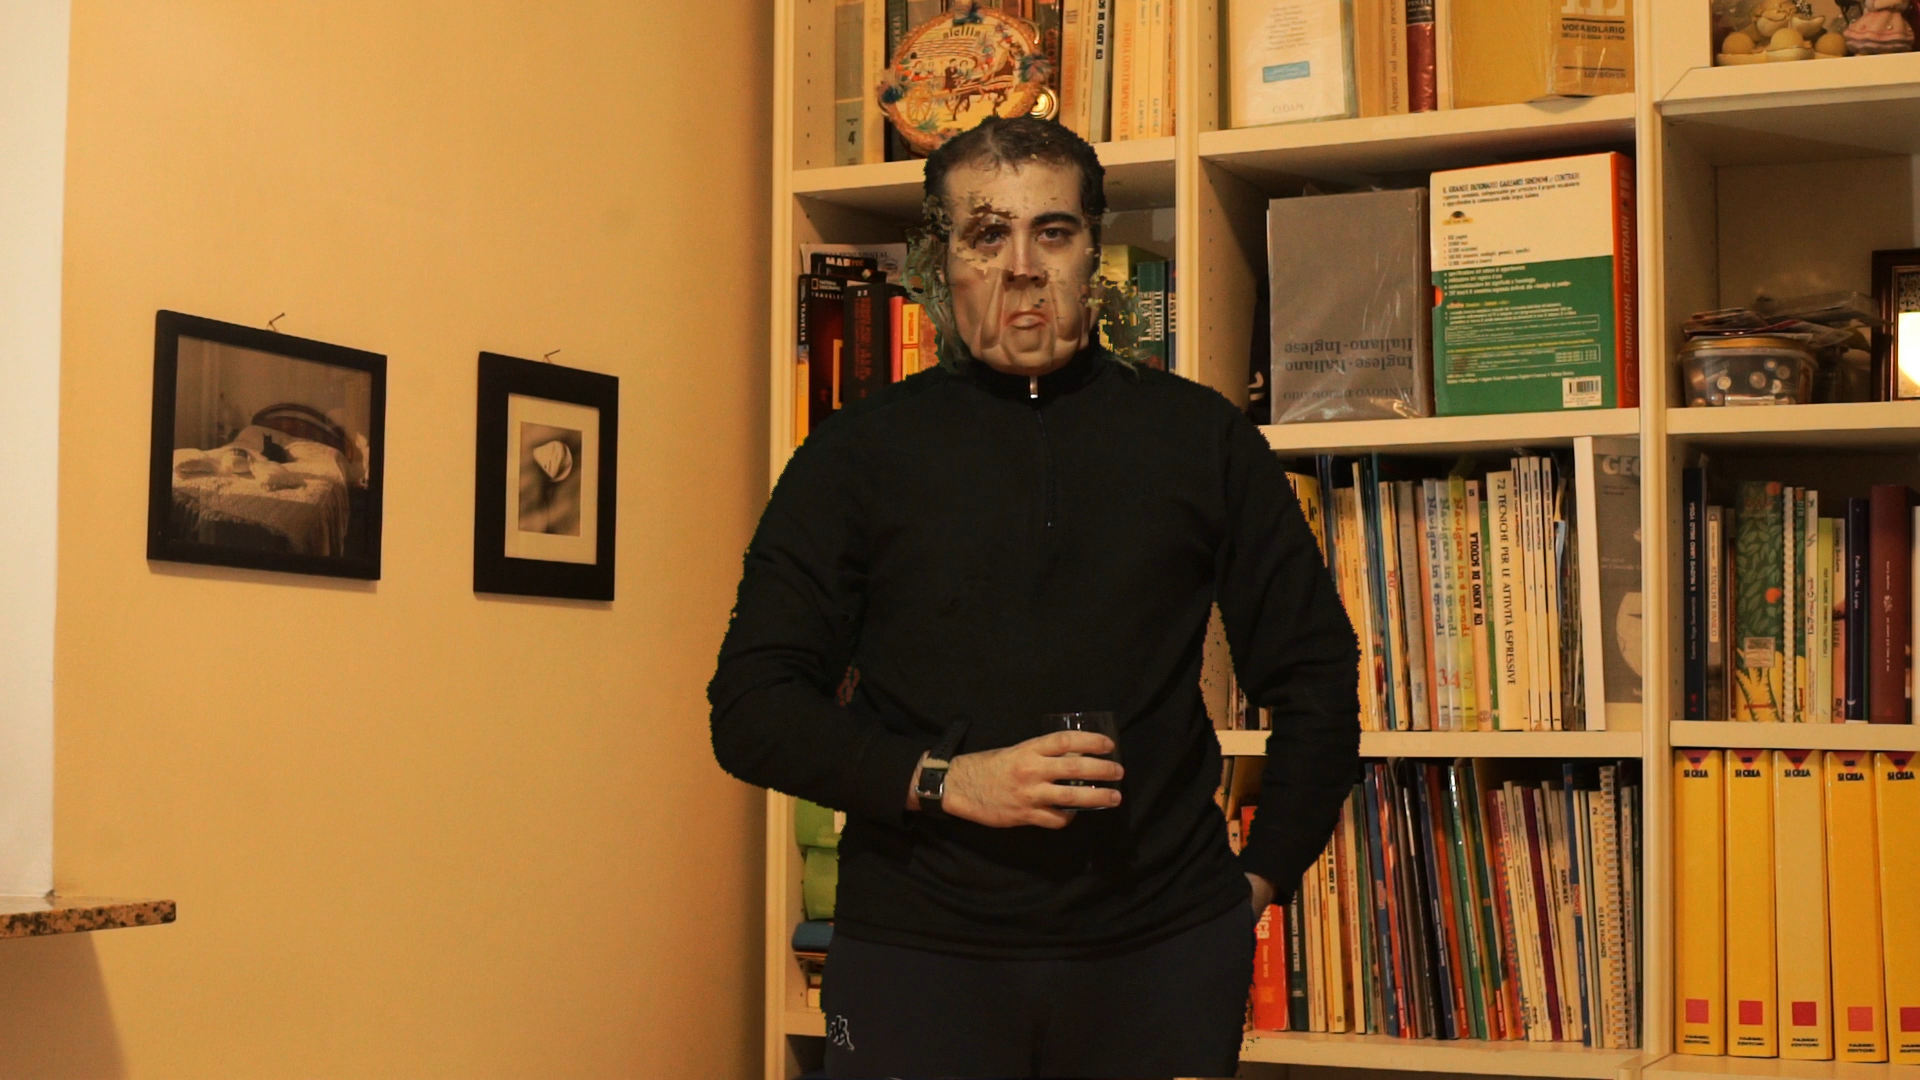 The ongoing effect: the actor is gradually transforming
 Even without the green background
Of course, the effect can also be achieved without the chroma key, directly filming the two actors in the same place in the room. The problem is that, as we said, the face of the two actors must be in the same place: therefore one must be careful not only not to move the camera between the two shots, but also to make the position of the actors coincide perfectly (you can help making a sign on the floor to indicate where exactly they should go). The advantage of not using the green sheet is that the brightness certainly always remains the same and the actors are very well integrated into the scene (because they really are). The problem can arise when the background we want to have contains moving objects.
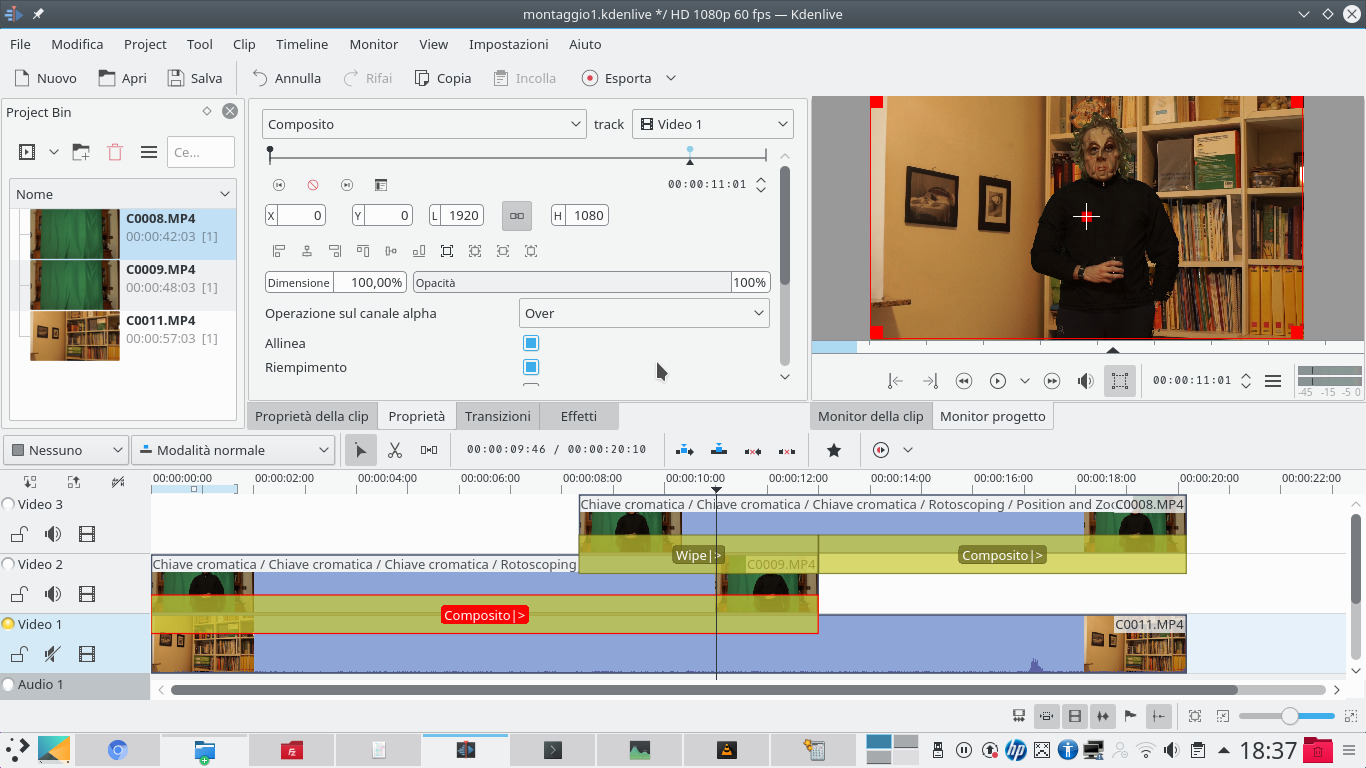
Clips in place
We need three clips on three different tracks: the background, the first actor, and the second actor
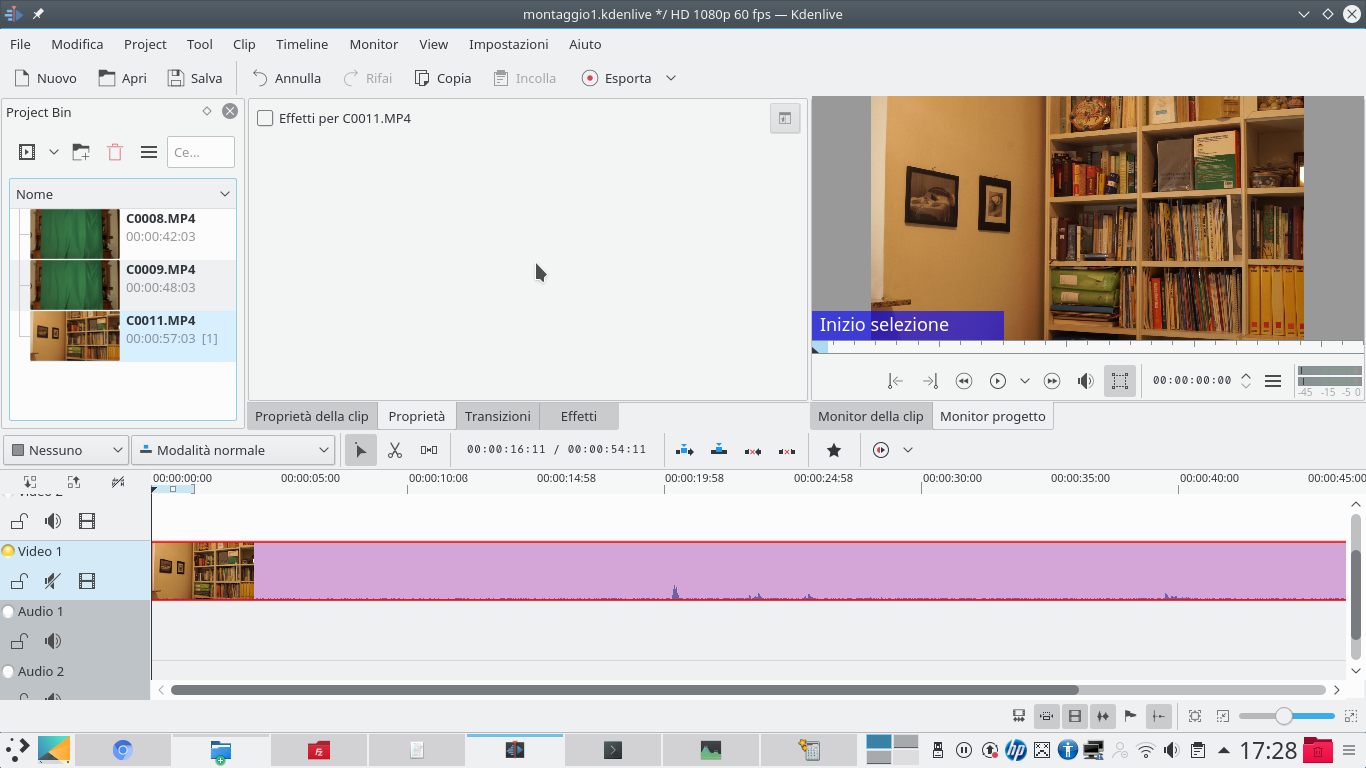 1 THE BACKGROUND CLIP – Let’s start by creating a new project in Kdenlive and position the background clip in the lowest track, ie the Video1 . The two actors’ clips are then needed in the project.
 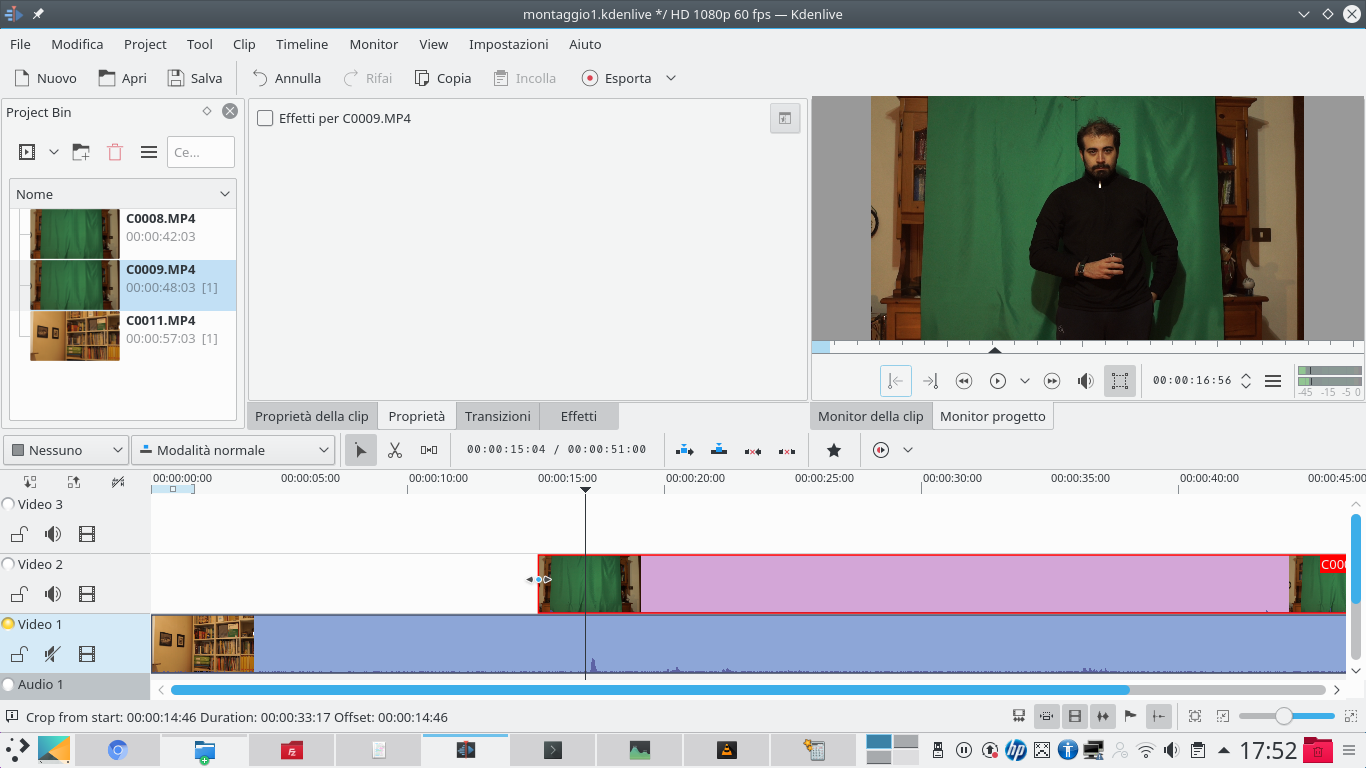 2 HERE ARE THE TWO ACTORS – The clip of the first actor, the one who is to be transformed into the second actor, can be inserted in the track Video2 , i.e. the intermediate track. Obviously this clip must be cut using the Scissors tool or the special handles.
 Clear the green sheet
The two clips of the actors must have a transparent background: we will use the chromatic key
 1 COMPOSITION – The last clip, that of the second actor, must be put in the highest track, the Movie3 , aligning it so that it partially overlaps the clip of the first actor. We add to the track clip Video2 a type fade Composite towards the Video1 .
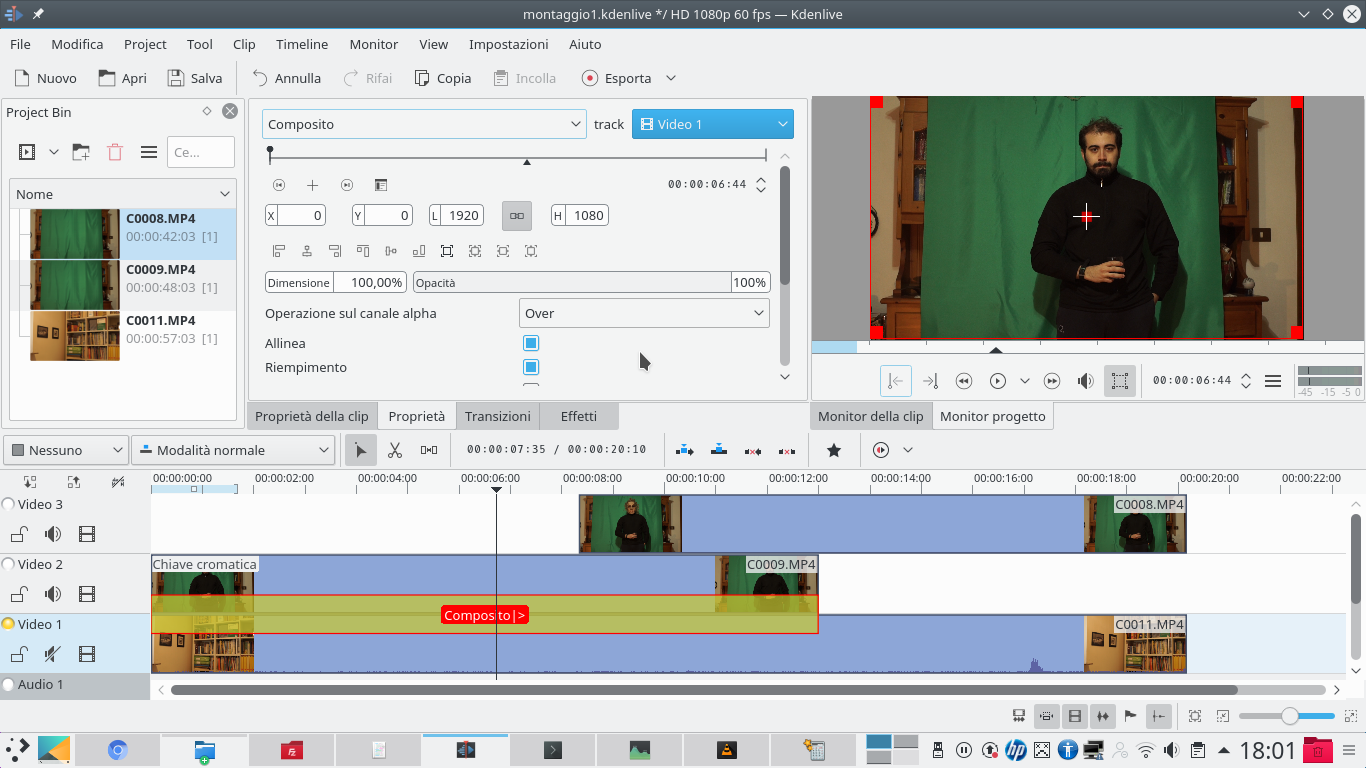
  2 THE CHROMA KEY– The background of the first actor must be removed: we can do it with the effect Chromatic key . Just select the color of the green fabric and the appropriate variance. If there are multiple shades of color, multiple effects can be added one after the other.
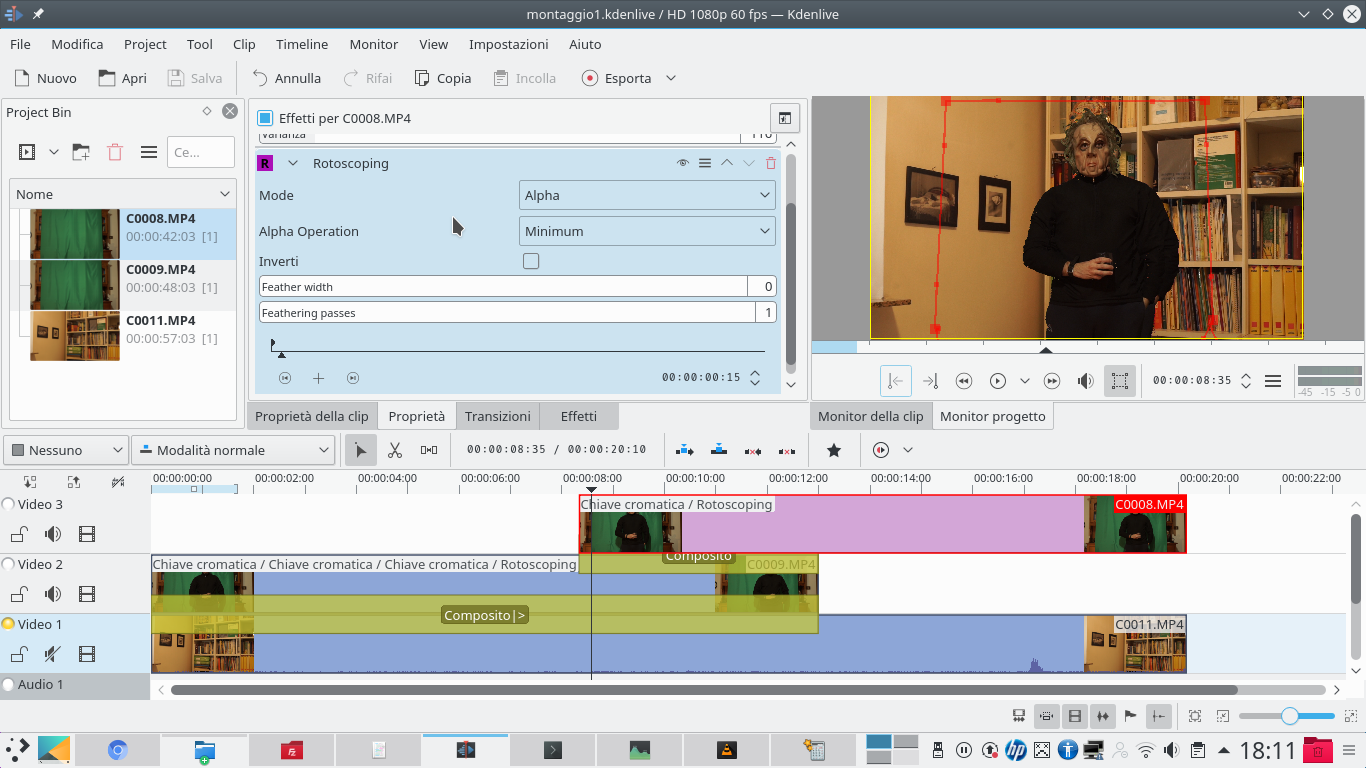
  3 ROTOSCOPING – To finish the edges, we also add a type effect rotoscoping , drawing on the Project Monitor the outline of the area where the actor is present, with operation Minimum . So any edges of the sheet should disappear.
 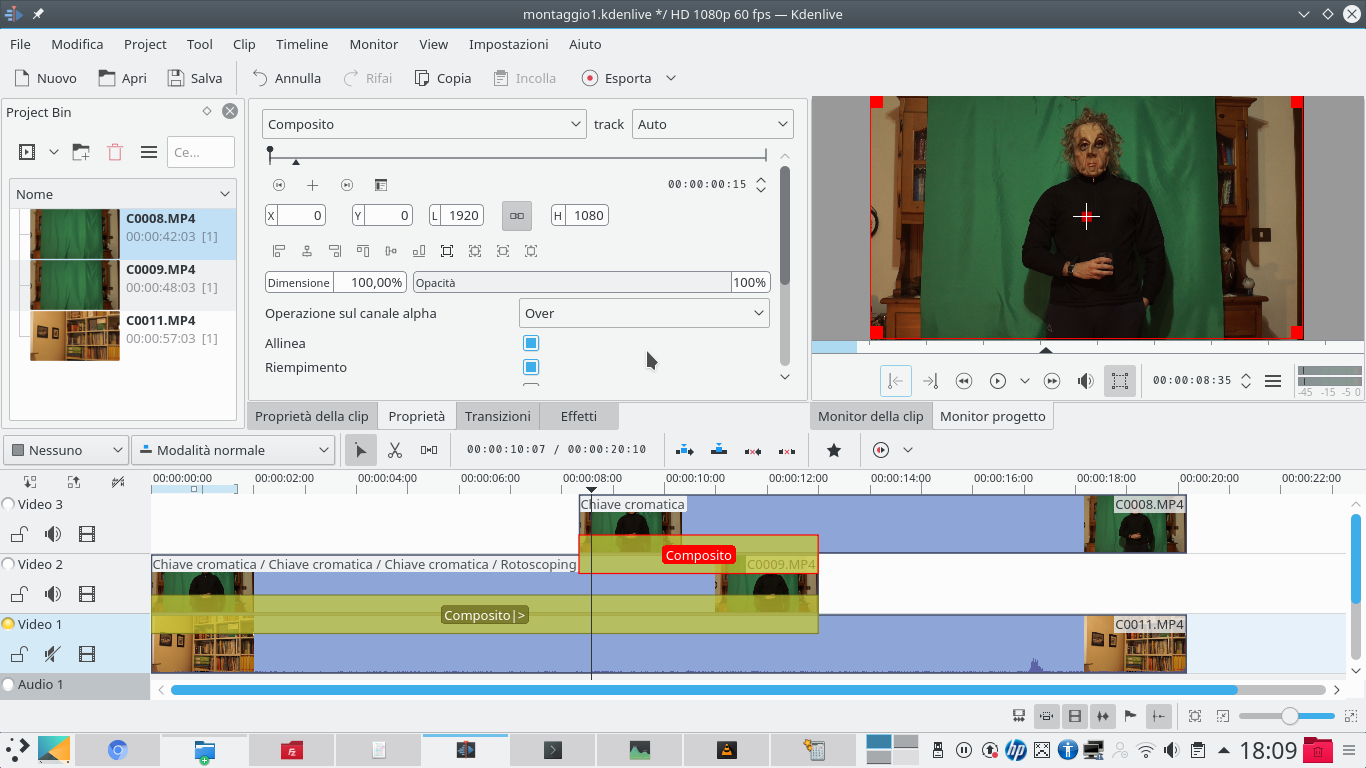 4 A TRANSITION – Let’s start working on the track now Movie3 , which contains the clip of the second actor. We set a transition for this track from the beginning of this clip to the end of the first actor’s clip. The type of transition is unimportant, Composite for now it goes well.
 The transition we want
For our effect we need a particular transition in the shape of “clouds”
 1 OTHER CHROMA KEY – The background must also be removed from the second actor’s clip, using effects Chromatic key is rotoscoping just like we did for the first actor’s clip. The two actors may appear not well overlapping, but for now it doesn’t matter.
 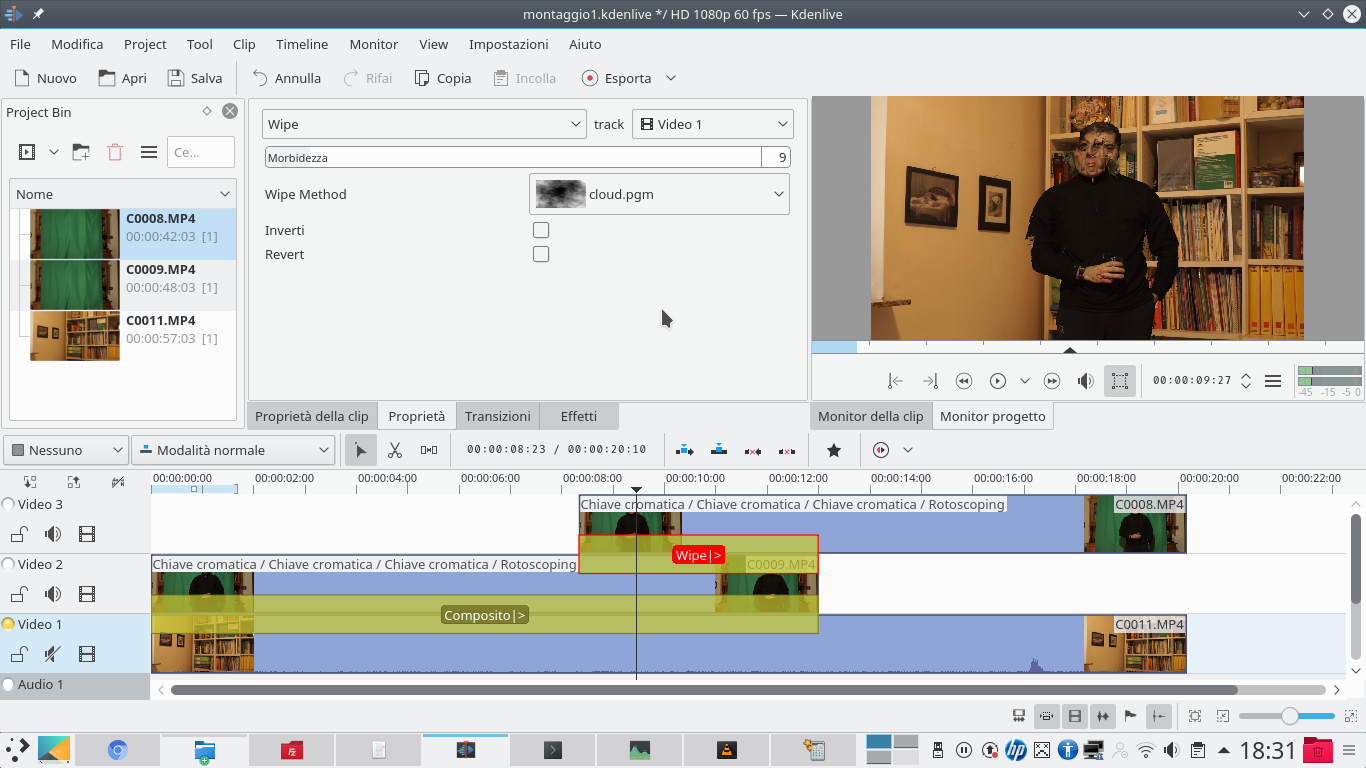 2 WIPE TRANSITION – Now let’s work on the transition that allows you to overlap the clips of the track Movie3 is Video2 : let’s set it as Wipe instead of Composite . The Wipe method it must be cloud , and the softness about 10. No box should be checked.
 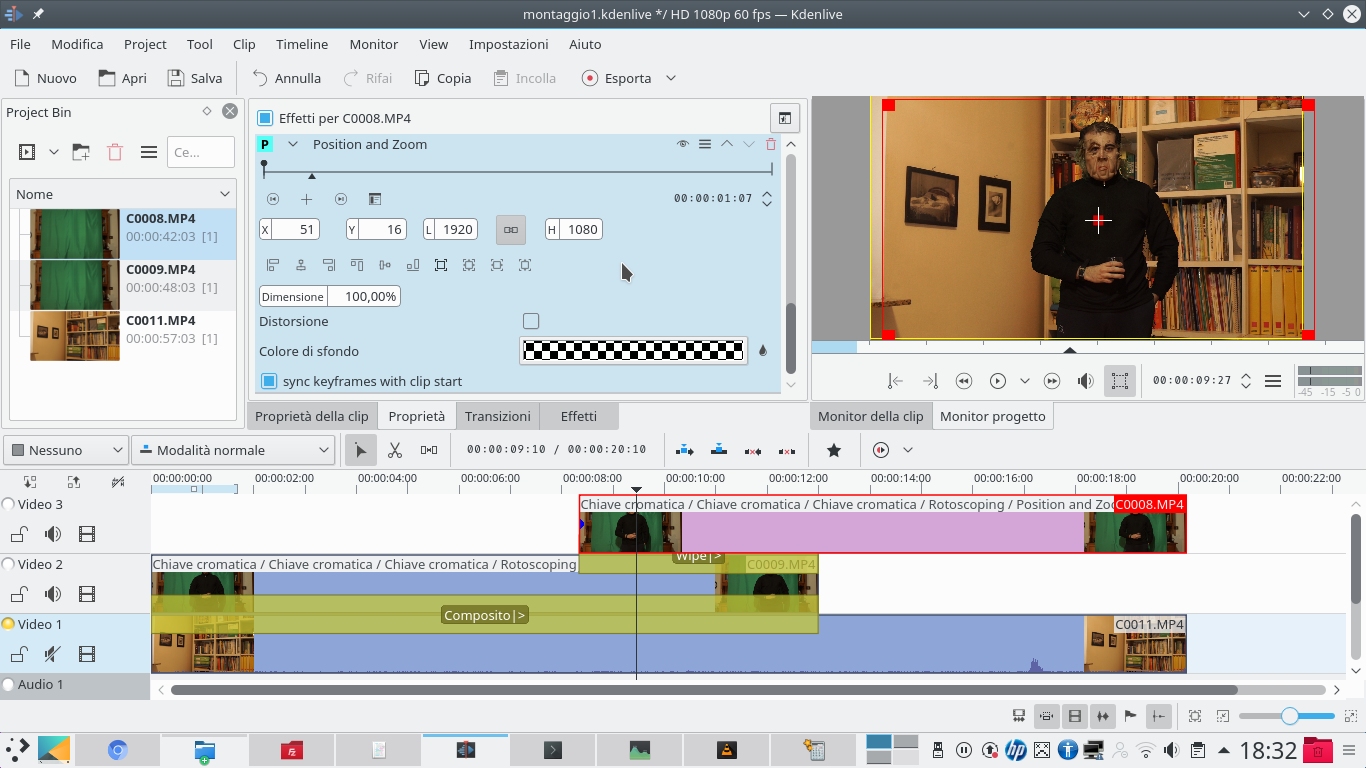 3 THE ALIGNMENT – It is necessary to align the clips as best as possible: we add the effect to the clip of the second actor Position and zoom , translating it so that at least the face (eyes, nose, mouth) is perfectly aligned with that of the first actor.
  4 FINAL OF THE VIDEO – To continue the overlap even after the particular fade, we add a type transition Composite for the track Movie3 referred to Video1 , which must last from the end of the track clip Video2 at the end of the track clip Movie3 .
 Finish the transition
By adjusting some details we can make the effect more credible
 1 THE KEY FRAME – Let’s go work on the transition Composite of the track Video2 . Positioning just before the end of the clip, we can add a new keyframe with the appropriate shaped button + .
  2 A FADE – Moving to the end of the clip, we add an additional keyframe, and in this we set the opacity to 0 . We should therefore get the first actor to disappear by fading: this helps us if the two actors are not well overlapping.
  3 THE ALPHA CHANNEL – Let’s add the effect to the clip of the first actor Operation on the alpha channel . We choose as an operation Shrink soft , setting the two values numbers in the way that seems to us to give the most realistic effect.
  4 A REDUCTION – We do the same thing also to the clip of the second actor: effect Operation on the alpha channel , by selecting Shrink soft . This allows us to better blend the actors with the background and with each other.
  5 LIGHT AND CONTRAST – At this point you can make small color corrections, assigning the effect to the clips Curve , and drawing a curve on the canal Luma . The important thing is that all the clips seem to have the same brightness.
  6 SOUND EFFECT – To make the effect better, sounds can be added. You can find them on Freesound by clicking on the menu Project / Network resources . The imported audio clip is inserted into the track Audio1 and aligned with the moment when the transformation occurs.

