With Kdenlive it is possible to assemble a completely virtual collage of photos and videos, in order to simulate the movement of a camera on it. A perfect solution for the opening credits of any movie, and for music clips.
Whether you are making a holiday video, a music video clip, a movie of events such as weddings and other ceremonies, or even a real movie, there is a type of sequence that you can often want to insert: collage. In a sense, it is a more elaborate and less banal version of the splitscreen, and it always has its effect. In a nutshell, the idea is to simulate a poster, a billboard to hang several photos on which to slide the camera to show the various photos one at a time or all together. Of course, you can do the same thing directly in the room, by printing photos, hanging them on a poster, and moving the camera over it. The realization in the room, however, has a series of annoying disadvantages: first of all, printing photos costs. Secondly, managing the lighting can be very complicated: the paper on which the photos are printed is generally glossy, therefore it risks reflecting the light of the lamps that are used to illuminate the scene, making white lines appear on the images. Even if you use matte printing paper, the light reflection is reduced but not completely eliminated. There is also to say that the light with which to illuminate the poster cardboard is probably different from the optimal one for the photo, so one of the two elements would risk being underexposed. It can also be difficult to control the movement of the camera to avoid sudden shots: obtaining fluid movements is not easy at all, it may be necessary to use a dolly or a jib, tools that however cost several tens of euros. In addition, there is the unsolvable problem of the need to have still images. In fact, in a real poster it is only possible to print and paste photographs, not videos. In many cases, however, it may be preferable to make a fake poster with videos or photo sequences, instead of still photographs, which is obviously unrealistic but provides a much more pleasing result to the eye and is also a better way to tell a story. As often happens, in cinema pretending something allows you to make it more realistic than it would seem if you really tried to do it directly in the room. Obviously, with Kdenlive it is very simple to make a film of this type: all we will need is a series of photographs or videos with which to compose the collage, and the photograph of a poster in which to “glue” the selected material. The image of the poster should precisely be a picture or a frame containing printed photographs, preferably the classic Polaroids. The print format of the polaroids, with their white box, is so well known that it immediately appears to anyone as an authentic photograph, it is unequivocal. However, it will be necessary to modify a little, and in this GIMP, the poster image helps us. The various photographs must in fact be covered with a green rectangle (or any other color not present in the rest of the image). The trick is simple: by using the key chromatic effect of Kdenlive we can replace each green rectangle with a movie or a photo among those we have chosen for our virtual poster. As always, you can see the example video at the following address: https://www.youtube.com/watch?v=9IJBQm3UweY
 The collage of videos we made
  Thanks to 4K resolution, we can zoom in on individual photos without grainy pictures
Two tricks to improve the effect
A first thing to note is that, if desired, with GIMP it is also possible to add captions to the photos, writing a text in the famous white box of the polaroids, so we can describe what happens (very useful option for the opening credits: you can present the characters dedicating a polaroid to each of them). Alternatively, the caption can also be added later with Kdenlive, using the menu Project / Add title . The second key point is the resolution. In fact, in the realization of our Kdenlive project, we will use a simple trick: we will use a very high resolution, at least 4K (you can choose a custom resolution even larger). In this way we can then insert the video thus made into another Kdenlive project with 1080p resolution, and zoom in on the various images without losing quality. The movements that we will obtain will be much more fluid than those that would be obtained by manually moving a camera on a real poster.
Prepare the project
First of all we specify the resolution in 4K and choose a background
 1 4K RESOLUTION – Let’s start by creating a new project in Kdenlive: its resolution, which can be set from the menu Project / Project settings , it must be 4K , better if DCI , which is the higher resolution. You can also choose a resolution manually.
 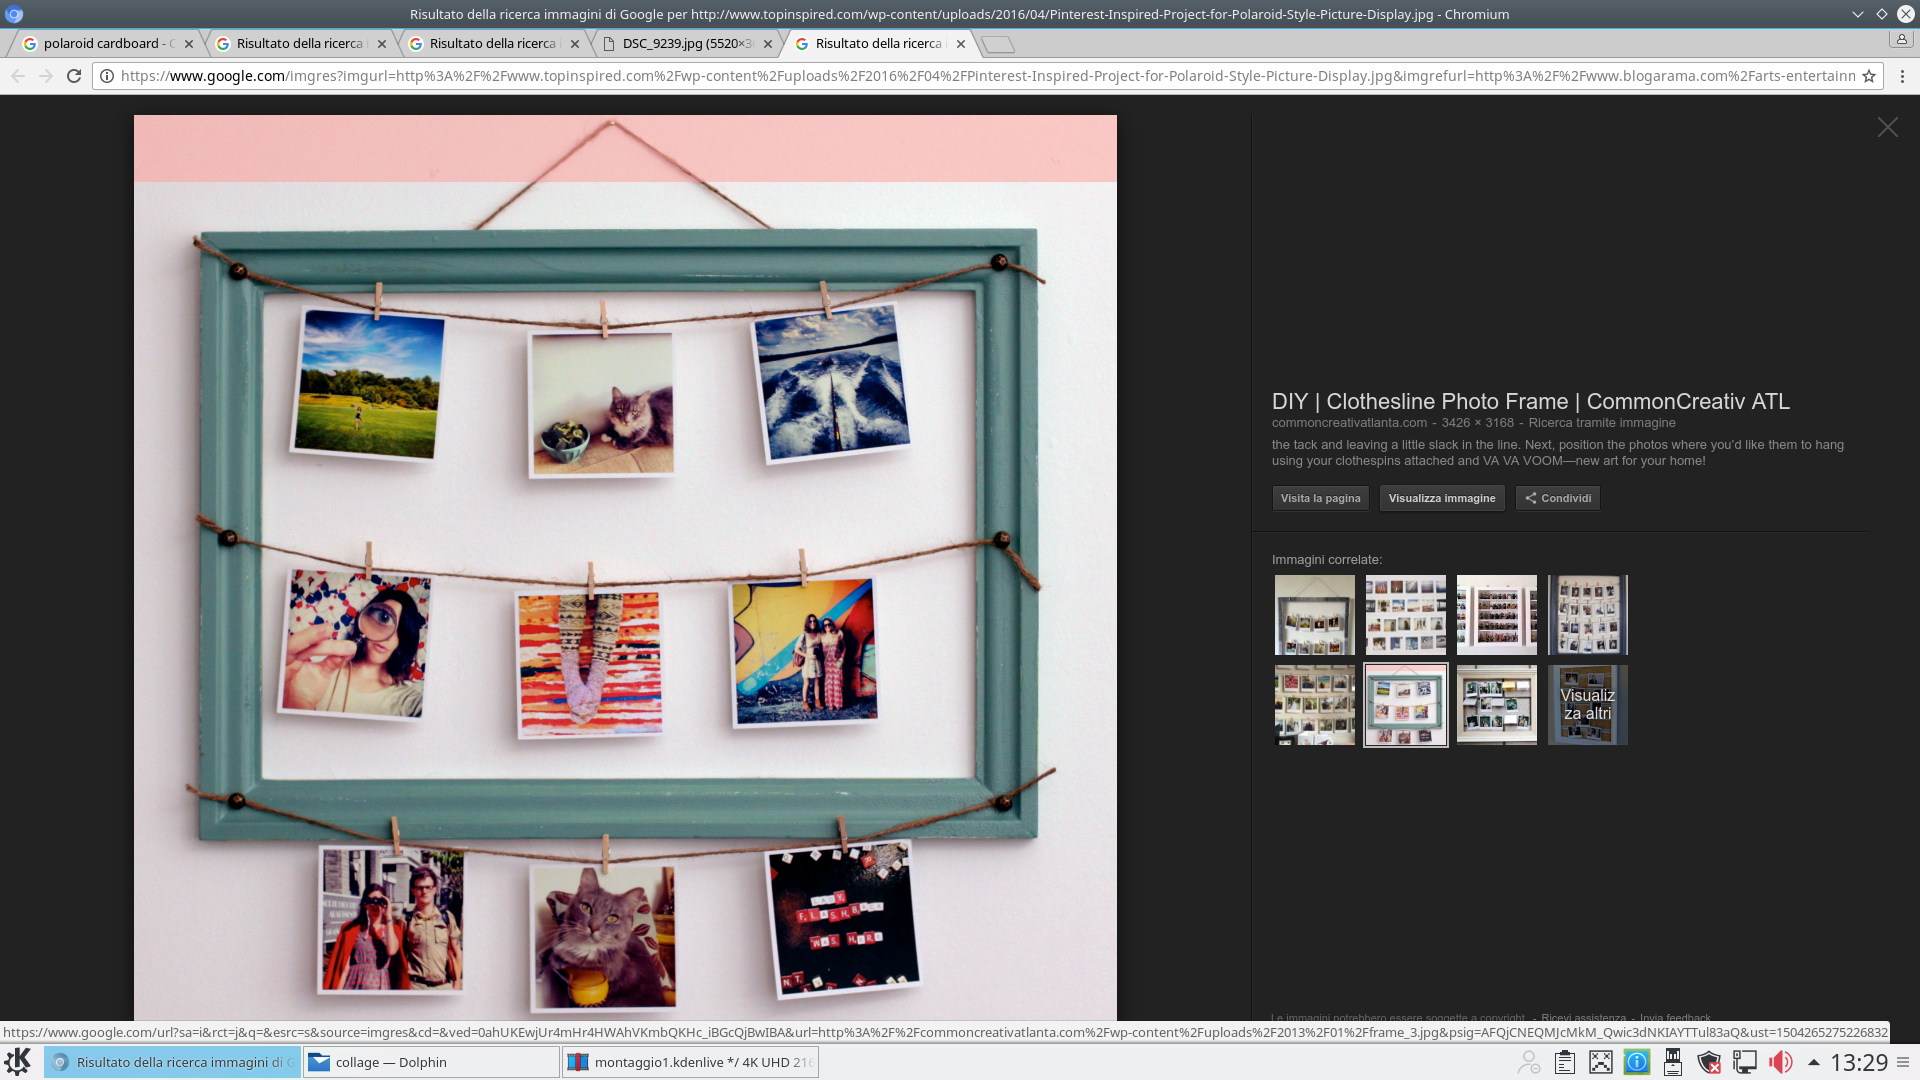 2 PHOTOS OF THE POSTER – We must then obtain the basic image, the one that will form the background. We can take a photo as we want it, or search on Google Images for something like “polaroid collage cardboard”, to get posters made with photographs.
 The background image
The photograph of the poster must be positioned in the highest track
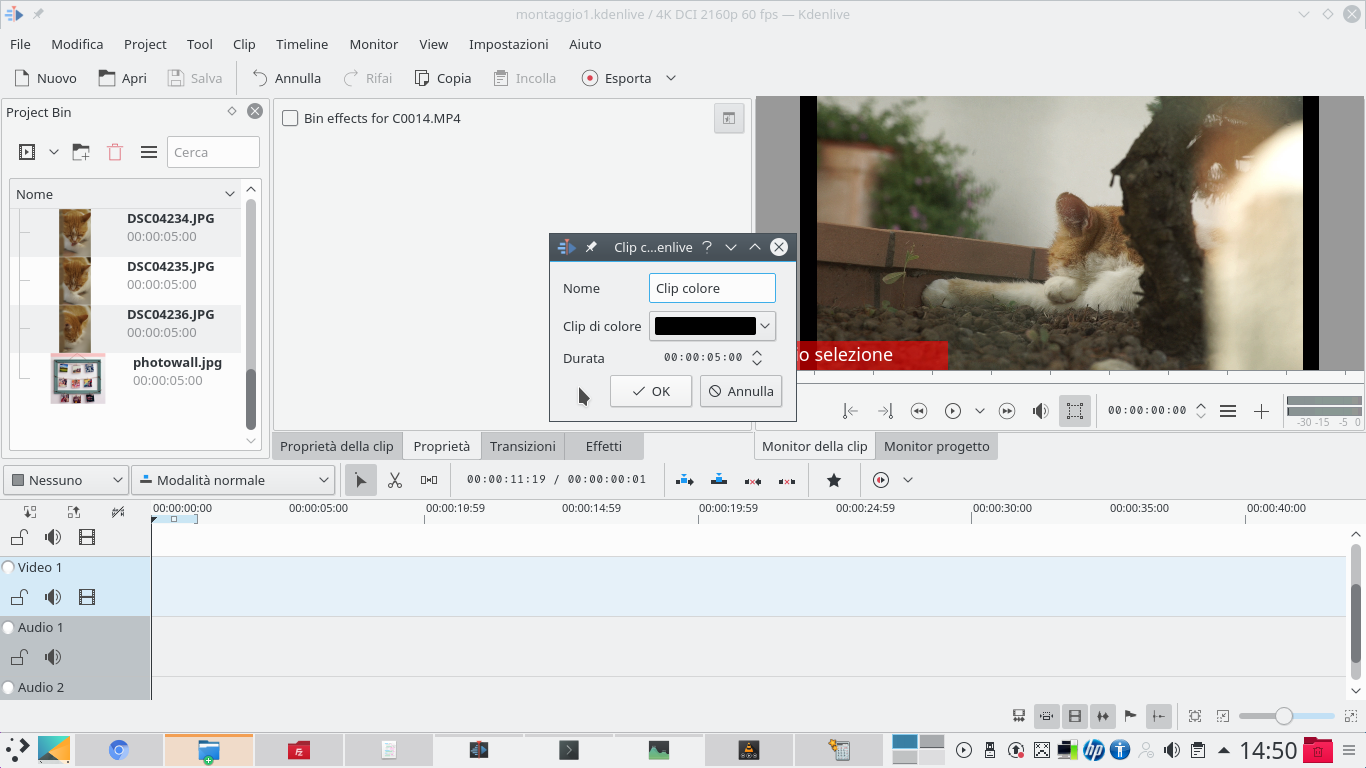 1 ONE COLOR CLIP – In the Kdenlive project it is necessary to insert all the video clips and also the background photograph. A color clip is also needed, which we can get from the menu Project / Add color clips . This is inserted into the clip Video1 , the one below.
  2 MORE VIDEO TRACKS– Numerous video tracks will be needed: we can add them by clicking on the last one with the right button and choosing the option Add track . If we want to insert 6 movies we will need a total of 8 tracks (the 2 more are for the background and the color clip).
  3 THE GREEN COLOR – The background image must probably be adapted: first of all, it must have the proportions of the Kdenlive project (4096×2160 points). Then, the boxes that must contain the photographs must be colored with a bright green.
  4 HERE IS THE BACKGROUND – Now we can insert the background image in Kdenlive, in the highest possible video track (for example, Video8 if we have 8 tracks). A composite transition, referring to the track, must be added to the clip Video1 (that of the color clip).
 The photographs and films to be “glued”
All the clips to be included in the collage are placed between the background image and the color clip
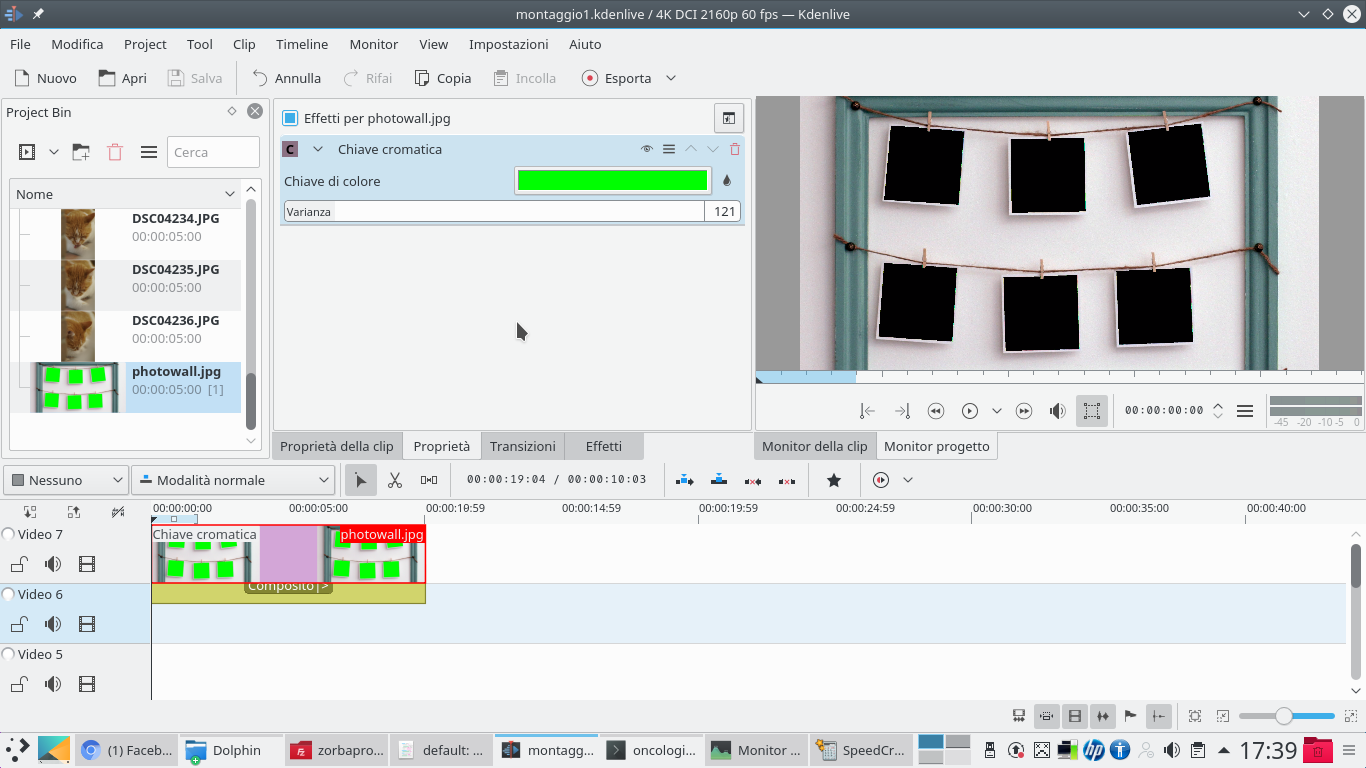 1 CHROMATIC KEY – The transition must be extended over the entire duration of the clip. The effect must also be added to the clip Chromatic key . The color to choose must be green, in order to make the “containers” of the images that we will insert transparent.
  2 THE FIRST MOVIE – We insert in the track immediately below the background one of the videos or photographs that we want to show. Obviously, we can cut the clip to adapt it to the length we prefer.
  3 THE COMPOSITION – This clip must also have a type transition Composite along its entire length, referred to the track Video1 . With this transition we can adapt the size and position of the clip to make it fit into one of the boxes arranged in the background.
  4 ALL OTHERS – Now you can proceed in the same way with all the other tracks until you fill the various “holes” in the background. Obviously, multiple clips can be put on the same track, as long as they are all covered by the transition Composite always referring to the track Video1 .
 Export and edit
With a new project in Full HD we can zoom in on the clip and move on it
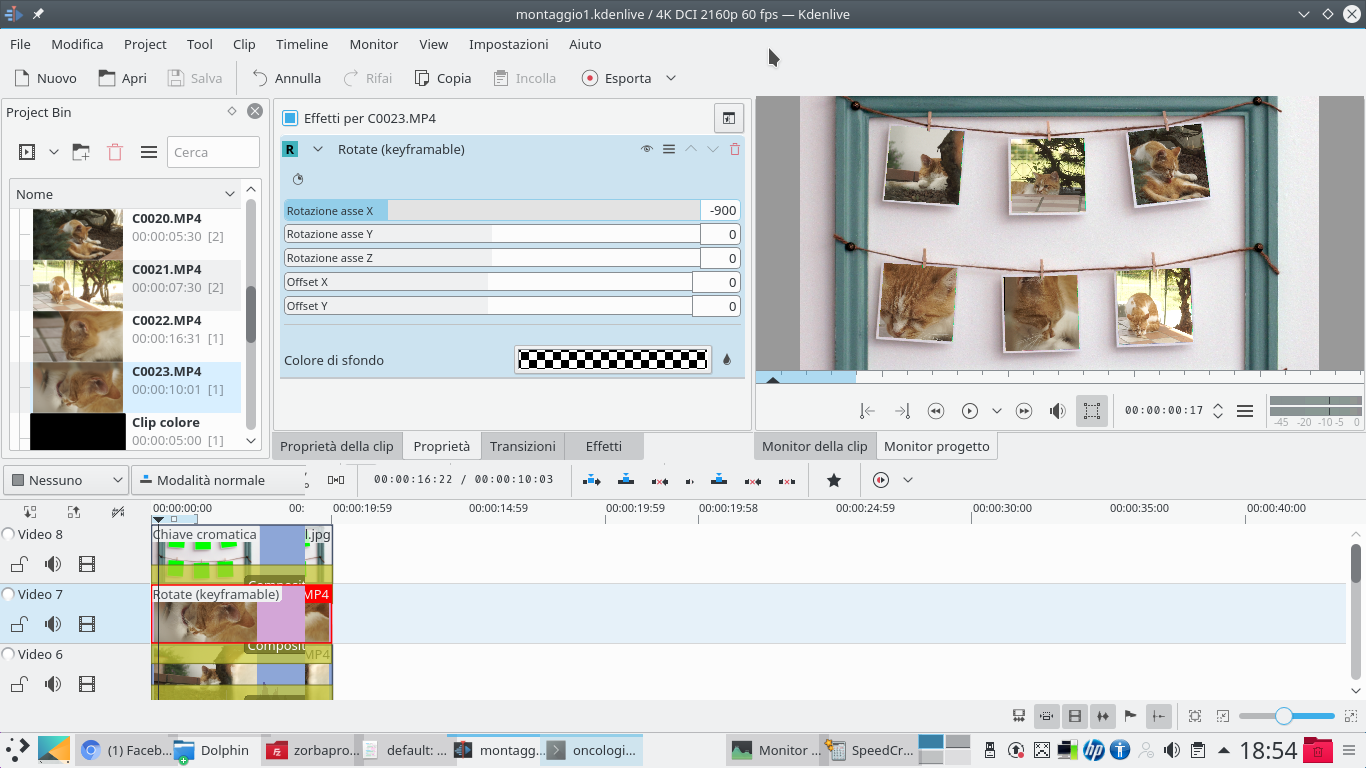 1 OTHER EFFECTS – The various clips can also receive various types of effects: using Rotate you can rotate the images to adapt them to the frame you see in the background. In addition, you can change their colors and apply artistic effects.
 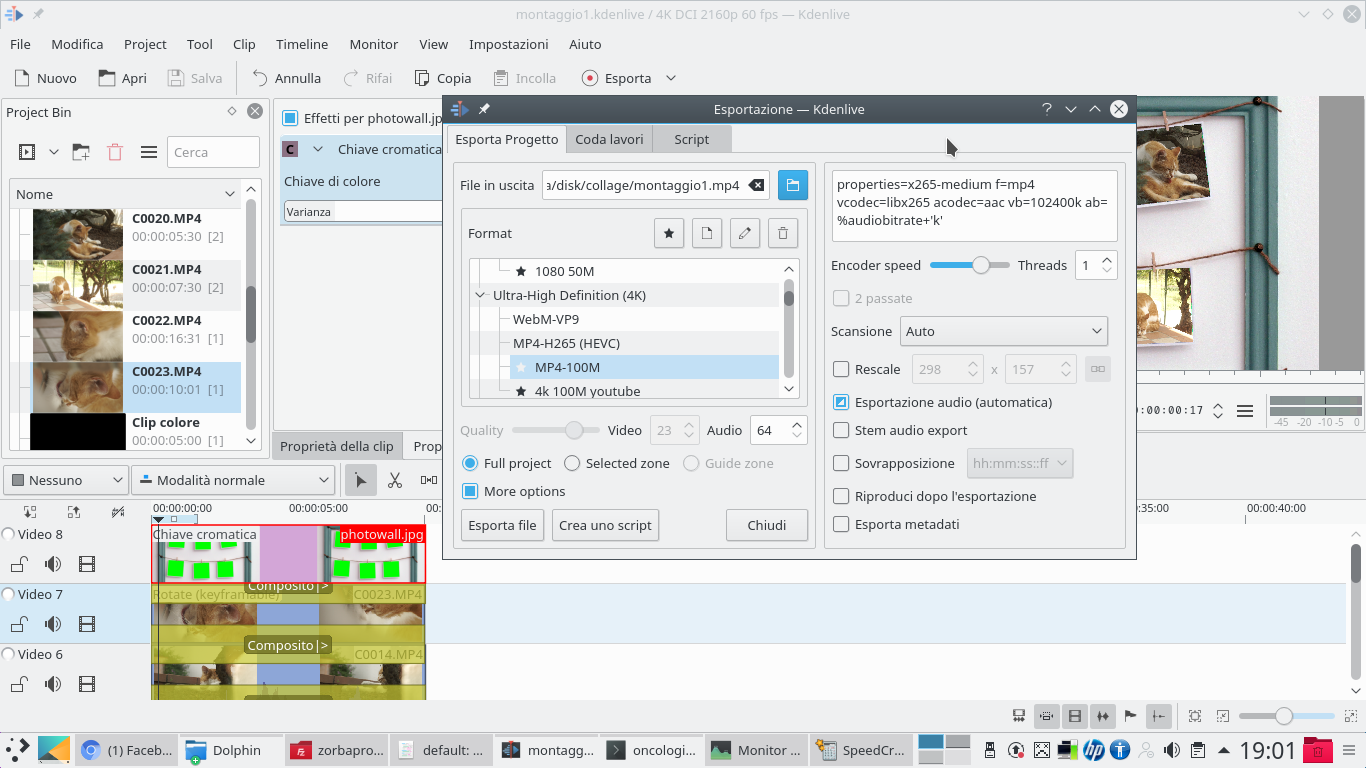 2 EXPORT – Insert all the images, we can export the video. To do this just click on Export and choose a profile in 4K . If you want to set a bitrate, it will have to be double the bitrate of normal FullHD movies.
  3 WITH ONE SCRIPT – Since the file is very large, it is possible that Kdenlive cannot export the movie because it runs out of memory. In this case just click on Create a script , save the file sh , and then start it from Konsole.
 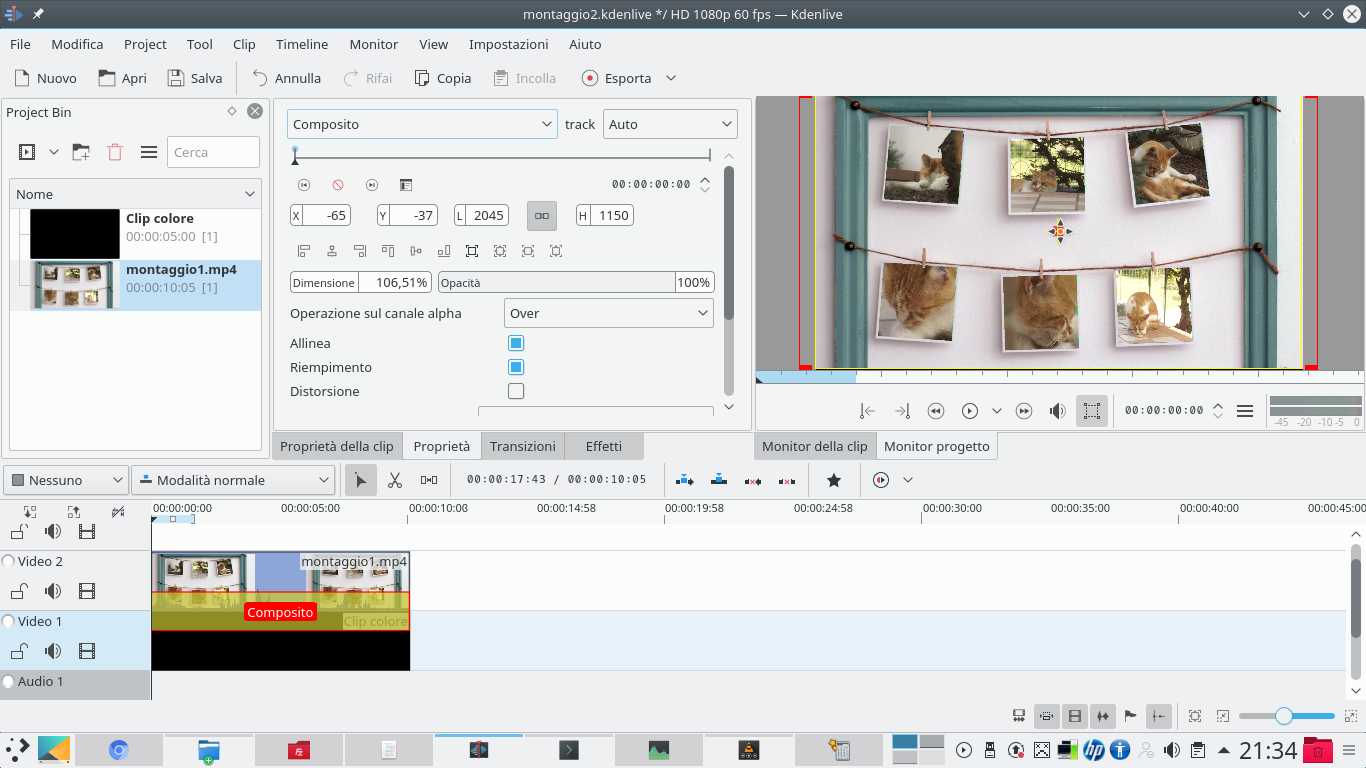 4 NEW PROJECT – Now let’s open a new Kdenlive project this time in 1080p format. In this project we will insert a color clip, always from the menu Project / Add color clips , and the newly created 4K movie.
 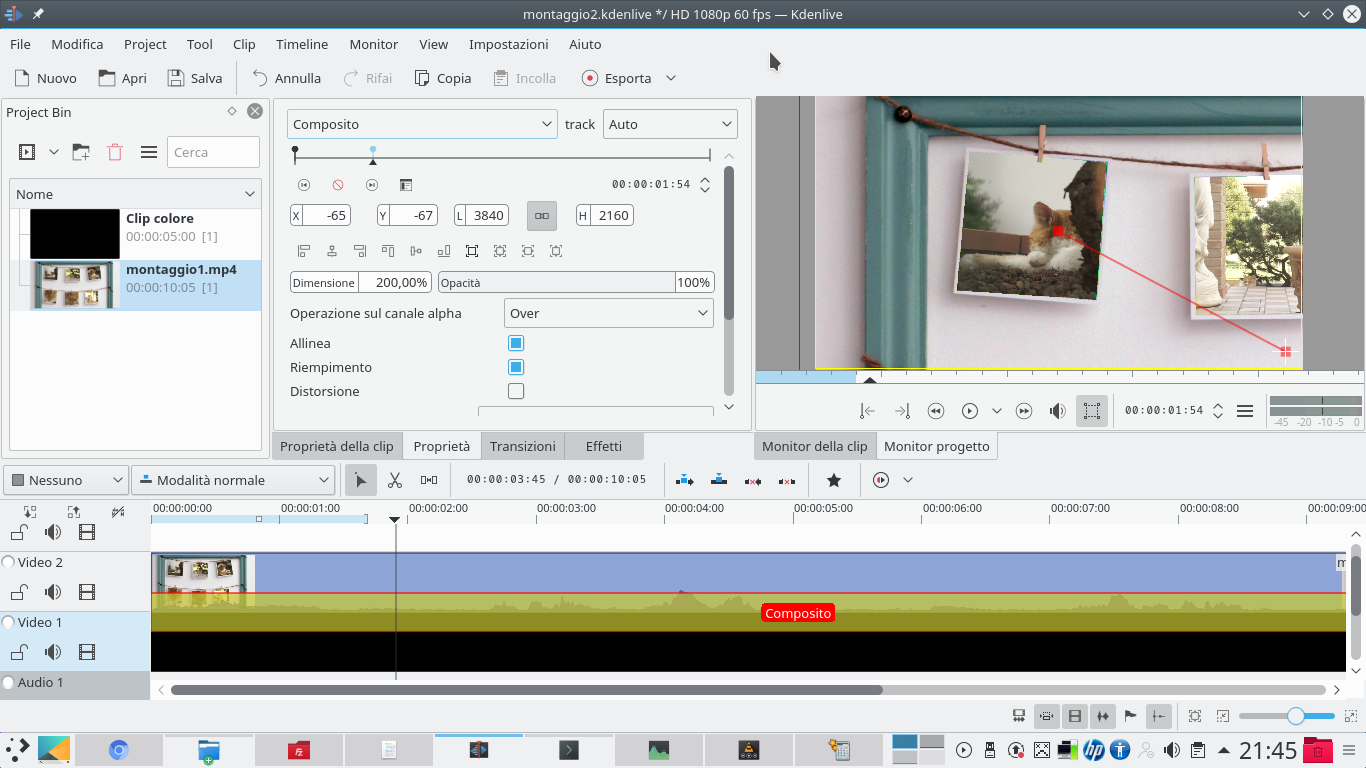 5 MANY KEYFRAME – We insert the color clip into the track Video1 and the movie in Video2 , placing a transition between the two Composite . Let’s start adding keyframes to change the size and position of the movie.
 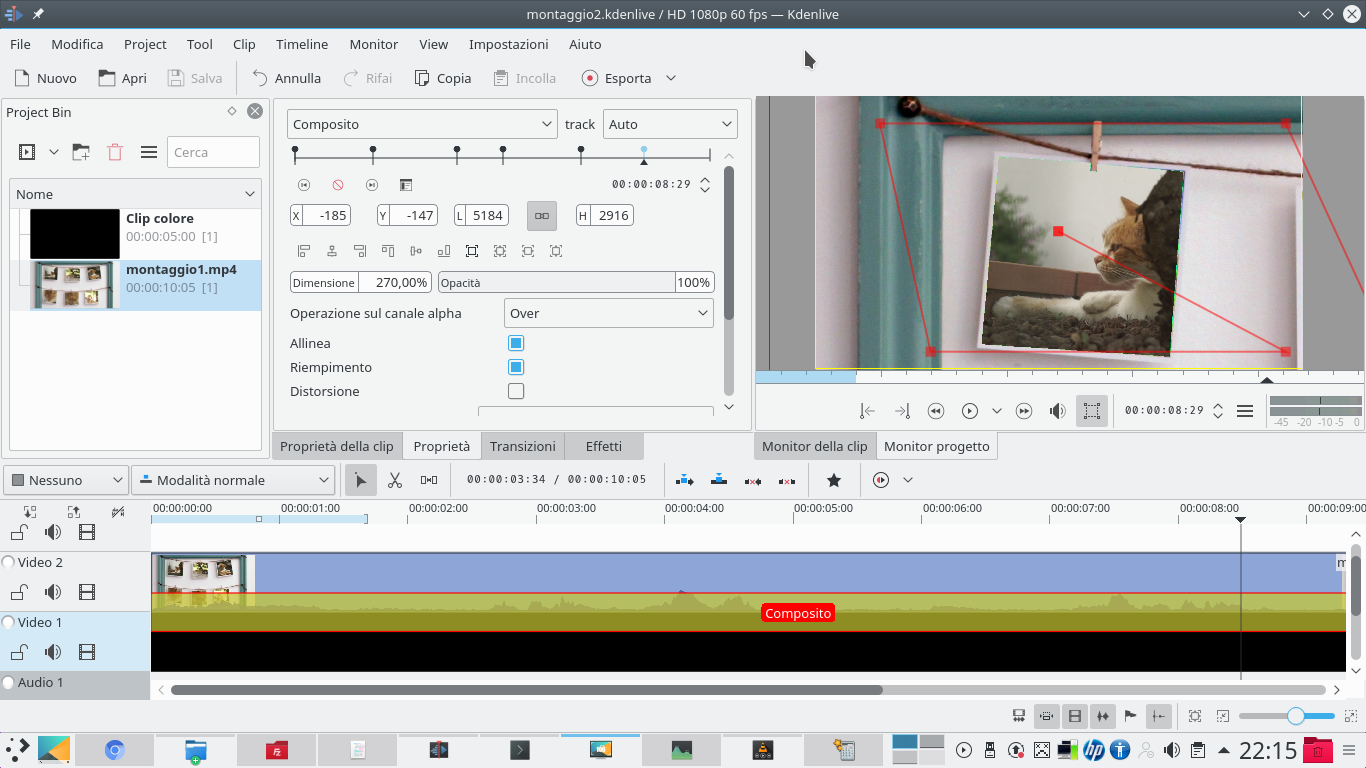 6 MOVE AND ZOOM – As for dimensions, it is advisable to keep within 300%: beyond this value we start to see ginning. By moving the clip it is possible to simulate a camera that moves over a poster. Eventually, this movie can also be exported.

