With Kdenlive we can simulate the clean cut of a limb, giving the illusion that one of our actors arm has been amputated. By adding the movement of the arm and the fake splashes of blood we can obtain a realistic result.
In a combat scene it is essential to demonstrate the effects of the action on the characters. Of course, maybe it is not necessary to show the details like in a Quentin Tarantino film, but if we are filming a duel with swords it is inevitable that sooner or later someone will see a part of their body amputated. For example, a leg or an arm. The problem is that we can’t really cut our arm off: there is a good chance they wouldn’t agree. However, we can take advantage of digital editing to make parts of the actor’s body disappear and give the illusion that he has been deprived of an arm. Of course, simply hiding the arm would not help much: viewers need to guess what is happening to believe in makeup. We will therefore have to show the moment of the cut. And we can do it by taking advantage of Kdenlive. All we need to shoot are three clips: a first clip containing only the background, or our scene without the actor. A clip is then needed in which the actor pretends the amputation of the arm. For example, he may first keep his arm flexed, so that it is clearly seen that he has an arm still attached to his body. Then she can quickly stretch it out, and suddenly keep her arm fully stretched out as if she had been amputated (for example, screaming in pain might be quite an appropriate action). To make it easier for us, it is better that the actor does not move his arm too much, or we will have to follow his movement during editing. The third clip must always be shot in the same conditions: the camera and the actor in the same positions as the previous clip, with the same lighting, but the actor must keep his arm stretched out in front of a green cloth (or any other color that stands out well from that of the actor’s arm). In fact, we will delete all of this clip except the actor’s arm thanks to the chroma key, an effect that allows us to eliminate the green sheet by selecting its color and therefore remain with the arm “clean” from the background. We will use this last clip to make the actor’s arm superimposed on the image of the actor without an arm (this is produced trivially by superimposing a part of the background clip on the clip in which the actor pretends the amputation, thanks to the Rotoscoping effect ). Taking advantage of the transitions of Kdenlive we will be able to move the arm giving the illusion that it has detached itself from the body and that it falls on the ground or flies out of the frame. One may ask: why do we use the chroma key when it would be enough to take a photo on the arm and delete the background with a photo editing program like GIMP? The fact is that by using a chroma key movie it is possible to move the arm even while it flies away. For example, to give a comic tone to the scene, the actor can be asked to raise his thumb while holding his arm in front of the cloth: in this way, the spectators will have the illusion that after the amputation of the arm, while it is flying in front of the camera, still have the strength to raise your thumb as if to say “all right”. Or, you can also simply pretend some spasm of the arm, giving more realism to the scene. Again to add realism to the scene, we can insert a splash of blood at the moment of cutting. After all, even if we don’t want to fall into the splatter, nobody would believe in an amputation without blood loss. As always, you can see the example video at the following address: https://www.youtube.com/watch?v=rUQ7EWJePBs
 The moment of detachment of the actor’s arm
  The actor’s arm is flying out of the frame
 Green towels and green coveralls
To selectively disappear some parts of the body, it is possible to obtain a suit of the same color as the cloth used for the chroma key (typically green). The actor can then put on the suit leaving only the areas of the body that must be visible, for example the head and the back, to give the illusion that he is without legs. In a nutshell, if the actor wears socks and trousers of the same color as the chroma key, we can easily make his legs disappear. In the same way, if the actor wears green gloves, his hands can be digitally removed from the scene, as if they had been cut off cleanly.
A web search
We recover photographs of blood splatters to be used for our effect
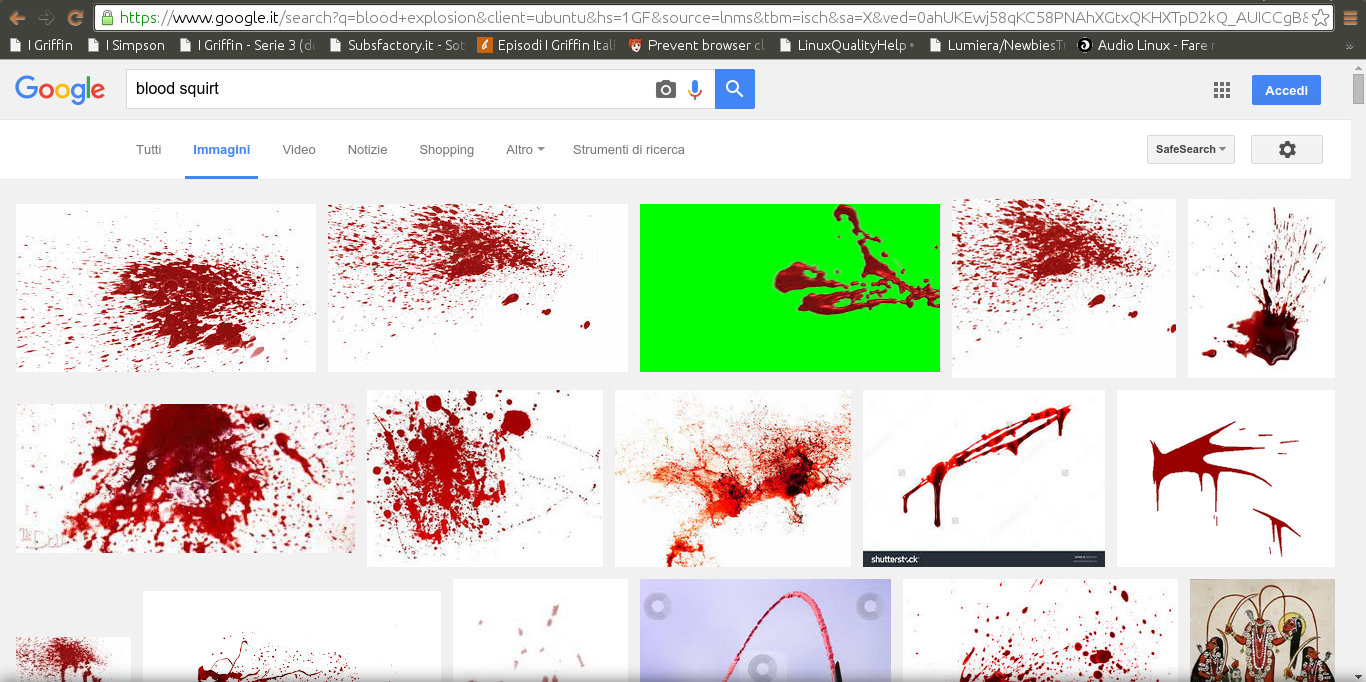 1 SEARCH ON THE WEB – To begin with we need blood splashes, in English “blood squirt”. And if we don’t want to get hurt, better look for them on Google Images, by downloading good images with a white background.
 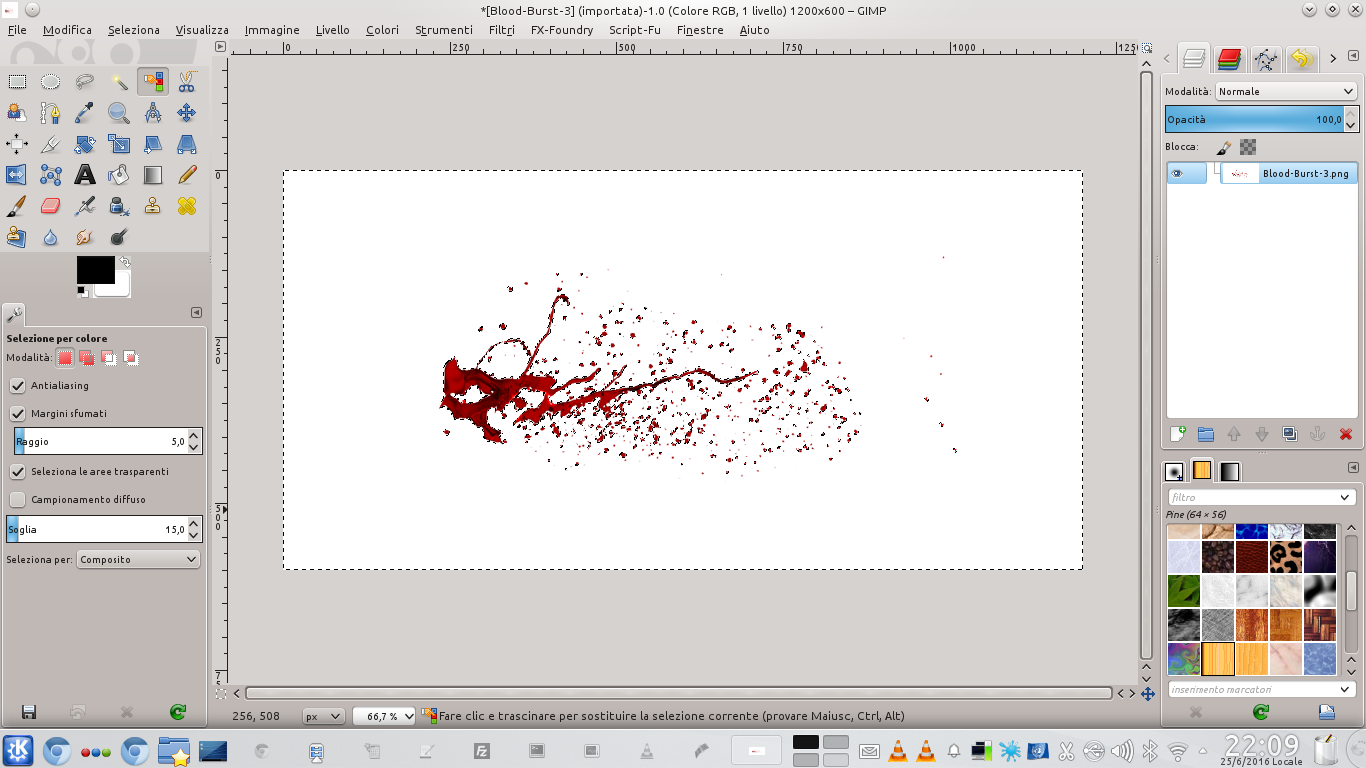 2 CHANGE IN GIMP – Open the image in GIMP, add a alpha channel by clicking with the right mouse button, we select the background color with the tool Selection by color and we delete it. Then we save the image with the format pNG .
 We operate the cut
We digitally cut the actor’s arm
 1 THE FIRST TWO CLIPS – We open Kdenlive by inserting it in the track Movie3 the movie made without the actor, and in the Video2 the movie in which the actor extends his arm. We cut the movie of the track Video2 at the point where the arm must be cut.
  2 WITHOUT THE ARM – We add a transition of type Composite between the two overlapping clips, and we apply to that of the track Video2 an effect rotoscoping . We draw the outline in order to cut out the arm and set Feather width at 10 .
 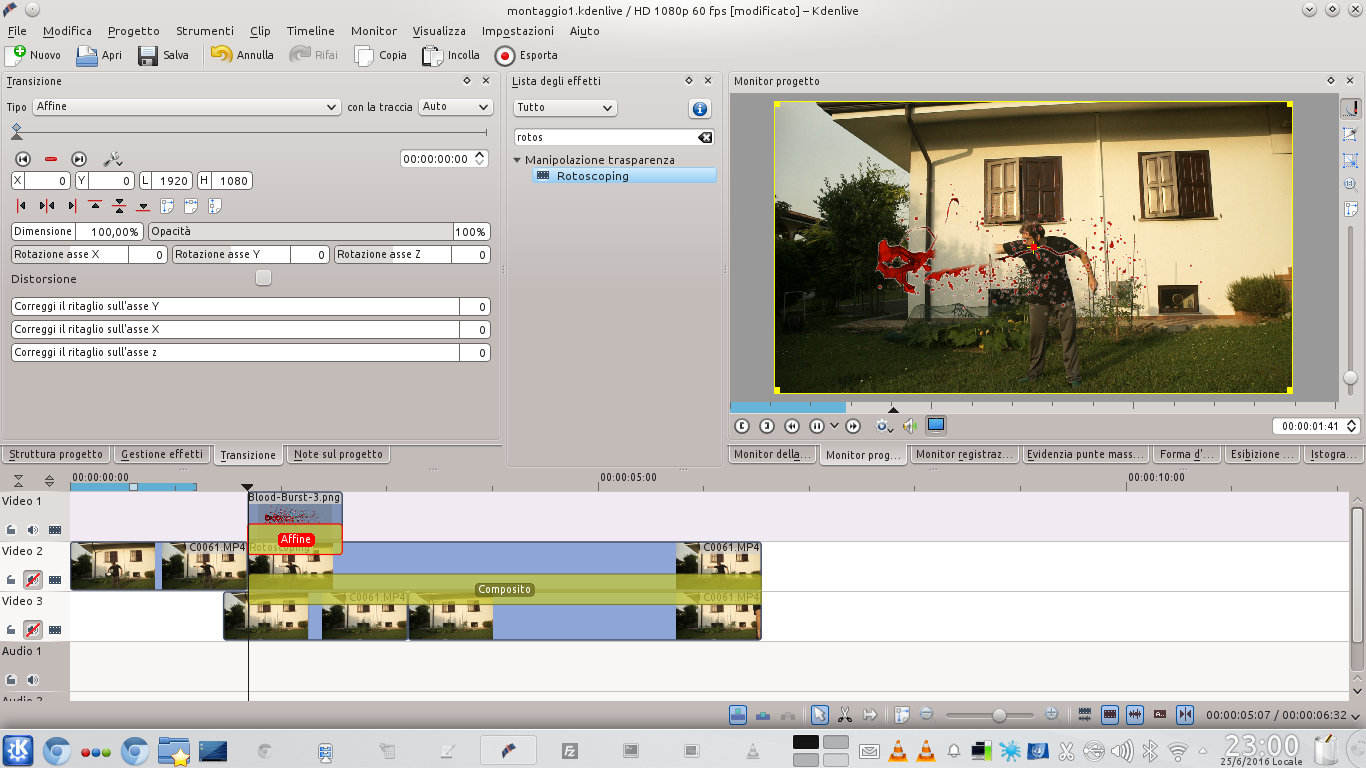 3 BLOOD SKETCH – We add the clip with the blood splash on the track Movie3 , positioning it at the moment when the actor’s arm disappears, and making it last no more than 1 second. We apply a transition to it Affine referred to the track Movie3 .
  4 INITIAL POSITION – We adjust the size and position of the blood splash by transition Affine , so that it looks just like a thread coming out of the severed arm. We also set the opacity to 80%, so that it appears superimposed.
 Here comes the blood
To add realism, let’s make a splash of blood and spots appear
 1 SECOND FRAME – After a few frames, depending on how fast we want the effect, we add a new keyframe in the transition Affine . In this we simply have to enlarge the sketch so that it appears to come out of the arm.
 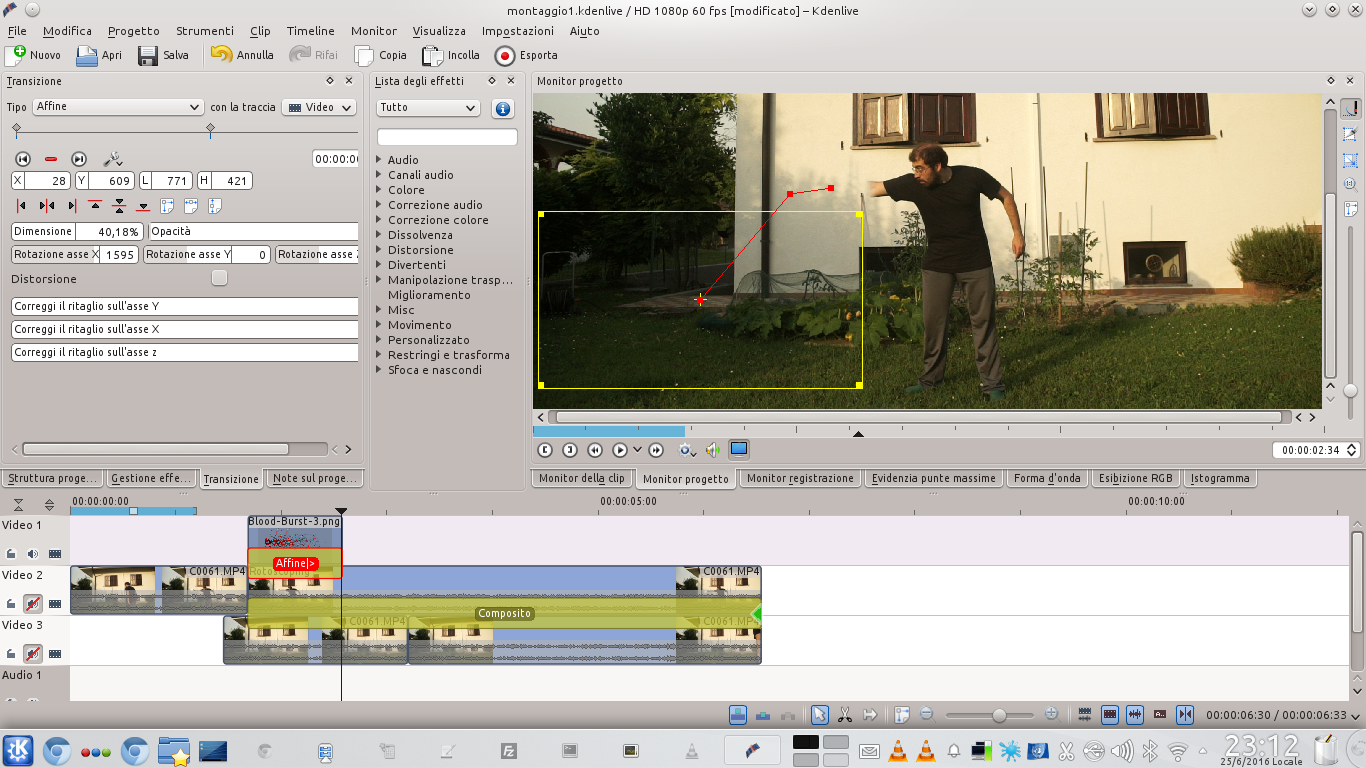 2 BLOOD END – Finally, we add a key frame at the end of the transition Affine , further increasing the size of the blood splash, rotating and moving it so that it is tilted down and bringing the opacity to 0 .
  3 NEW TRACK – We need other tracks, so we add one by right clicking on the track Video1 and choosing Add new track . The new video track must be positioned above the current one Video1 .
 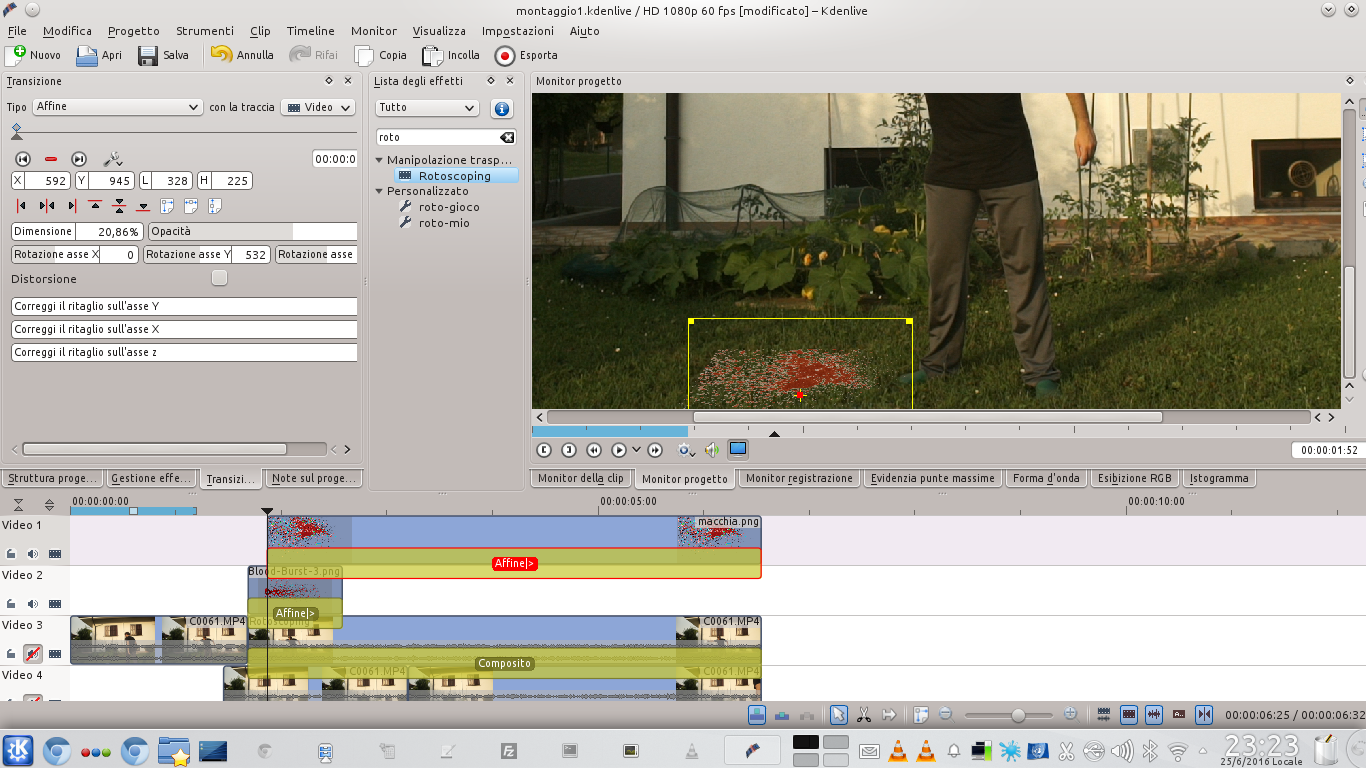 4 OTHER STAIN – In the new track Video1 we can insert a blood spot that is deposited on the floor or on the actor’s body (for example on the still visible part of the arm), positioning it with a transition of type Affine .
 The arm flies out of frame
We use the chroma key to add the arm that detaches from the rest of the body
 1 WITH THE GREEN TOWEL – We now need another track above the current one Video1 . In this new track we add the clip filmed with the green sheet, and a transition of type Affine referred to Video5 . The clip should start just when the arm disappears.
 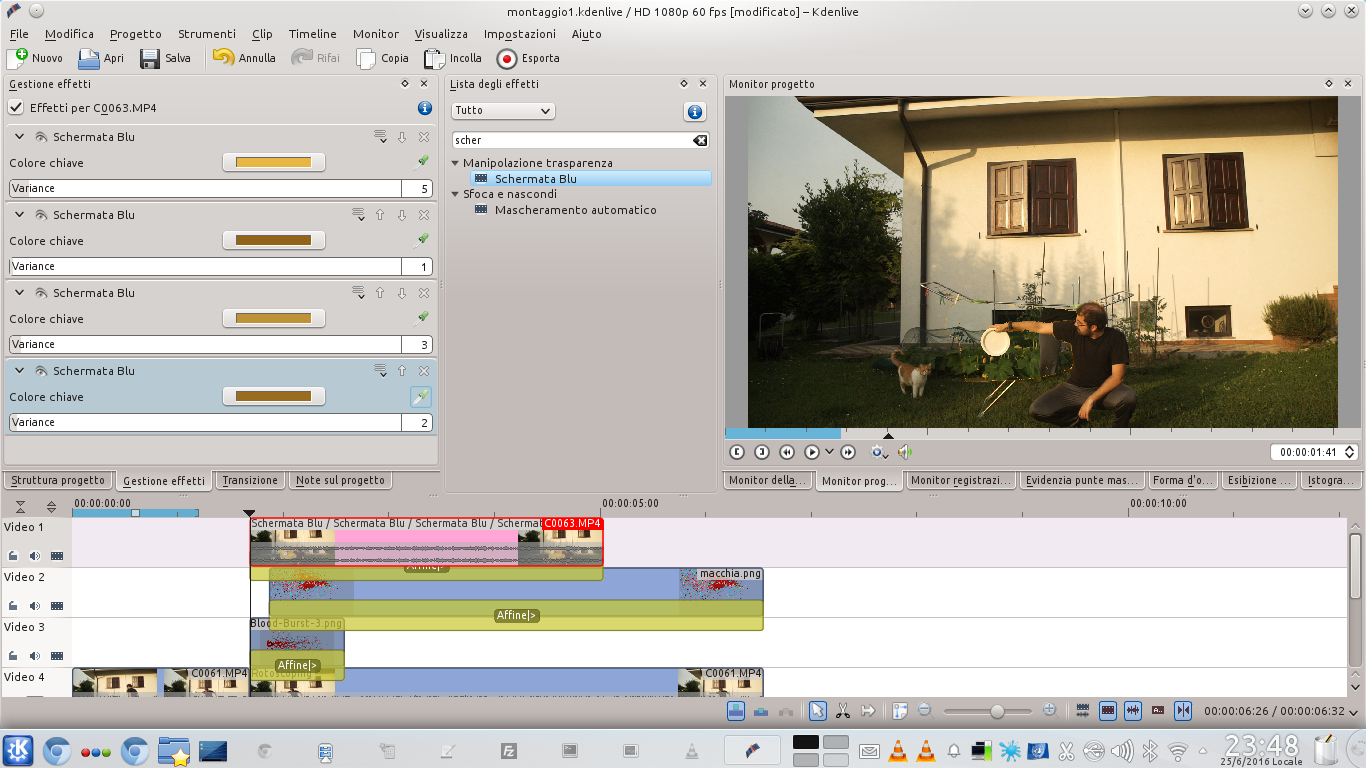 2 “BLUE SCREEN” – Let’s add an effect Blue screen to the track clip Video1 by selecting the color of the sheet and setting variance at a value that does not make the arm disappear. We can add other effects Blue screen , until all the green sheet is canceled.
  3 THE ROTOSCOPING – We also add a type effect to the same clip rotoscoping , with operation on alpha channel Minimum . The outline of the rotoscope must be designed so as to follow the outline of the sheet, so that the only visible part of the clip is the arm.
  4 CUBE OUT OF FOCUS – To make the effect more realistic, we add a type effect Out of focus cube , setting the blur factor ad 1 and the vertical multiplier ad 1. The horizontal multiplier instead it must be increased to 5.
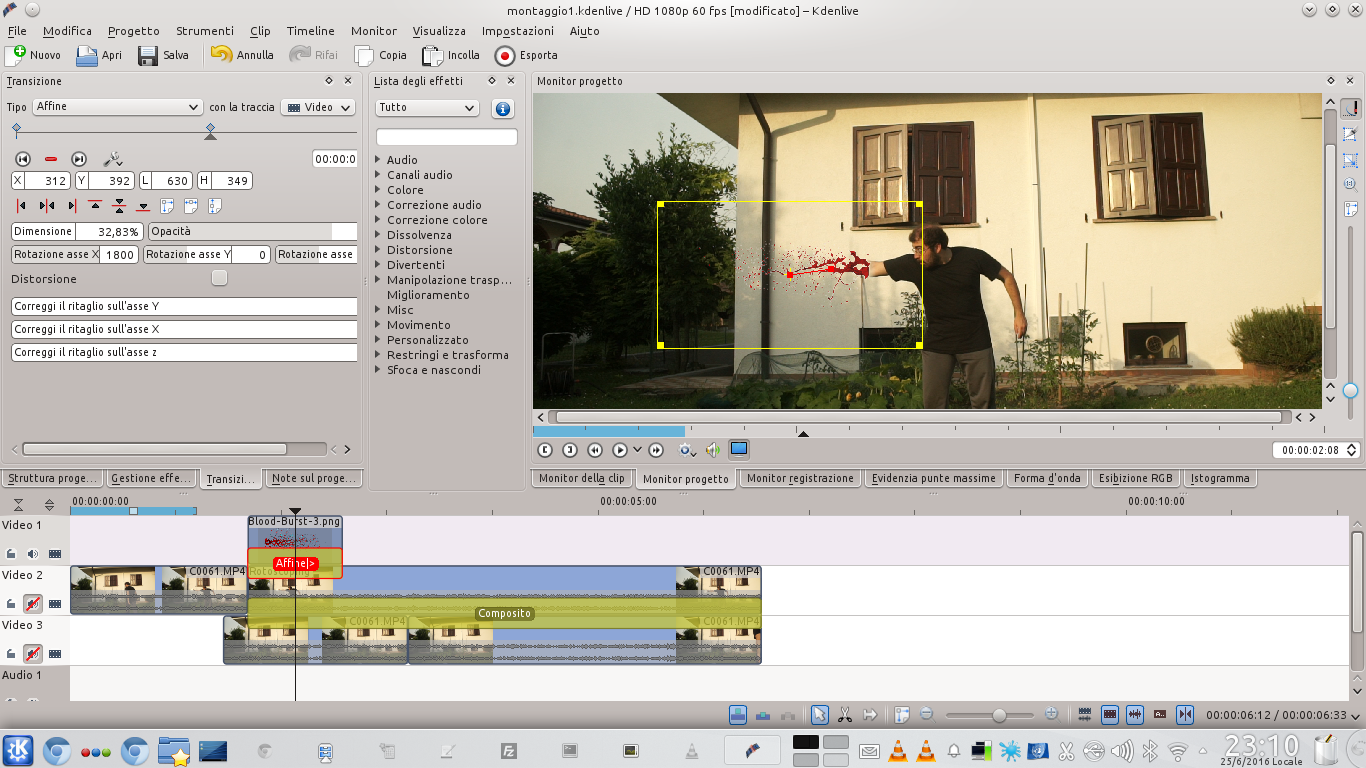
 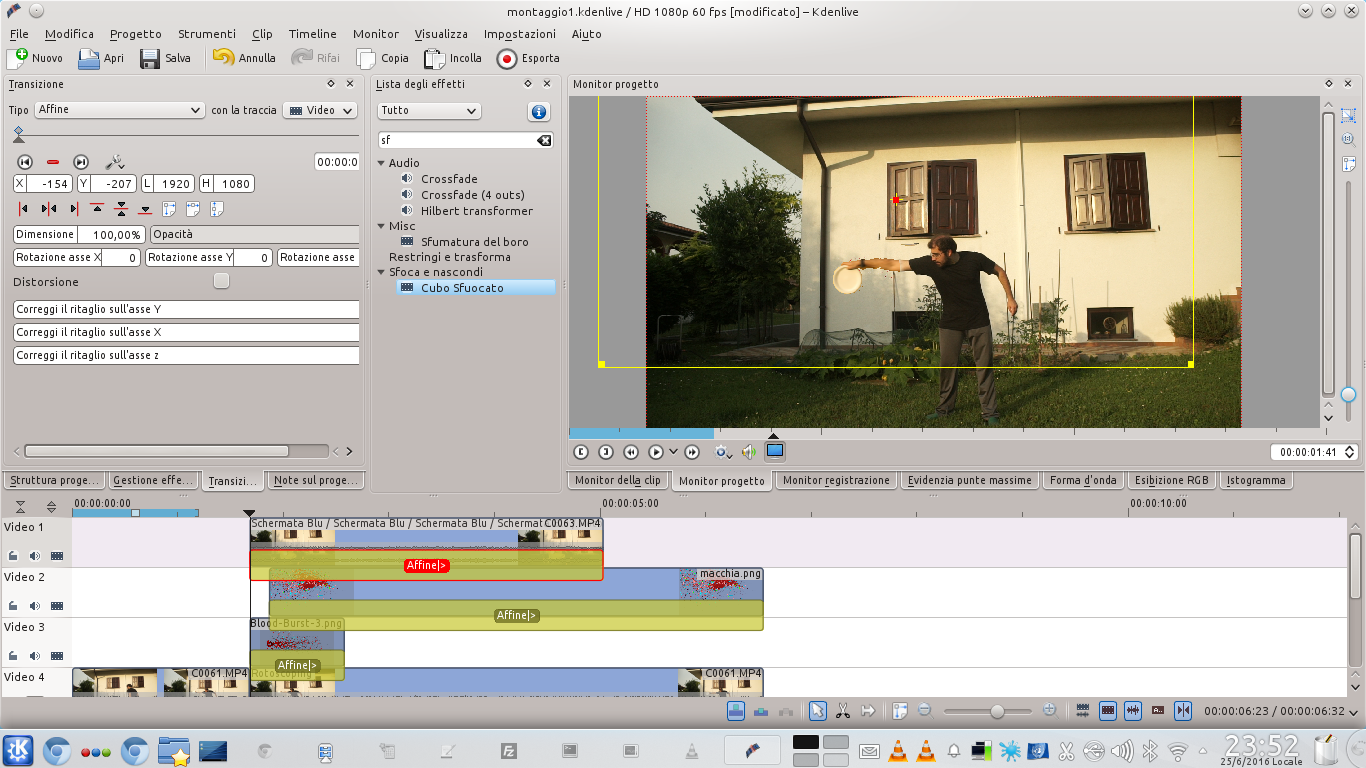 5 STILL ATTACKED – We use the Affine transition to position the arm so that it appears attached to the actor’s body. Then we can move a little further with the frames and create a new keyframe.
  6 THE ARM FLIES – The new keyframe will have to see the arm rotated on the X axis and moved as if to form the beginning of a spiral. Then we can add one or more other key frames until the arm comes out of the frame. The effect should not last longer than 1 second.

