There are several methods to insert a ghost in a movie, and we offer you the simplest and fastest solution: thanks to Kdenlive, we will be able to make a ghost appear in a few steps even in films that include other actors.
Ghosts, more commonly called ghosts, are a recurring character in movies. And we are not only talking about horror films: an evanescent presence can also be included in a comic film, or in an action film, or even in a romantic film. It is simply a good way to get the idea of a person who has failed. It is in fact instinctive for viewers who see a character appear in transparency over the other components of the scene to suppose that this character is deceased and appears in the form of a spectrum. The effect is conceptually quite simple: a character is superimposed on a scene, with the opacity well below 100%. There are of course several methods for accomplishing this. Perhaps the most “elastic” method is that of the chroma key: just film the ghost on a green background, and then remove this background with the Kdenlive “Blue Screen” effect. The beauty of this approach is that by using the Composite transition in Kdenlive you can position the ghost anywhere in the scene, for example by making it float, and you don’t have to worry too much about the edges of the ghost figure. This method has, however, one flaw: often, ghosts are made with long and light clothes, moved by a breeze (easily recreated with a fan): the movement of clothes and hair makes the chroma key very difficult, and would end up also some pieces of green backdrop appear in the final image. In addition, semitransparencies in fabrics are often necessary (for example, the ghost can be covered with a semi-transparent white sheet). And if the ghost must have interactions with the environment or with other characters of the scene, it becomes very complicated to recreate them in a completely green studio devoid of any other object. Not to mention that there may be difficulties in recreating the correct point of view, that is, the position of the video camera with respect to the ghost and the rest of the scene. In short, working with the chroma key to have a ghost that interacts with other actors is not impossible, but it is very complicated and works well only in large enough productions. In an amateur production it is easier to exploit a small trick: you can shoot two movies, one in which the ghost appears, and one in which all the other actors appear. At that point, just overlap the two clips using the Kdenlive Composite transition, and the rotoscoping effect to limit the overlap (and therefore the semi-transparency effect) to the area where the ghost is located. The beauty is that all objects that remain “still”, such as those in the background, will appear unchanged, while the ghost appears semi-transparent with respect to the background itself. There is also an alternative, especially useful in close-ups: filming the ghost and any other actors in a single clip, and then making a second clip with only the background. At that point, just superimpose the background on the clip with the ghost and use rotoscoping to make the background appear, in semi-transparency, only above the ghost and not above the other actors. However, this method is impractical if the ghost passes in front of other actors: in this case, it is better to follow the method that we explain in our tutorial. As always, you can see the example video at the following address: https://www.youtube.com/watch?v=jVZqu-z1Rbk
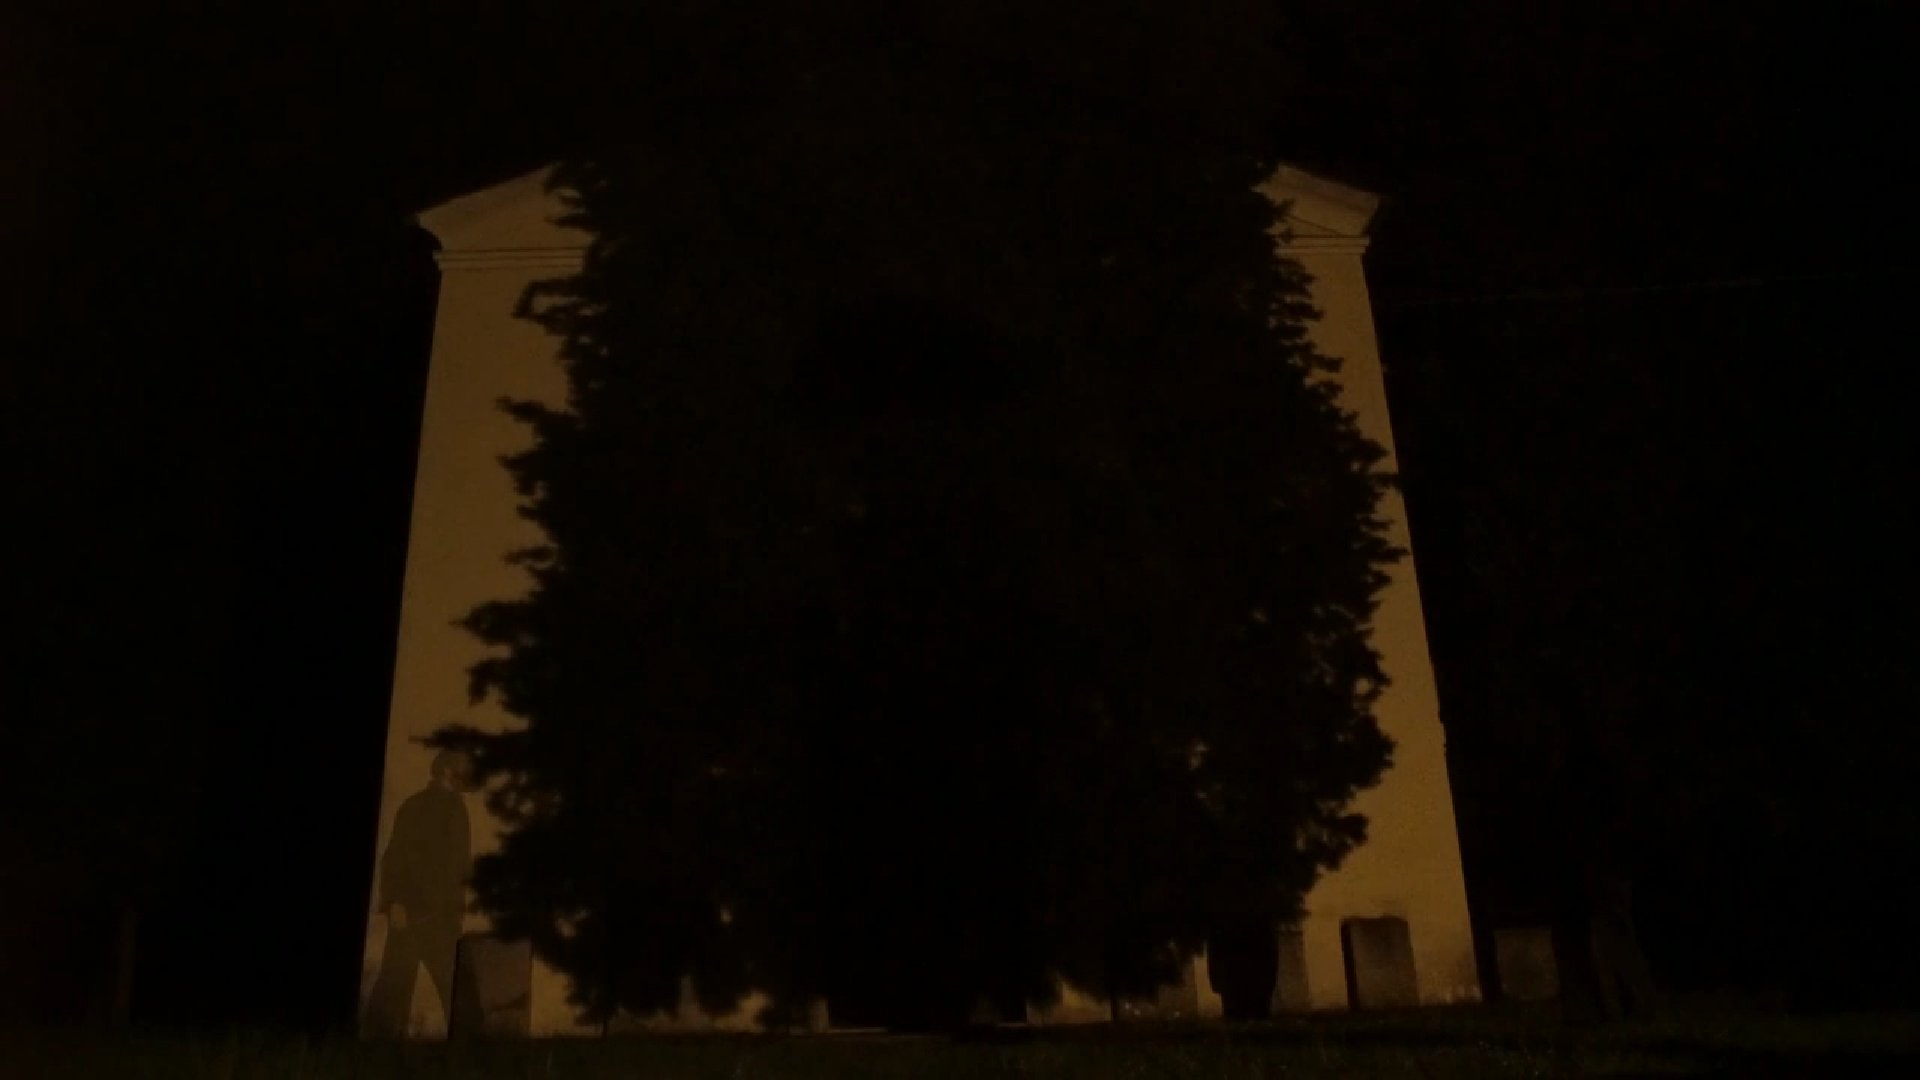 The ghost appears superimposed on the wall of the building
 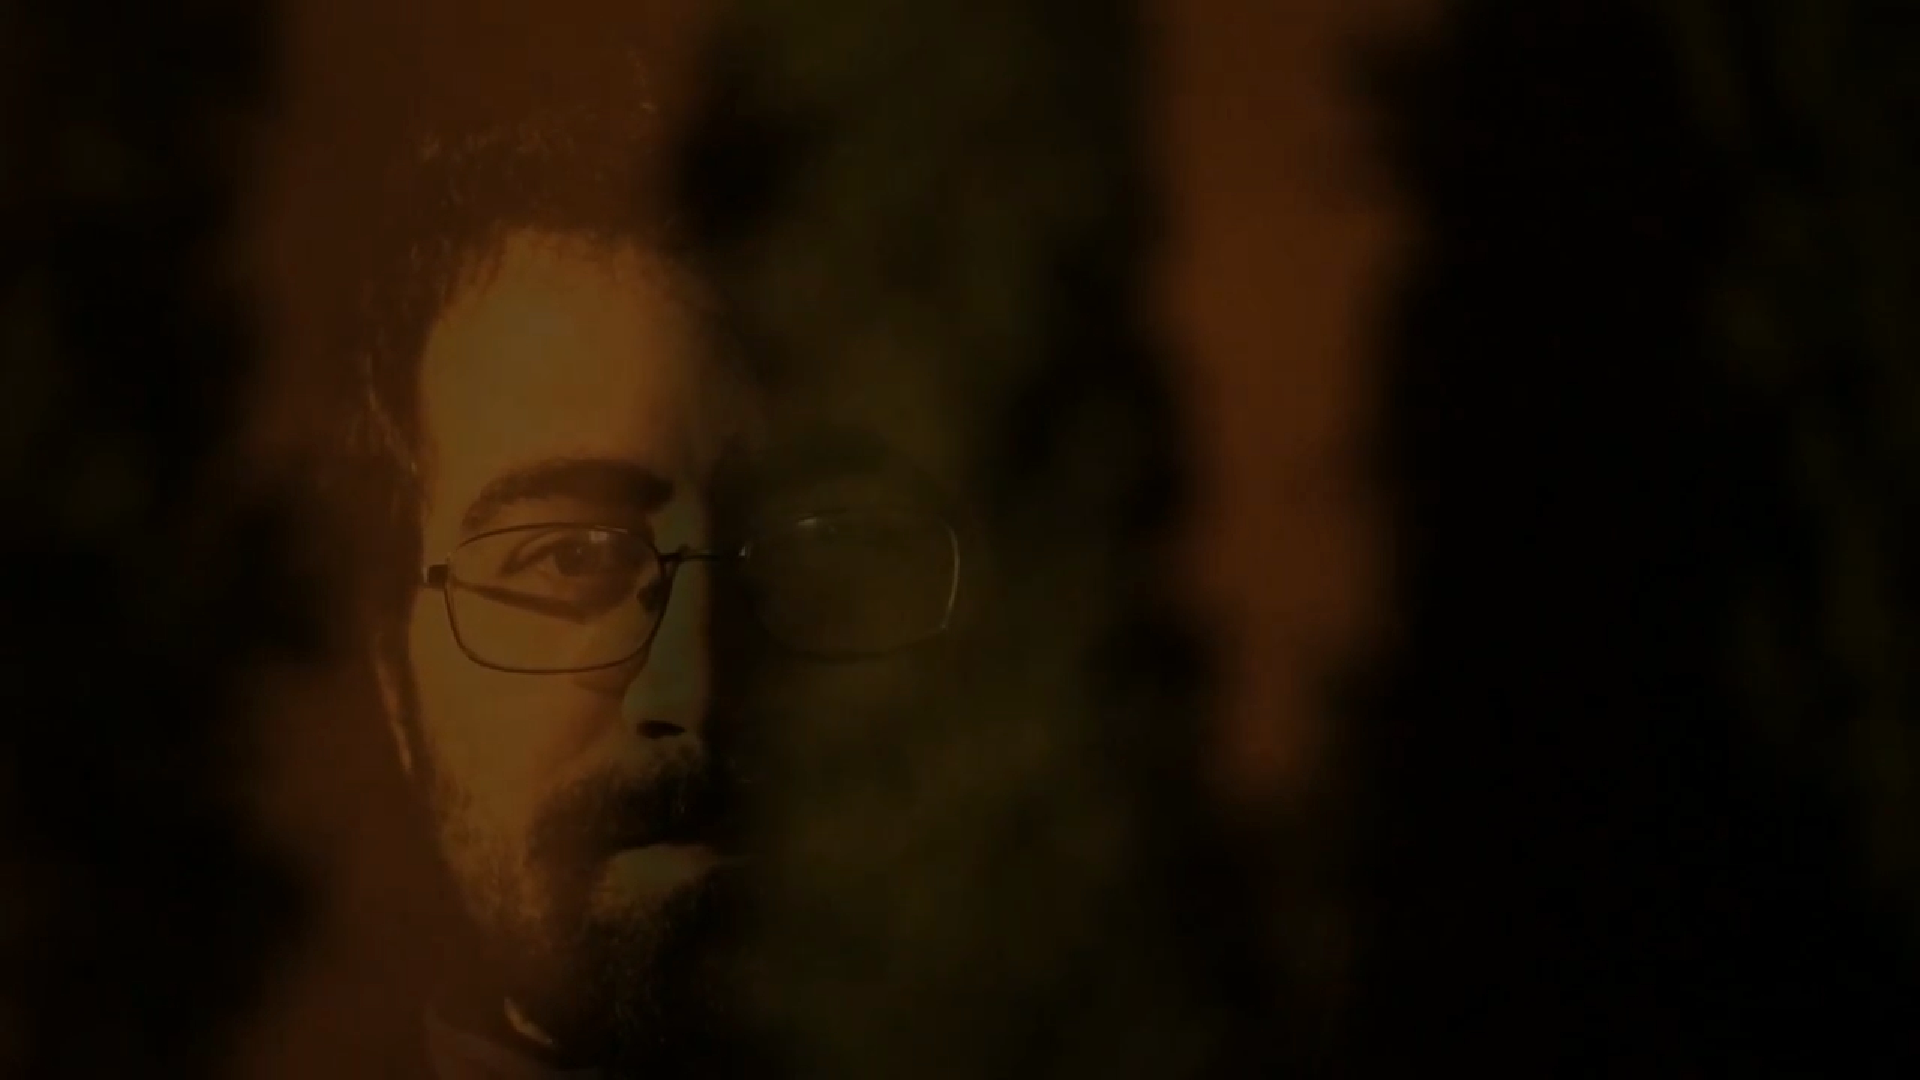 In the foreground, the ghost’s face reveals the trees in the background in transparency
 Movements and lights
This trick is very easy to do when the camera is stationary. If the camera moves, it is still possible to take advantage of this method, the important thing is that the camera is always moved in the same way and at the same speed: for this reason, programmable motorized dollies are used, which however have the notable defect of being very expensive (over 500 euros). Of course, it is possible to build a rudimentary motorized dolly with Arduino and a servomotor: there are special projects on the web. Another important trick to consider is the lighting and composition of the scene: the effect works very well as long as the background has well-defined shapes. If the background were of a single color, it would not be understood that the ghost is superimposed. You can therefore enhance the lights and shadows of the background by increasing the contrast with the effect Bends .
One clip on top of the other
The clips must be superimposed, so we will place them in two overlapping tracks
 1 THE TWO CLIPS – To begin with, we need two basic ingredients: the clip where the actor appears and the one where the ghost appears. We have to place them in the Kdenlive timeline: the actor’s clip must be below the one with the ghost.
  2 TRACK 2 AND 3 – For example, we can place the clip with the actor in the track Movie3 , and the one with the ghost in the track Video2 . We move the ghost clip so that this character appears when we want it (for example when the actor gets scared).
 Transition and rotoscoping
We take advantage of the composite transition to achieve semi-transparency
 1 THE TRANSITION – By clicking on the bottom left corner of the track clip Video2 , add a transition between this clip and the one below. We drag the transition so that it spans the entire length of the clip.
  2 OPACITY AT 50% – The transition does not have to be of type Dissolve , but kind Composite . L’ opacity should be brought to about 50% : you can choose a higher or lower value depending on the yield that we see in the preview.
 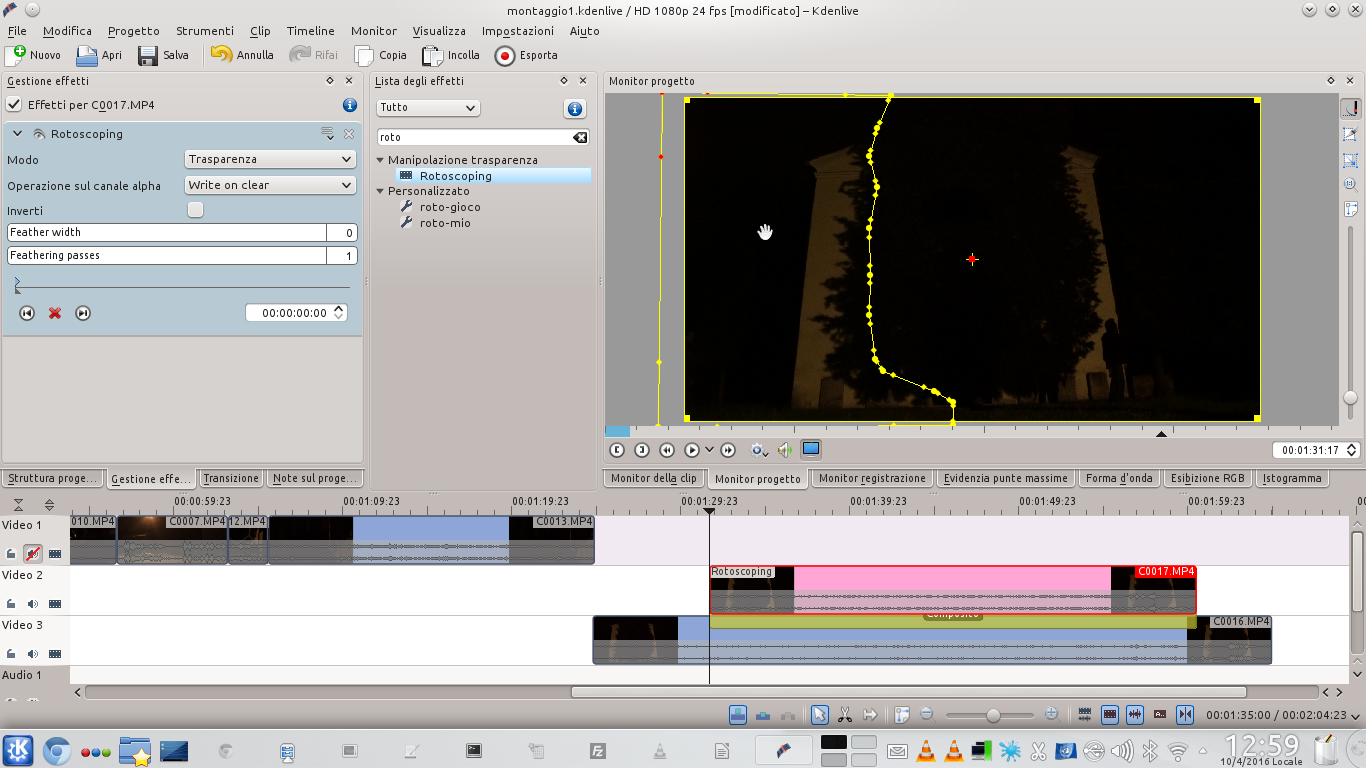 3 THE ROTOSCOPING – The problem is that at the moment the actor is also in transparency, and not just the ghost. The problem can be solved by adding the effect rotoscoping on the track clip Video2 . We draw, on the preview, the outline of the area in which the ghost moves.
  4 THE FEATHERING– What is inside the drawn area will appear in semi-transparency, the rest will be invisible (therefore in its place you will see the clip of the Video3 track). We set Feather Width at 8 e Feathering passes to 2 to soften the transition between clips.
 Corrections for a more likely effect
Let’s make the ghost appear gradually
 1 ALIGNMENT – Since the shot is fixed, it is not necessary to change the position of the rotoscope. So, we can take advantage of the ghost’s semi-transparency to correctly align the two clips, so that the actions of the characters are perfectly synchronized.
 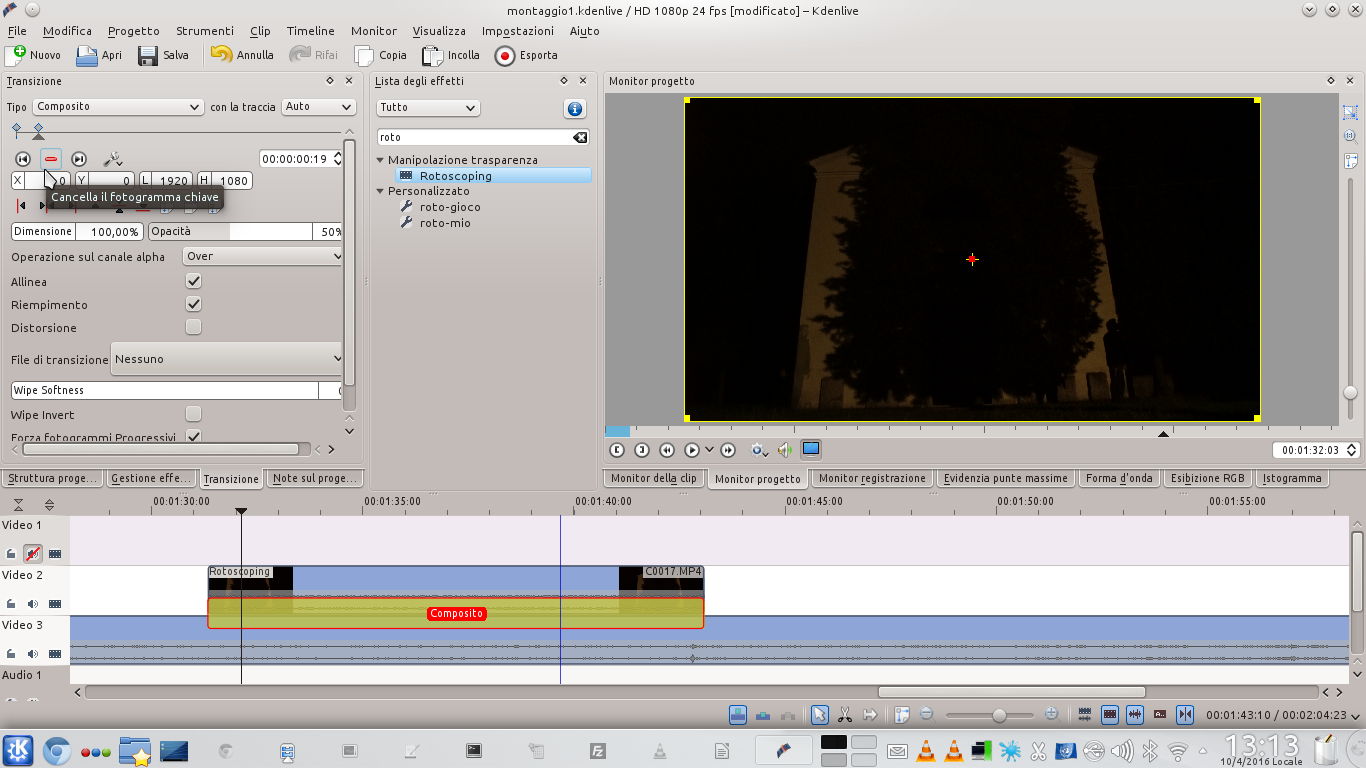 2 A NEW FRAME – We can also gradually make the ghost appear: by scrolling the transition of the ghost clip, let’s position ourselves about 1 second after the start. Here, we create a new keyframe by clicking on the button + .
  3 OPACITIES EQUAL TO 0 – Without changing the settings, let’s go back to the beginning of the transition. Here, we have to bring the opacity to value 0 . In this way, Kdenlive will automatically bring the ghost’s opacity from 0 to 50% in 1 second, making it appear gradually.
  4 THE CURVE OF LIGHT – Now let’s work on the clip with the actor, that of the track Movie3 . Let’s add an effect Bends . The effect must be activated on the channel Luma , and the curve to be drawn will face upwards, to increase brightness.
 Featured scenes
We use some tricks to improve the foreground ghost scenes
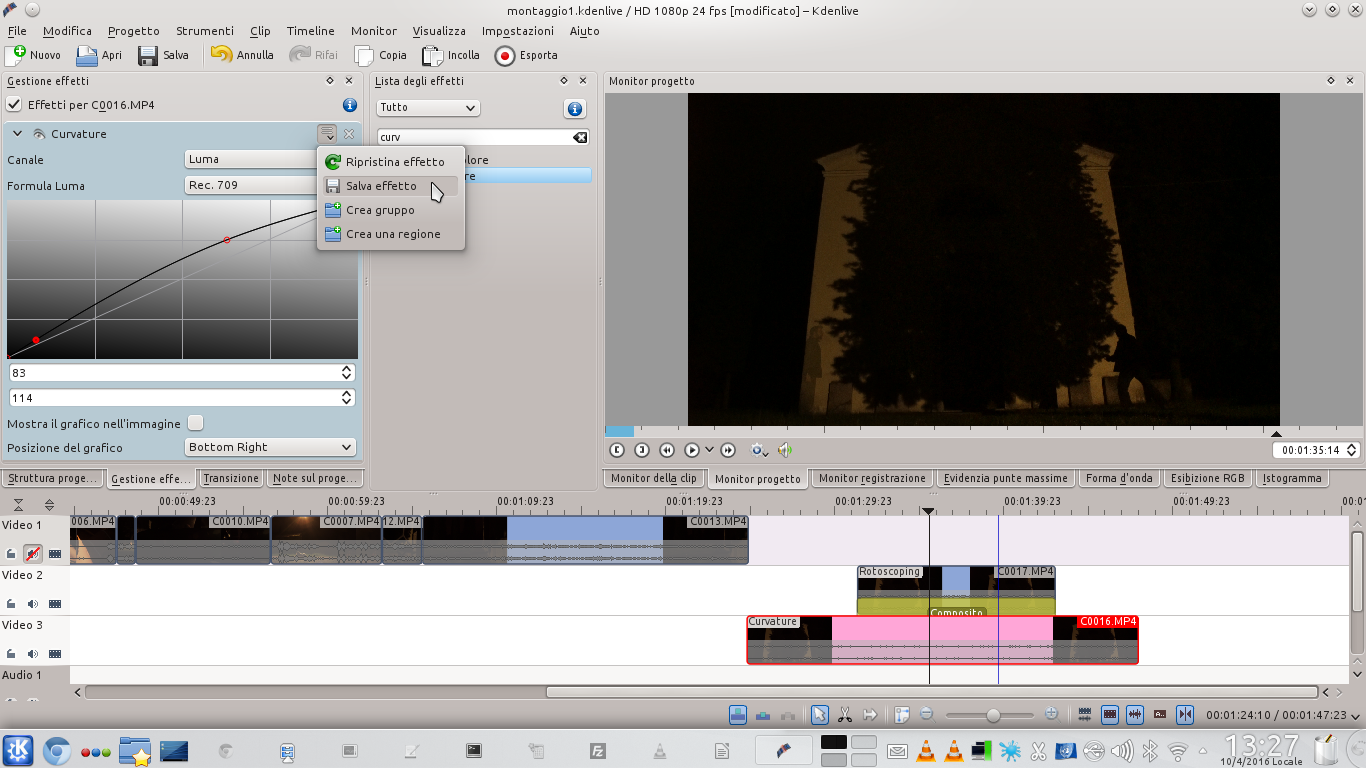 1 SAVE THE EFFECT – When drawing the curve it is advisable to raise the midtones mainly, but shadows can also be retouched. Once the modification is complete, you can click on the effect menu and choose Save effect , giving it a name.
  2 THE SAVED EFFECT – If we now look for the name just chosen in the list of all effects, we should be able to find it. We can then drag it directly onto the track clip Video2 , so both clips will have the same effect.
  3 THE COMPOSITION – When we have a close-up of the ghost, without other actors, the situation is easier: just superimpose the ghost clip on the background clip, using the transition Composite between the two tracks..
  4 LOW OPACITY – The opacity of the transition must be less than 50%, because the ghost would stand out too much in the foreground. We can give the ghost clip a more ethereal appearance by applying an effect to it Bends On the canal Luma .
  5 MORE CONTRAST – The curve must be drawn to increase halftones and decrease shadows, in order to increase contrast and reduce shades of brightness. Always an effect Bends On the canal Luma , we can then work on the background clip.
  6 ALSO AUDIO– In this case the curve should be drawn simply to increase the overall brightness of the image, so as to bring out the background behind the ghost. To improve the performance, when the ghost appears, disturbing music can be added.

