Everyone knows the sketch “I like trains”, and probably someone thought of making it with a video camera. But how can you simulate being run over by a train without hurting yourself? With computer graphics, of course, and Kdenlive’s help.
Since the first video was released, the ASDFmovie series has reached hundreds of millions of views: the second episode ( http://www.youtube.com/watch?v=tKB4h9gvmm0 ) alone has over 40 million hits on YouTube. In addition, these films have been dubbed in different languages (including Italian) and on the internet there are T-shirts with drawings taken from these cartoons. It is a collection of nonsense sktech, a sort of evolution of the English humor of Monty Python. Among the many scenes, the most famous is the one of the little man who says “I like trains” and immediately after he is hit by a train arrived from no one knows where. We took inspiration from this scene to present you with a very useful visual effect, which can easily be achieved with Kdenlive: we want a movie in which an actor is hit by a train. And of course, we don’t really want anything to happen to the actor. The trick is to make two videos: first fix the video camera on a tripod and choose a shot. It is essential that the shooting position is the same in both movies. The first video must contain the passage of the train: obviously it starts shooting when the train has not yet entered the frame, and ends when it is definitely gone. The other video consists of the actor who pretends to receive a push from the same side from which the train arrived, and falls: in our example video we decided to leave the actor lying on the ground for a few seconds, in order to do it appear after the passage of the train. Of course you can decide not to show the actor after the passage of the train, to leave viewers with doubt about the fate of the protagonist, or make him appear thrown elsewhere. This second option is relatively easy to carry out, and it can be done in this way: first you film the falling actor and then, with the video camera still on the same shot, the passage of the train is resumed. Immediately after the disappearance of the train from the scene, the video camera is rotated to follow the train ride (so much now the video of the falling actor has already been made and we don’t need to keep the shot) and the actor is embraced to a tree, thus giving the illusion that it was hit by the train and thrown against the tree as would happen in a cartoon. From the assembly point of view, however, in any way we intend to achieve the final effect, the trick is the same: it consists of superimposing the movie of the actor on the train. Then you cut out the figure of the actor so that it is the only visible thing on that track. Finally, an actor’s translation is caused by using the Composite transition so that he looks really thrown forward as soon as he is hit by the train. You can find the example video at the following address: http://www.youtube.com/watch?v=i0pcF87a3F8
 The actor is pushed out of frame
  Before rendering, we also arrange the audio
 Shooting techniques
This effect lasts less than a second, so the viewer does not have time to notice the details, but in order to obtain a realistic effect, several attempts may still be necessary: once you understand the mechanism, everything becomes very simple. Meanwhile, we can anticipate that the best result is obtained by framing the train almost perpendicularly, so as to have a fairly realistic perspective even during the translation of the actor’s body. The beauty of this technique is that it can be used to simulate practically any collision with an object (a car, a motorcycle, etc.). Not only that: even the jump of an obstacle in complete safety can be achieved with this same technique, making the person jump without the obstacle (for example a car thrown at full speed) is present and then filming the passage of the object from jump.
Our clips
We upload the video clips
 1 TWO SIMLI MOVIES – We have to load ( Project / Add clips ) the two films: one contains the sequence of the train passing on the track, the other contains the actor who falls. The videos are made with the same shot, so they are superimposable.
  2 IN THE TIMELINE – The two clips must be inserted in the timeline: the clip with the train movie must be positioned on the Video 2 , while the other is to be put in Video 1 . In this way, the actor is superimposed on the train.
 A transition phase
We need to properly overlay clips with the composite transition
 1 THE RIGHT POINT – First we have to identify the point where the actor and the train will collide: just move on the timeline by clicking with the mouse. For simplicity, we can hide or show the track Video 1 using his third button on the right.
  2 A LITTLE HELP – Since this point will be fundamental, we can insert a guide by right clicking and choosing Add guide . It is a blue line that allows us to understand immediately what is the point in question.
  3 MATCH OR NOT? – Now that the meeting point of the train and the actor is defined, we have to move the clip with the actor (Video 1) so that it coincides perfectly with that of the train (video 2) , and then the actor begins to fall when the train arrives.
 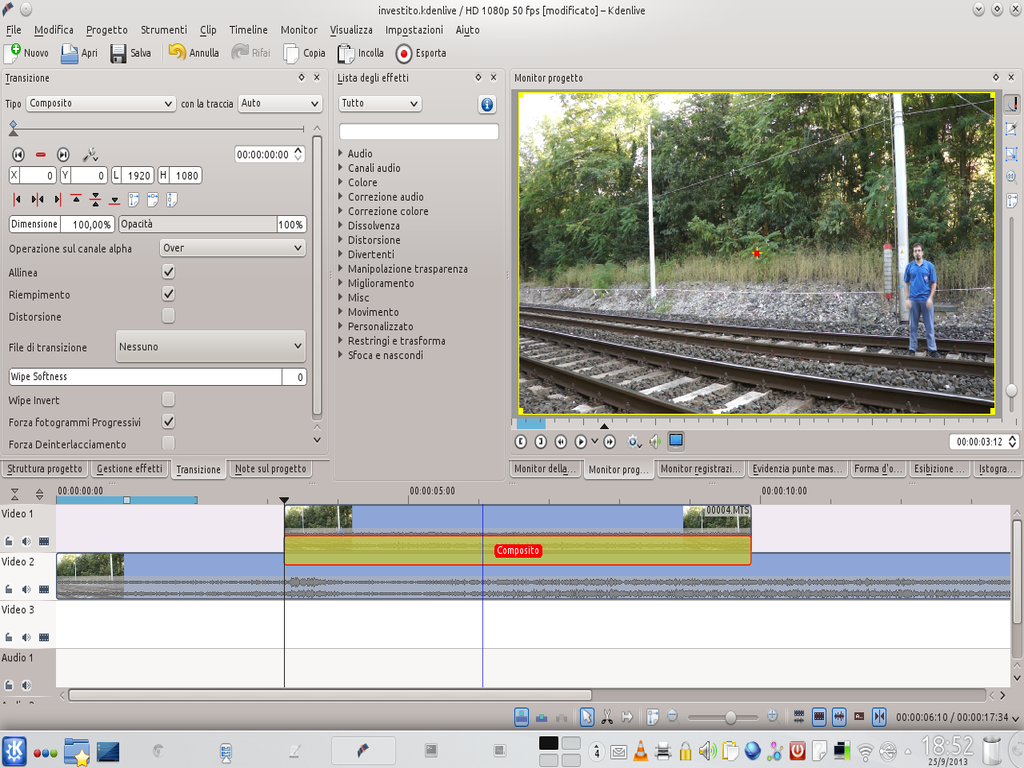 4 I SEE THEM BOTH – For the moment we only see the movie of the actor’s clip: instead we want to be able to see the train too. Then click on the bottom left corner of the Video 1 clip to create a transition. Let’s drag it along the whole clip and choose the type Composite .
 A transition phase
Rotoscoping must be added to the transition
 1 OUR EFFECT – The movie of the track Video 1 it must be largely hidden, to allow viewing of the train. So let’s go to the effects list and choose the rotoscoping : then we drag it onto the actor’s clip.
  2 THE FIRST FRAME – We design the mask for rotoscoping, following the outline of the actor. In this way, only the actor will be visible from this clip. We set the feather width at 4 e feathering passes 2.
 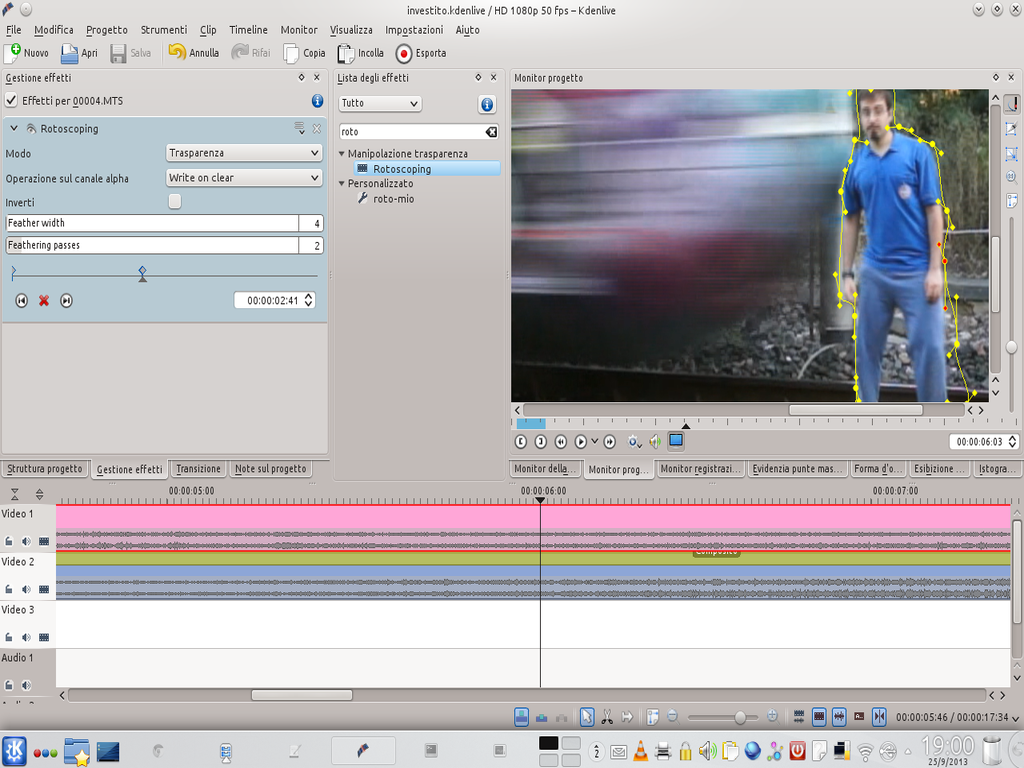 3 THE TRAIN COMES – Now we have to build the second frame, which corresponds to the moment of the clash (the one where the guide is located). A new key frame is created, and the points of the mask are moved to coincide with the figure of the actor.
 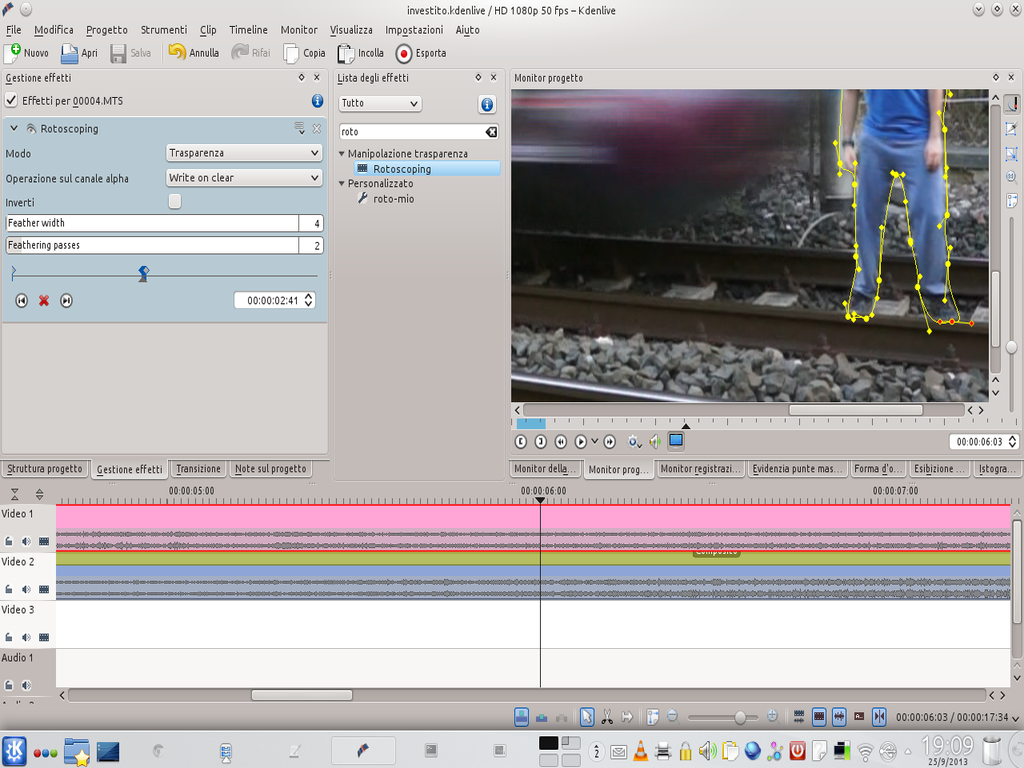 4 ALSO THE OTHERS – From this point on we must proceed frame by frame, correcting the mask. Fortunately, this is usually less than a second, so there are a maximum of 50 frames.
 Everything in its place
We move the clips and the image of the actor to the correct position
 1 A SHOT OF SCISSORS – The mask for rotoscoping must be corrected up to the frame where the train reaches the edge of the image: from that moment, in fact, the actor will disappear from the video. Once we reach the frame in question, we use the tool Scissors to cut the clip Video 1 .
  2 AGAIN A CUT – Let’s take the right portion of the actor’s clip, and cut it again so that it starts at the point where the actor is lying on the ground. Now the clip is divided into three parts: we delete the central one, so as to have only the first and the last portion.
  3 AND THE TRAIN IS NOT THERE – We move the clip where the actor is on the ground so that it starts when the train is disappearing from the scene. Then we activate a type transition on it Composite , as we are now accustomed to do.
 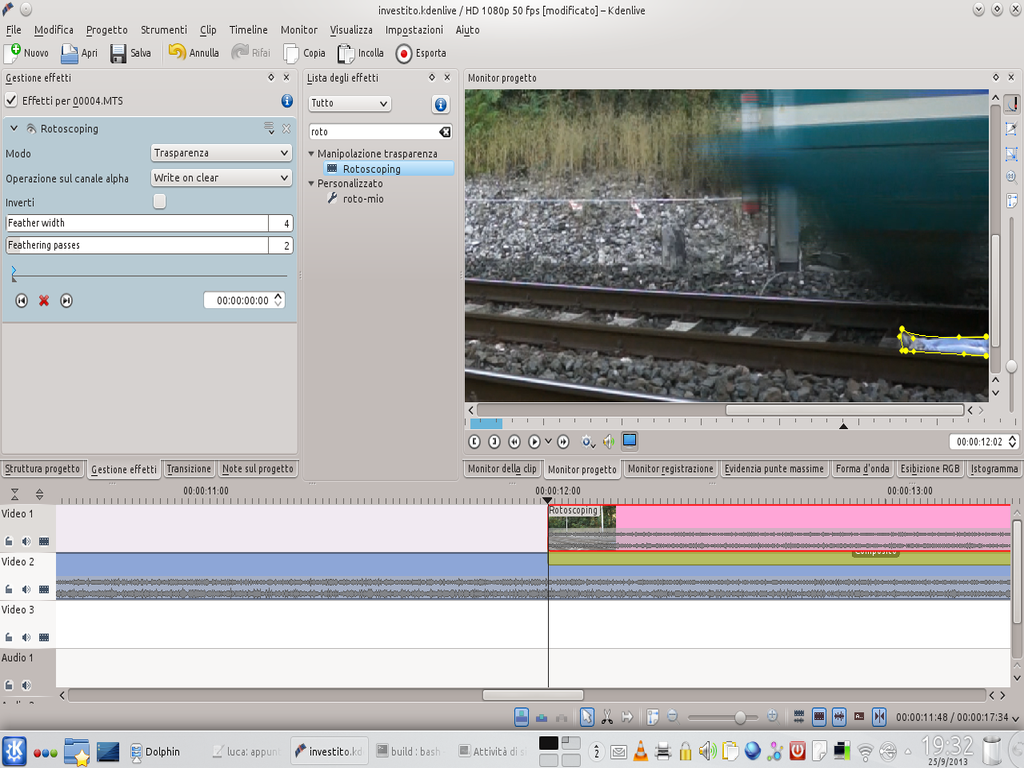 4 NEW ROTOSCOPE – The clip already has a rotoscoping effect on the clip, but there are no keyframes: so let’s set one to show the actor lying on the ground. We can also use other frames to make the legs appear as the train departs.
 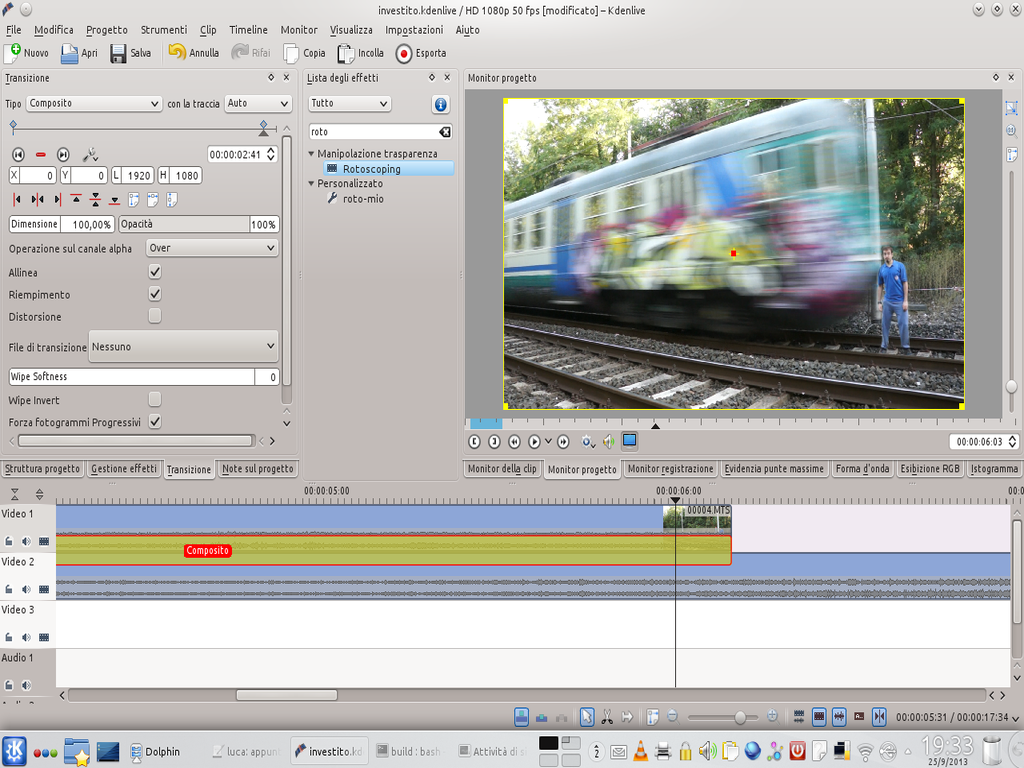 5 BACK TO THE CLASH – Let’s go back to the moment of the clash, indicated by the guide: click on the transition Composite and add a new key frame in this position. However, we keep the transition settings.
  6 A TRANSLATION– Let’s go now to the moment when the head of the train has just come out of the frame, and create a new key frame. Now it is sufficient to move the figure of the actor by dragging it in the same direction of the train, immediately out of the frame.

