Let’s start talking about special effects in computer graphics with Free Open Source programs: in this first episode we see how to simulate gunshots in movies using simply Kdenlive and some “ready to use” effects.
In 1896, the French magician and director Georges Melies accidentally discovers the “replacement trick”, that is, a method of making something disappear from a movie. It is interesting to note that everything happened due to a technical problem: Melies was picking up the wagons traveling on a road and had not noticed that, at some point, the camera had jammed and consequently for a few seconds the film had remained still. After developing the film, he realized that at some point the carriage passing by on the street had disappeared. This event marks the birth of special effects for cinema. More than a century has passed since that day, and now the techniques for special effects have developed in an incredible way to say the least: it is now possible to realize in a film anything the imagination of a director can imagine. Much of the merit is also of computer graphics (CG, Computer Graphics) which allows not only to make old tricks with film much simpler, but also to insert imaginary but realistic objects. Among other things, since the introduction of the CG, a difference is made between “special effects” and “visual effects” (or VFX): the former are made in the camera, that is, directly in the scene that is shot by the camera, without the need for modifications afterwards the assembling. The latter are instead made after shooting (for example via computer). Let’s immediately understand the difference between special effects and VFX: in today’s example we will simulate a muzzle flash, that is, a flash caused by a firearm. One way to accomplish it as a special effect would be to get a blank gun: it emits lightning but there is no risk of killing the actors. We, however, will create the effect in post production, using images ready to be superimposed on the movie. To get an idea of what the applied effects will look like, you can see the sample movie at http://www.youtube.com/watch?v=yaQVoklewdA . There are basically three steps: the first is to superimpose, at the right time, the effect of the muzzle flash on the scene filmed, positioning it so that it appears to come out of the barrel of the rifle or pistol. And this is done using a special transition, which allows you to superimpose two video tracks. Then you have to check, frame by frame, that the effect remains “attached” to the barrel of the firearm, even while it is moving (you cannot certainly shoot and remain with your arm perfectly still, it would not be credible). To do this, you need to create keyframes in the transition that overlaps the two clips: after creating a new keyframe you can move the image of the effect, to bring it to the correct position. Obviously, a key frame must be created for each frame in which the muzzle flash must appear superimposed on the original clip. The last step is to increase the light of the scene at the moment of the shot, to make the scene more realistic. It is, of course, important not to illuminate objects that could not be hit by the ray of light (in our example, a target taken from the back: it is obvious that the back cannot be illuminated). To solve this problem, we superimpose the same clip on the newly “illuminated” clip, but on the original one (ie without the lighting effect). Then we make visible, thanks to a mask, only the object that must remain dark: in this way, the final effect will be that the whole scene appears illuminated, with the exception of the object we have masked.
 A submachine gun with its “lightning”
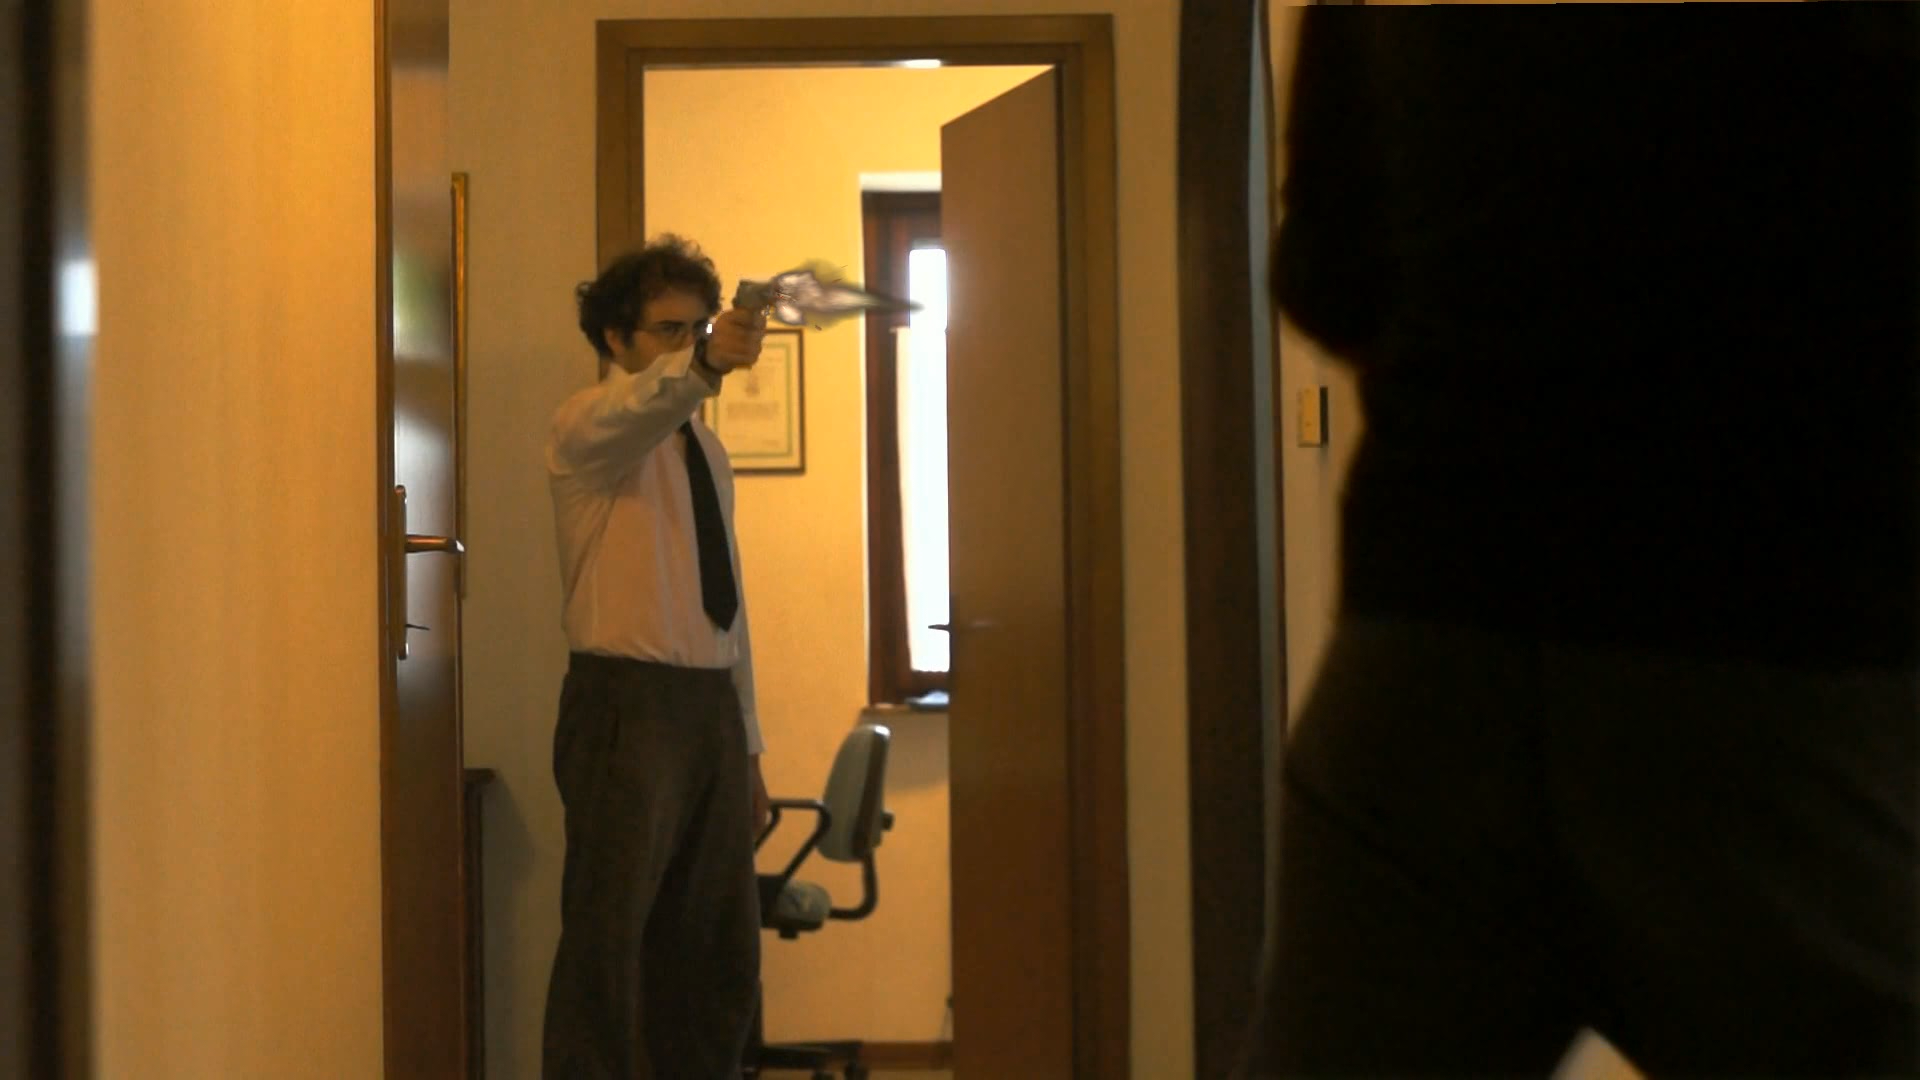 Gunshot simulation
Where to find the effects
In our examples we used two ready-made effects: one with the images of a machine gun, the other with those of a gunshot. You can easily find similar effects on the internet, but often these are films that need to be removed from the background, and this is an operation that often does not do well. It is much better to work with effects based on a series of semitransparent images: you can download the ones we used for these examples from the address https://www.kdenlivetutorials.com/files/muzzle.zip . There are also sounds in the zip file. These files are freely usable and editable. Alternatively, audio and video effects can be recovered directly from Kdenlive: just go to the menu Project / Network Resources and search for the clips we need.
All the clips we need
We prepare the necessary to apply the effects
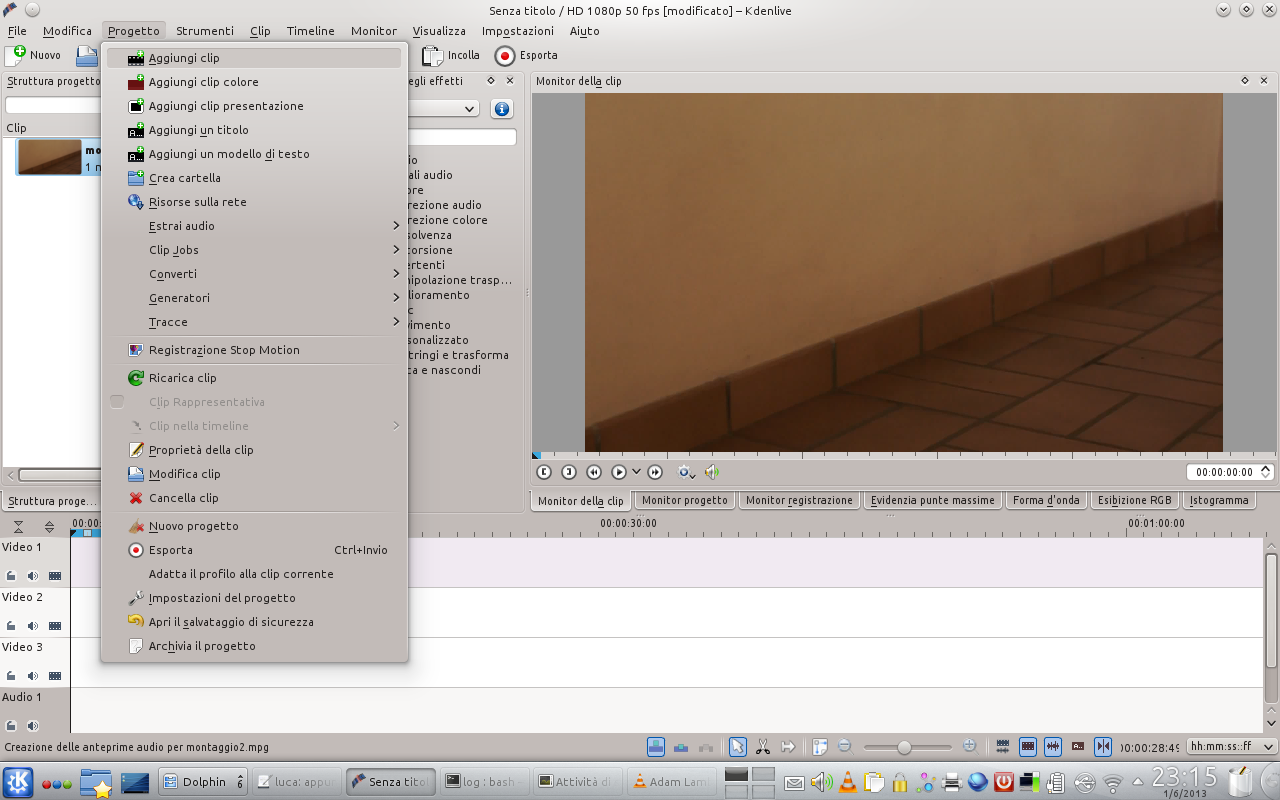 1 THE CLEAN MOVIE – Obviously we need the “clean” movie, that is the one on which we are going to apply the effects (possibly already cut where necessary). To load the movie file just click on the menu Project / Add clips .
 2 THE MUZZLE FLASHES – To load the effects you can use the menu Project / Add presentation clip . In the window just specify where the PNG files of the effect with duration of 01 first are located. To load another one, simply repeat the procedure with the other images.
 A submachine gun
We simulate repetitive shots, as a machine gun would do
 1 IN THE TIMELINE – The first operation is to put the movie in the timeline, in the lowest video track, and scroll it until we find the point where we have to start applying the effect. Then we add the effect clip to the track above the “original” movie.
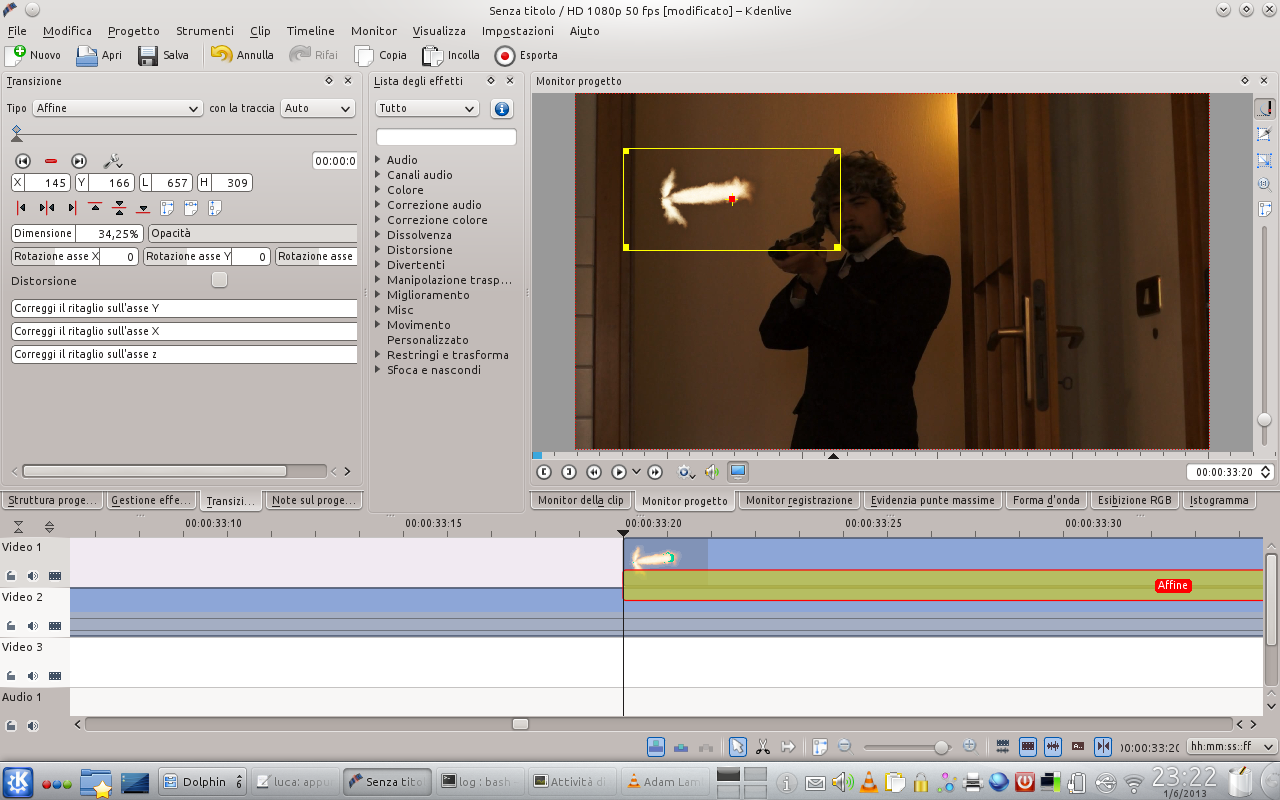 2 A TRANSITION– By clicking on the bottom left corner of the effect clip in the timeline we can add a transition: drag its right side so that it has the same length as the effect clip and change its type from Dissolve to Affine .
 3 IN ITS PLACE – In the transition settings panel you can change the position, size, and rotation of the image. Position and dimensions can also be changed in the Project Monitor . The rotation is expressed in tenths of a degree, from -1800 to 1800.
 4 FRAME TO FRAME– The effect is achieved so that one frame out of two is empty. These do not have to be correct, but in the other frames it will be necessary to change the position and rotation of the image: just move to the next frame and press the button + to be able to edit them.
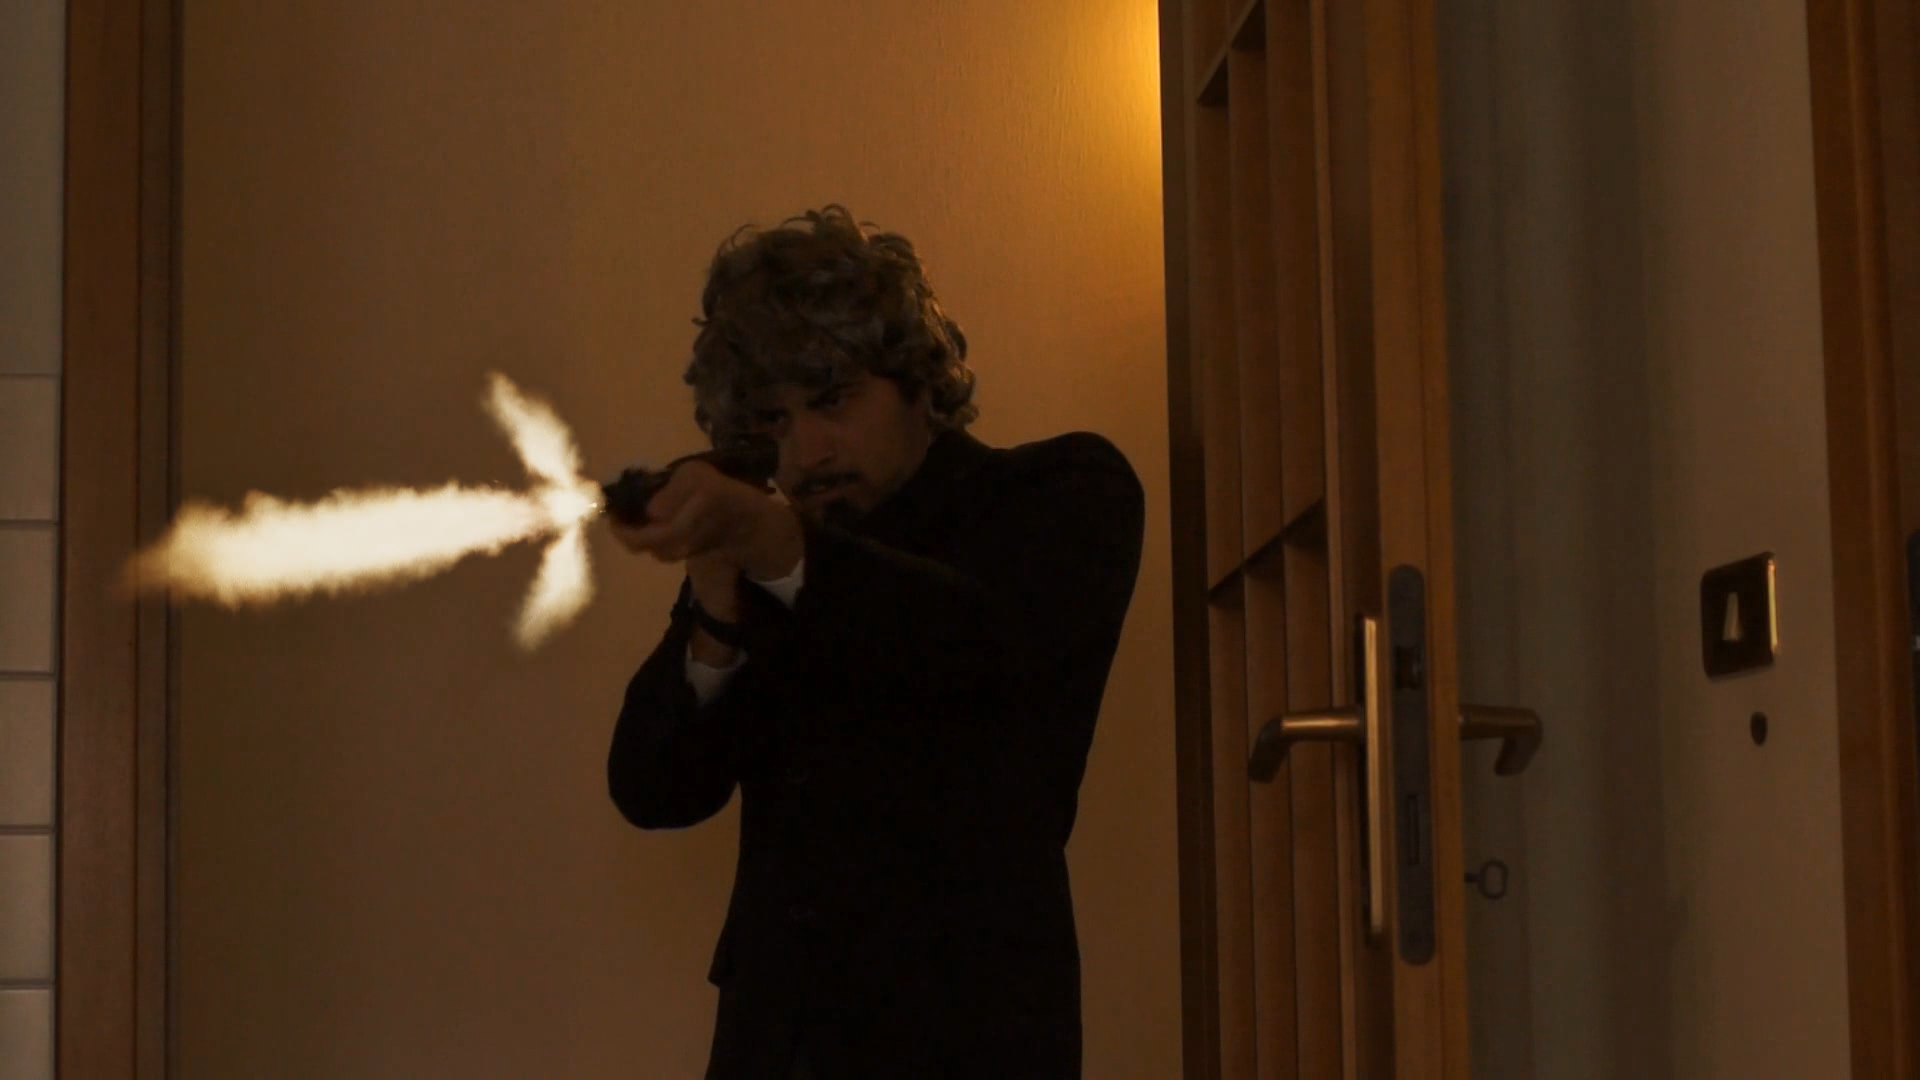
A single shot
Let’s try to simulate a gunshot, with the right perspective
 1 IN THE TIMELINE – As for the effect of the burst shots, also for the single shot the first operation to do is to position the clip of the effect in the timeline, above the movie. Then you need to assign a type transition to that clip Affine stretched to the end of the clip itself.
 2 IN BIG LINES – As we have already seen, we can position the image of the effect where we want thanks to the properties of the transition (size, position, rotation). This at least roughly: the effect may not appear in the correct perspective.
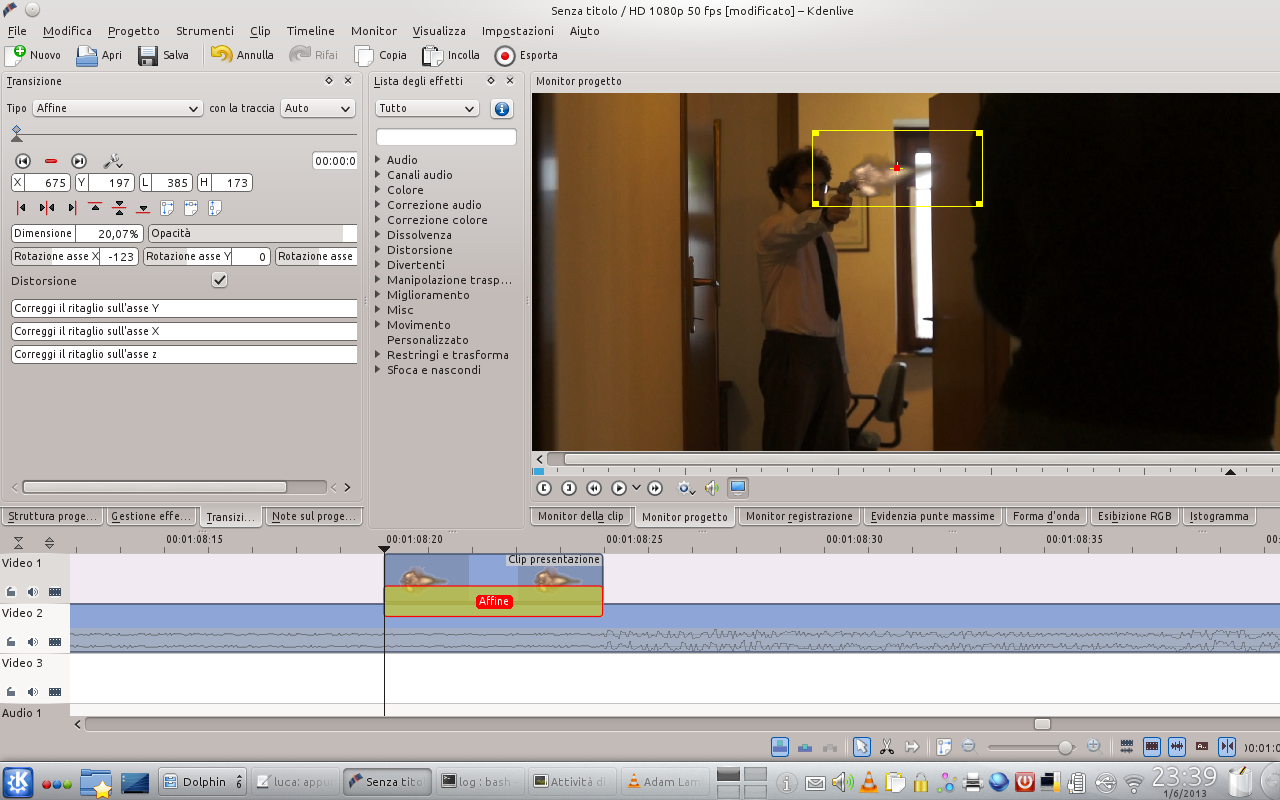 3 IN PERSPECTIVE – To correct the defects in perspective that the single shot effect almost certainly has, just tick the box Distortion in the transition properties, and then change the width and height of the image separately (now it is possible).
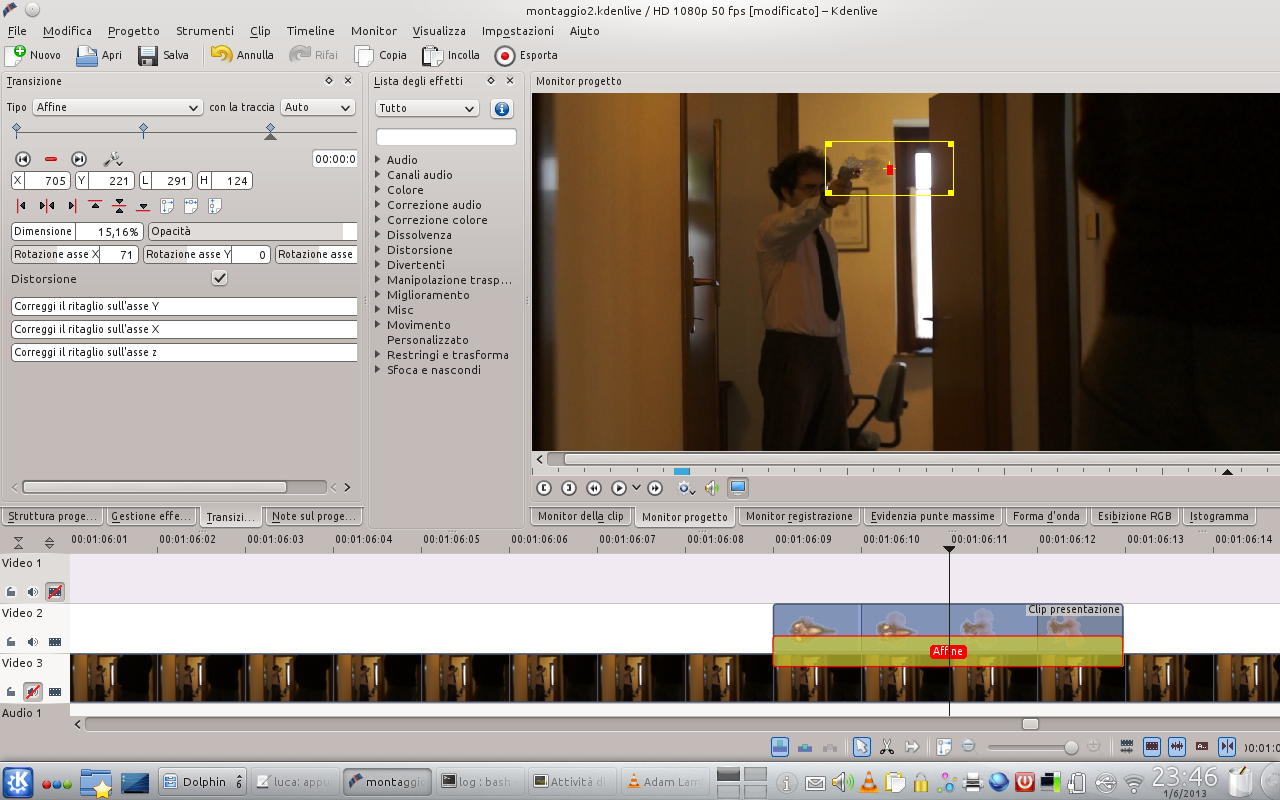 4 THE OTHER FRAMES – After arranging the image in the first frame, it is necessary to correct the position of the effect in the next three frames: just move on each of the other three frames and create a new keyframe by clicking on the button + in the transition panel.
The master touch
The gunshot must illuminate the scene
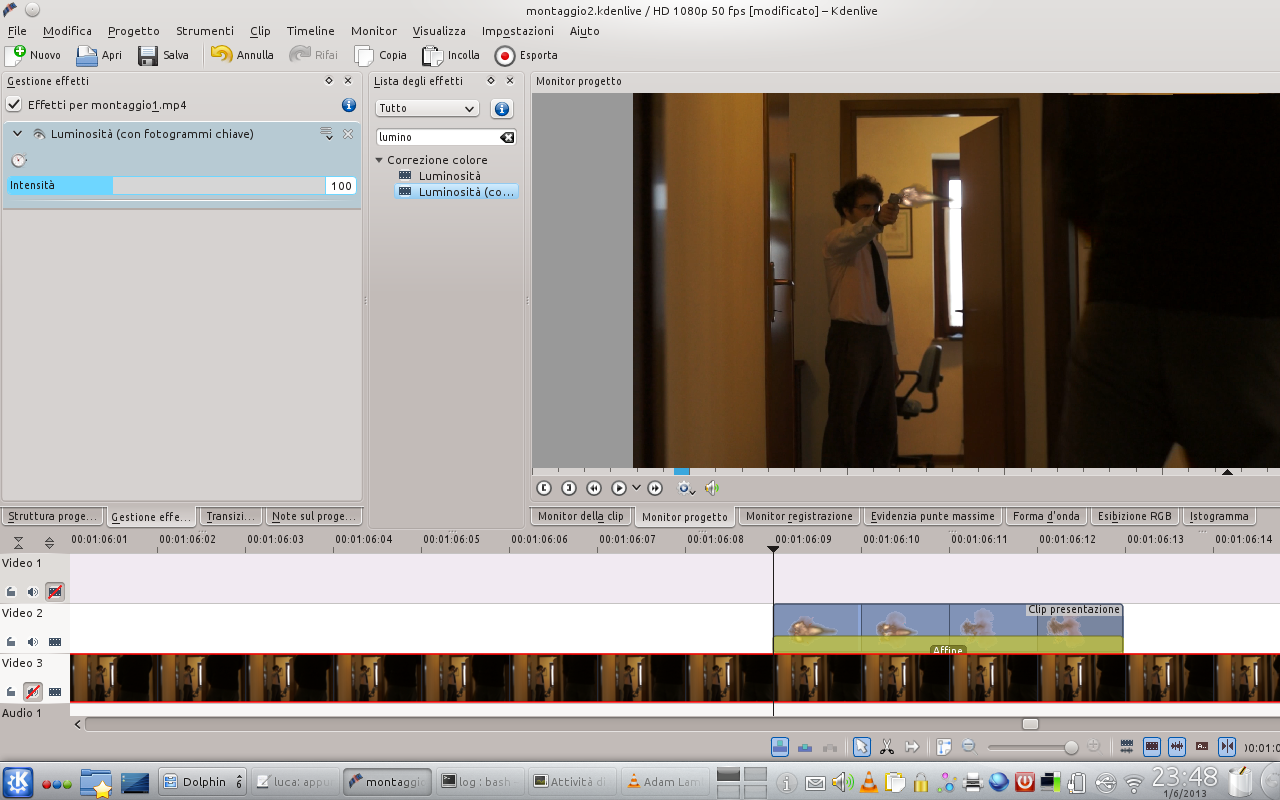 1 CHANGE OF BRIGHTNESS – In the list of effects we look for the one called Brightness with keyframes . Just drag it onto the original movie clip (not the effect clip) to start working. In the panel Effects management we can change the brightness.
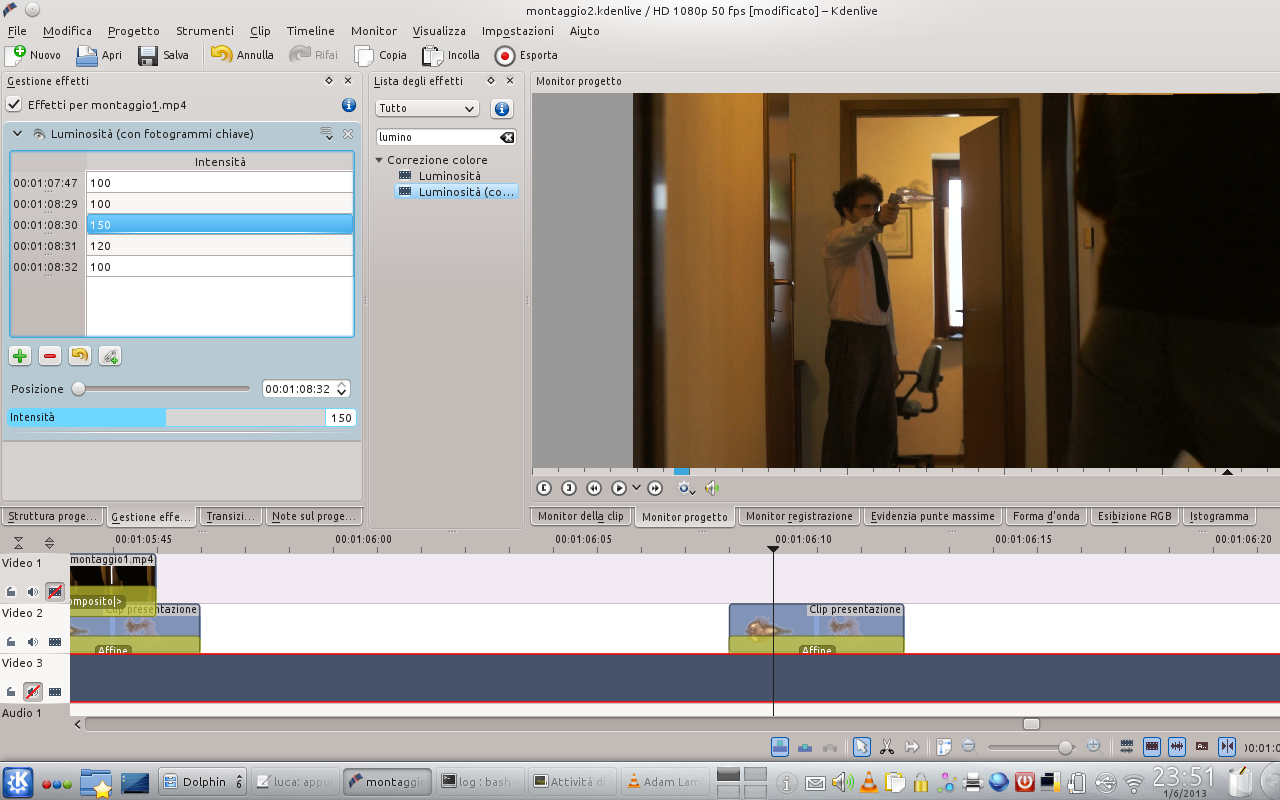 2 KEY PHOTOGRAMS – To set new key frames, just double click on the video track at the desired point. It is a good idea to set the frame immediately before the appearance of the gunshot at 100, the one after 150, and the one after 120.
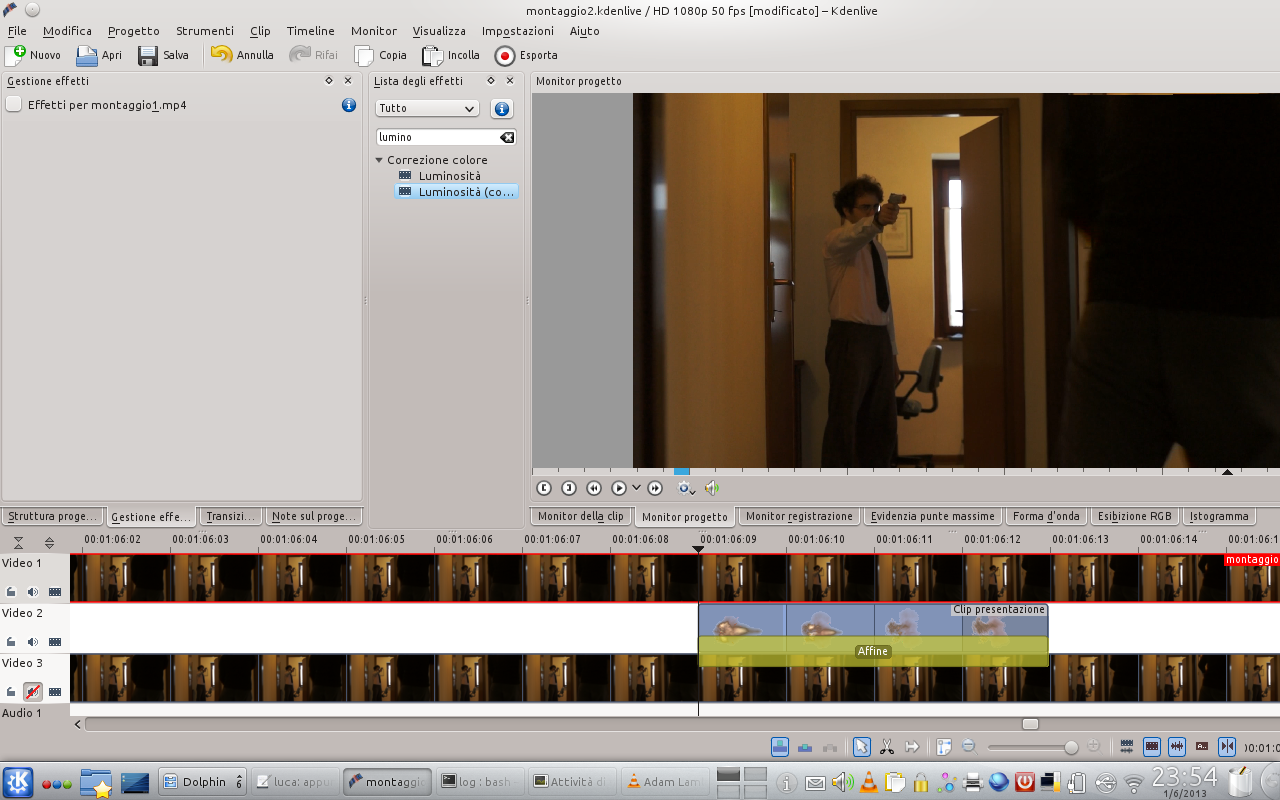 3 OBJECTS TO DARKEN – Remember to set the last frame of the shot to brightness 100. Now we have a flash spread across the scene: to keep some objects dark, we insert the original clip again in another track, above the one we have just modified.
 4 CUT AND COMPOSITE – We cut the newly loaded clip so that it is as long as the effect of the shot (in theory 4 frames). Then we have to activate its superimposition on the other tracks by setting a type transition on it Composite .
 5 ALL IN MASK – We must now mask the object that must remain dark, so that only he is visible (for the rest the illuminated clip will appear). For this there is an effect rotoscoping : just drag it on the cut clip and click on Monitor to draw the mask.
 6 WE MUST FOLLOW IT– As always, we have to move frame by frame and correct the position of the mask to follow the object in question: the button + in the panel of rotoscoping allows you to set a new keyframe.

