An actor with flames in his eyes may seem like a complicated effect to achieve, but we want to show you that thanks to Kdenlive you can get excellent results without having to resort to complicated, expensive, and not free software like After Effects.
In a film with visual effects you can do anything, but sometimes the best result is obtained with small changes, which keep the scene realistic enough not to appear grotesque. For example, how can a very angry person present themselves? We could transform the actor to make him look monstrous, which often happens in cartoons. But perhaps something simpler can still make us have a good effect: what is the most famous example of an angry character? Certainly the Charon of the Divine Comedy. He is described as a man with fiery eyes and a low voice. If we want to insert an angry person into our movie, then, we can refer to this character. Making a low voice is pretty easy, thanks to Audacity. There are two ways to change the pitch of the voice: the most classic is to change the speed. It works quite well, but obviously the audio can no longer coincide with the video (because they have different speeds and therefore different length). The effect Change intonation of Audacity, however, can do a little magic: keep the speed intact and only change the tone. This is what it does for us, because the resulting audio will be perfectly superimposable on the original movie. And the flames in the eyes? This is why Kdenlive comes to our aid, with the trusty effect rotoscope . And of course, we will need the movie of a flame. The trick is quite simple: just superimpose the film of the flame on that of the actor. Then the original footage is superimposed on the flame and the eyeballs are cut out of it. In summary, we have three levels, from the highest to the lowest: the face, the flames, the eyes. An important part for the success of the effect is that the flame has a slightly larger size than the eyes. In this way the result is that the fire really seems to be positioned between the iris and the outermost part of the face. If, then, the flames are slightly transparent and allow the pupil to glimpse the effect is much more likely. Obviously, in these cases the concept of verisimilitude is rather singular: it is obvious that the image cannot be realistic, no person could really have flames inside their eyes and remain alive. What matters is the impression that the viewer has in the first moment: when we watch a Pixar cartoon we know that the characters cannot be true, yet they appear plausible (even if we see a green and cyclopean anthropomorphic monster) because overall are credible. Even while realizing our effect, therefore, it is essential to keep in mind that we want to build something that can convince viewers even if it is not realistic, otherwise it will appear grotesque. One of the things that contributes to making the effect plausible is the feathering of the rotoscope: it can easily be seen that in its absence the contour of the eyes is too sharp and the flames are detached from the face. The feather, on the other hand, dampens the margins of each flame and places it in the context in a much more credible way. You can find the example video at the following address: https://www.youtube.com/watch?v=bbxqonG-Kbs
 In this case the flame appears elongated inside the eye
  In this case the flames fill the eyes entirely
 DetFilmsHD
For this effect, shooting of flames is needed. Our sample movie is based on the clips made by detfilmshd ( http://detfilmshd.com/G_Collections_PKFireColumns.html ) which have the advantage of being supplied with a transparent background, and can therefore be used in Kdenlive without the need to apply a chromatic key. Of course, good fire can also be achieved with a chroma key on a blue background. Just film a flame (made with a balled cloth and soaked in kerosene, like old torches) in front of a blue background. We suggest you use blue because green would be confused with flame yellow and black never allows an optimal chroma key.
What a strange voice you have…
Let’s start working on the audio of our movie
 1 VIDEO IN AUDACITY – To work on the audio of the movie, just upload the file of our video in Audacity. When we open a video file, the program automatically extracts the audio and inserts it into a track.
 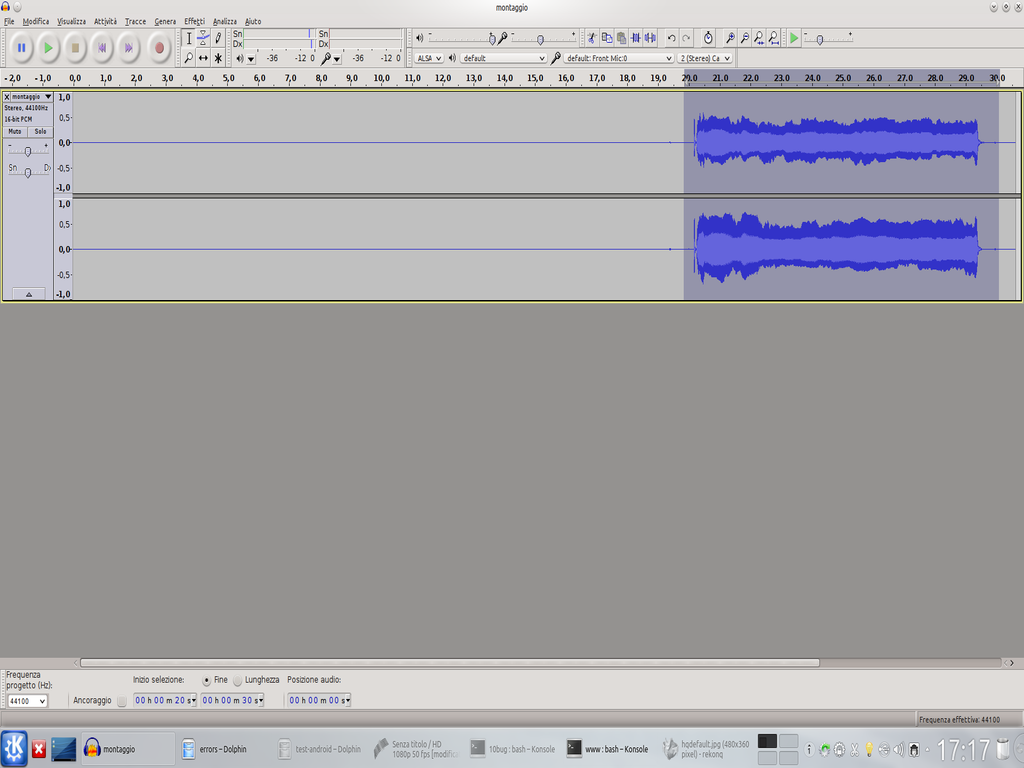 2 SELECTED VOICE – We are interested in only one part of the entire audio: the actor’s voice. It should be easy enough to identify in the spectrum: when we found it we just have to select it with the mouse. In this way we work only on this part.
 “Dubbing” with the modified voice
Let’s change the tone of the voice and replace it with the original one
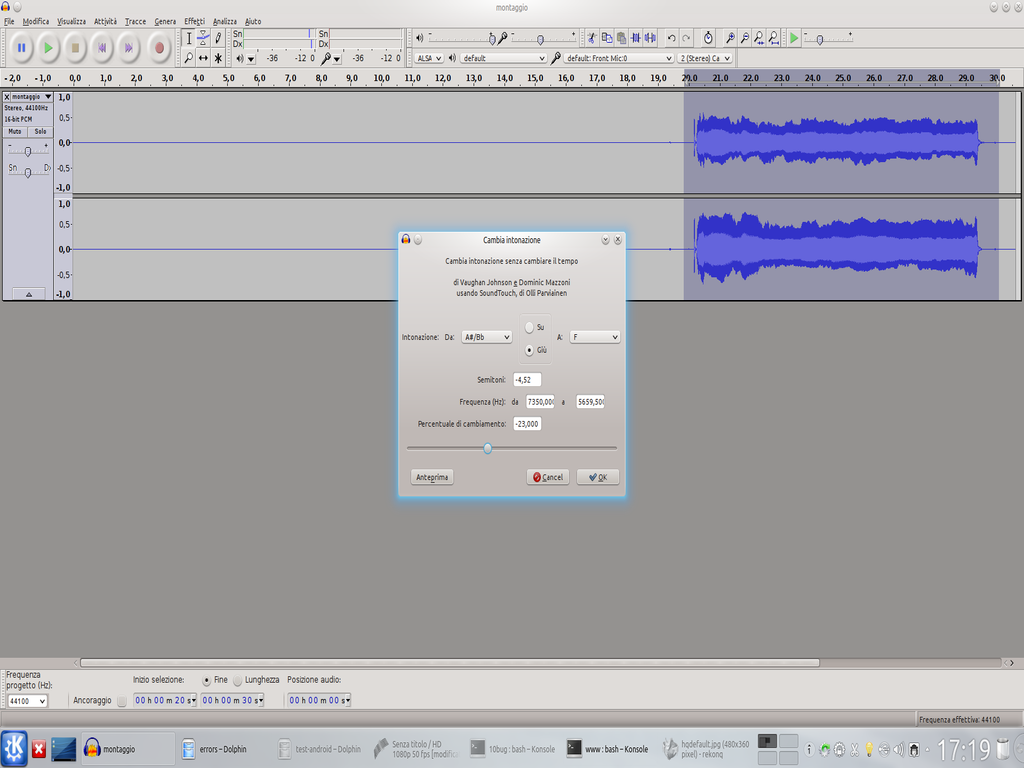 1 CHANGE OF TONE – To change the tone of the voice, simply use the filter Effects / Change intonation . To obtain a lower tone, a percentage of negative change must be set. We can hear a preview of the result.
 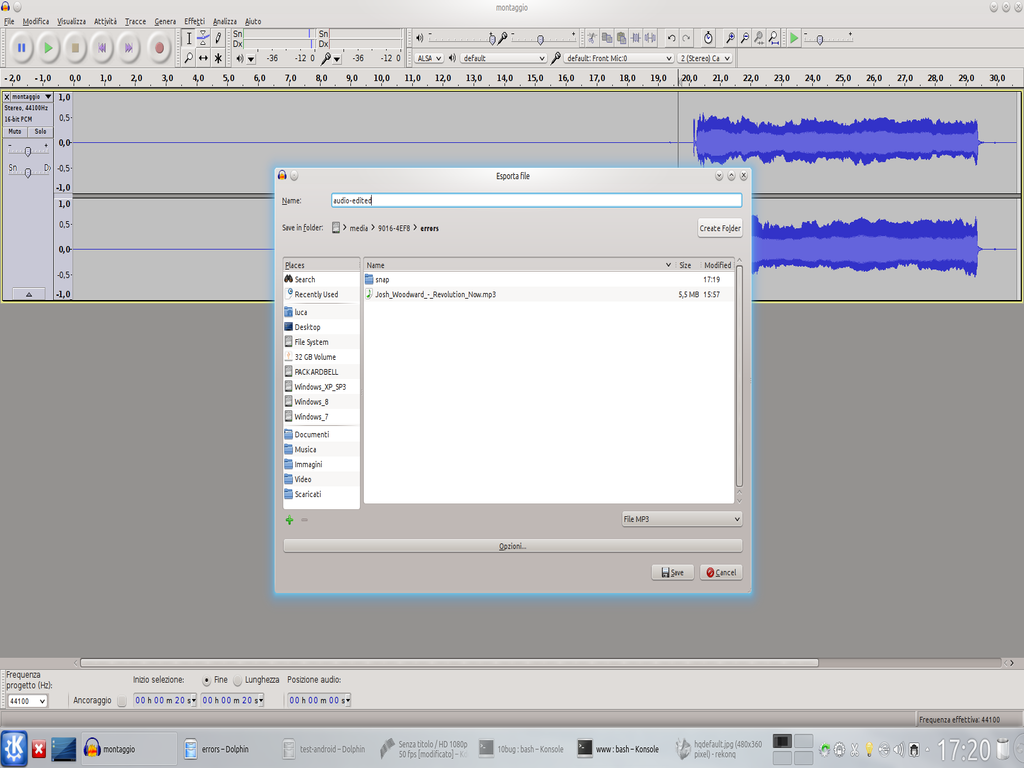 2 EXPORT – Just like in Kdenlive, Salva is used to register the project. If we want to have a usable media file, we have to use the menu File / Export . We can choose the Wav, Ogg, and MP3 formats: for Kdenlive they will all be fine.
  3 THE ASSEMBLY – We are ready for video editing: we load in the track Audio1 the edited audio file, and in Movie3 we put the original movie. We remove the sound from Video3, because the only audio track must be the one made with audacity.
  4 THIS IS THE FLAMES– We insert in the track Video2 the clip with flames purchased on DetFilmsHD . In the timeline, the clip must coincide with the moment we want the eyes to catch fire, so we have to cut it accordingly.
 All in position
The clips must be moved to coincide with the eyes
 1 A COMPOSITION – The image of the flame must be superimposed on that of the original movie, so let’s apply the now usual transition Composite to the clip of Video 2 , for its entire length. The transition refers to the track Movie3 , obviously.
 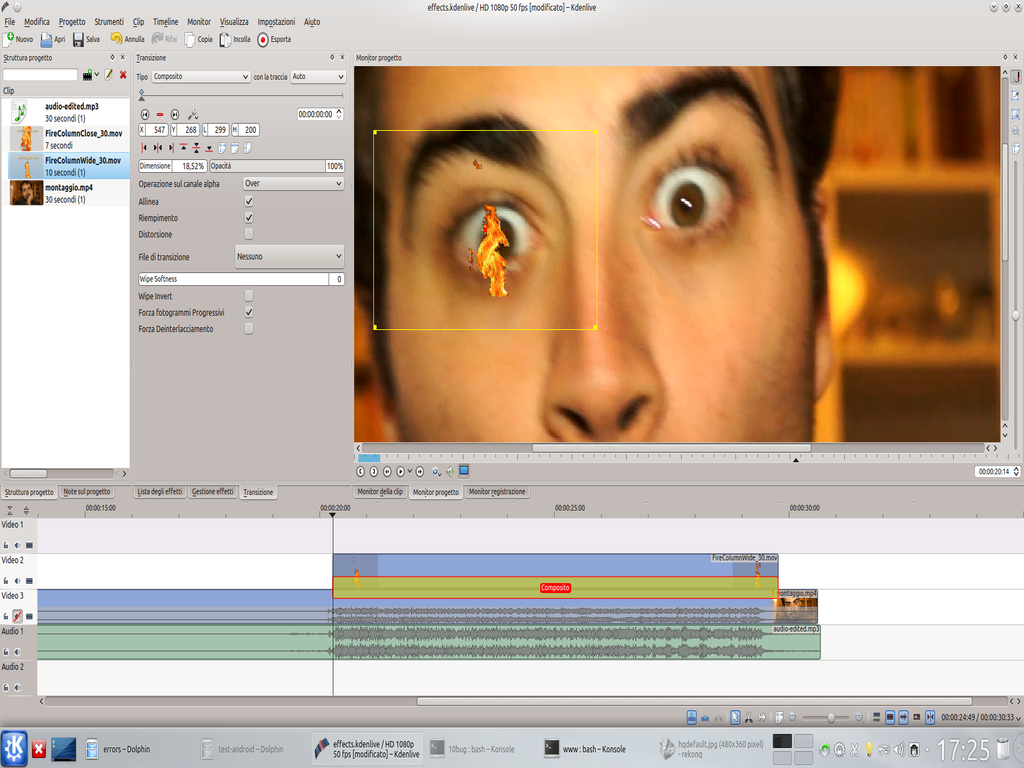 2 ABOVE THE EYE – The flame must be resized, with the appropriate handles, and moved so that it coincides with the actor’s eye. We can give the flame a size that covers the whole eye, or only the central part.
 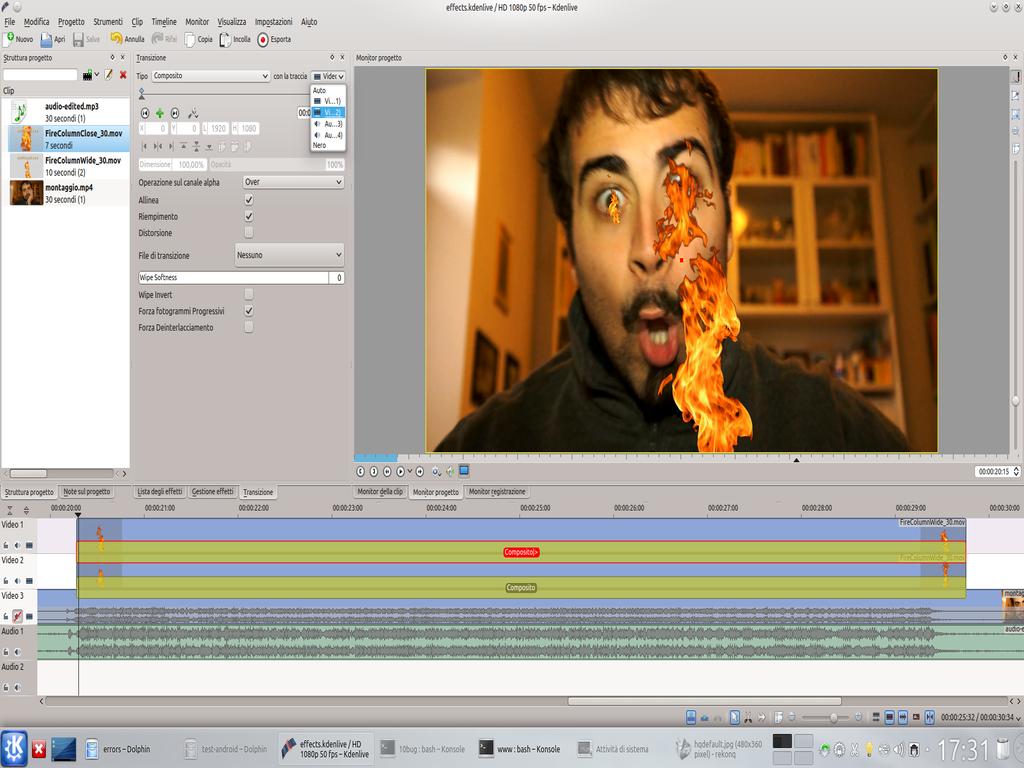 3 AND NOW THE OTHER – We repeat these steps for the other eye: we have to insert the clip into the track Video1 and apply the transition Composite . Again, the transition refers to the track Movie3 otherwise you won’t be able to see it correctly.
 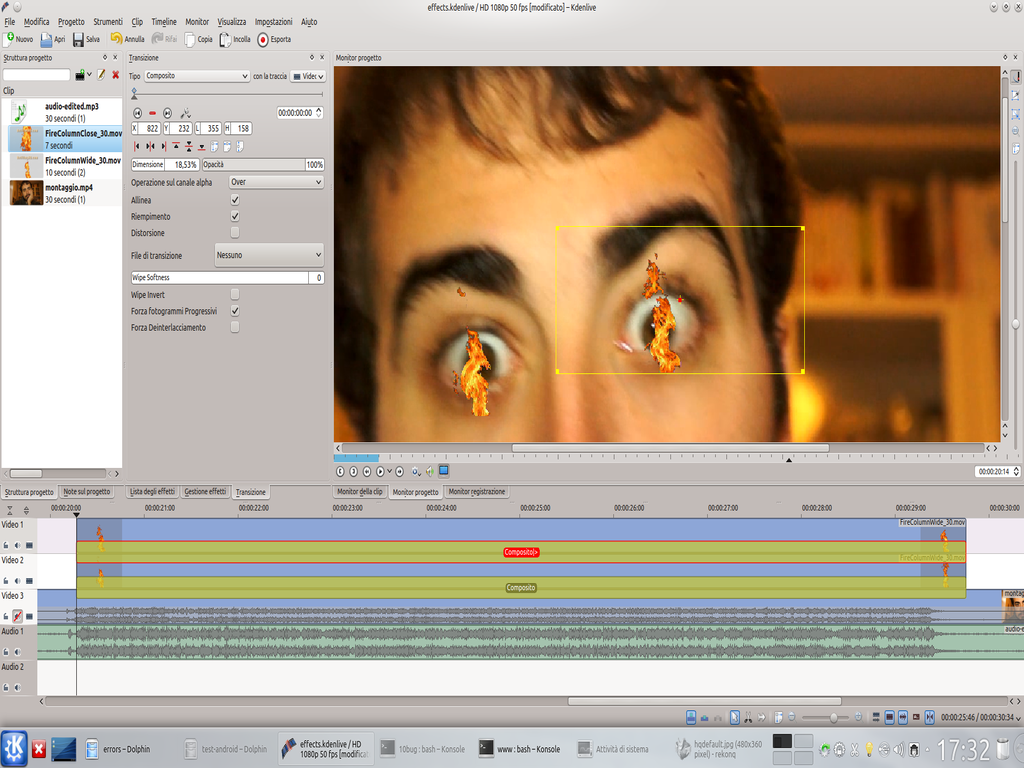 4 SMALL SMALL – This second flame must also be placed in the eye. The two clips should be more or less the same size and the same relative position, otherwise it will seem strange. Recall that so far we have only worked on the first frame of the transition.
 A “controlled” fire
The flames must not come out of the area around the eyes
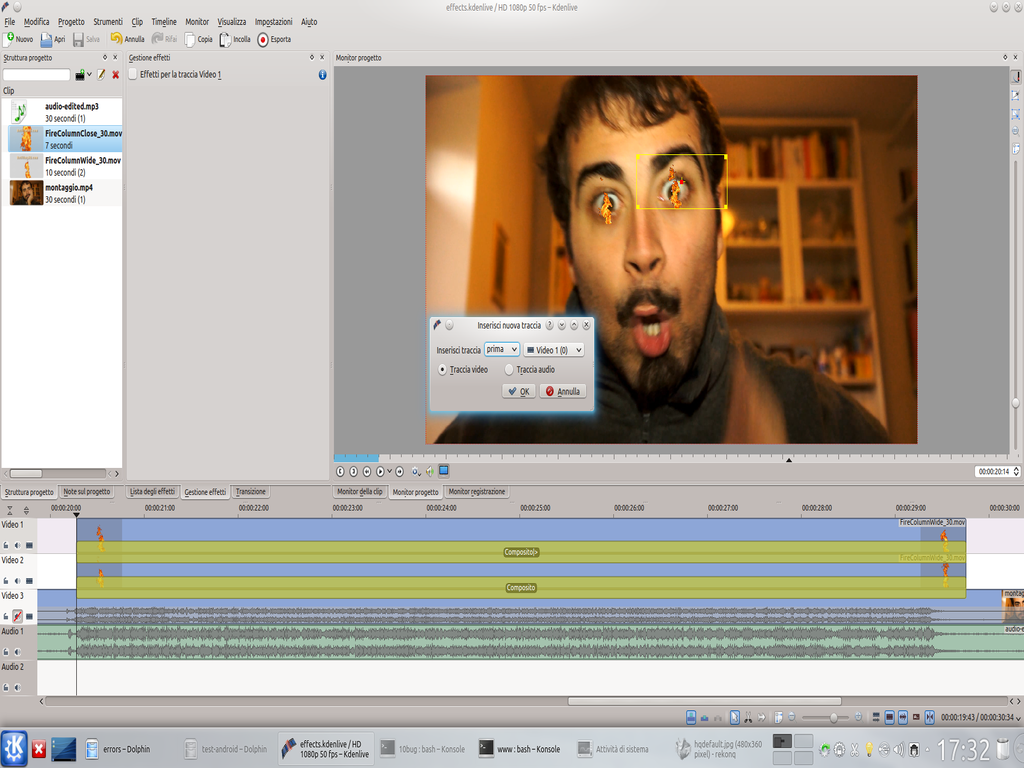 1 A NEW TRACK – By right clicking on the track header Video 1 a menu appears from which we can choose Add track . So let’s insert a new video track before Video1 .
  2 THE ORIGINAL ONE – In the new track Video1 , insert the original movie, and position it so that it coincides perfectly with that of the track Movie3 . We also apply a transition to this track Composite referred to Movie3 .
  3 THE ROTOSCOPING – Let’s add the effect rotoscope to the track clip Video1 and draw the outline of the eyes. With a single design we must be able to trace both contours, so the two eyes will be connected between them by a thinner central section as possible.
  4 THE OTHER KEYFRAMES – Now comes the boring part: we have to move forward, frame by frame, and adjust the mask designed so that it follows the movement of the eyes. With each new frame, of course, we have to set a new keyframe with the appropriate button.
  5 AND THE TRANSITION? – After placing the mask of Video1 , we must proceed frame by frame also on the transitions of Video2 is Movie3 to make sure that the flames have more or less always the same position in their respective eyes.
 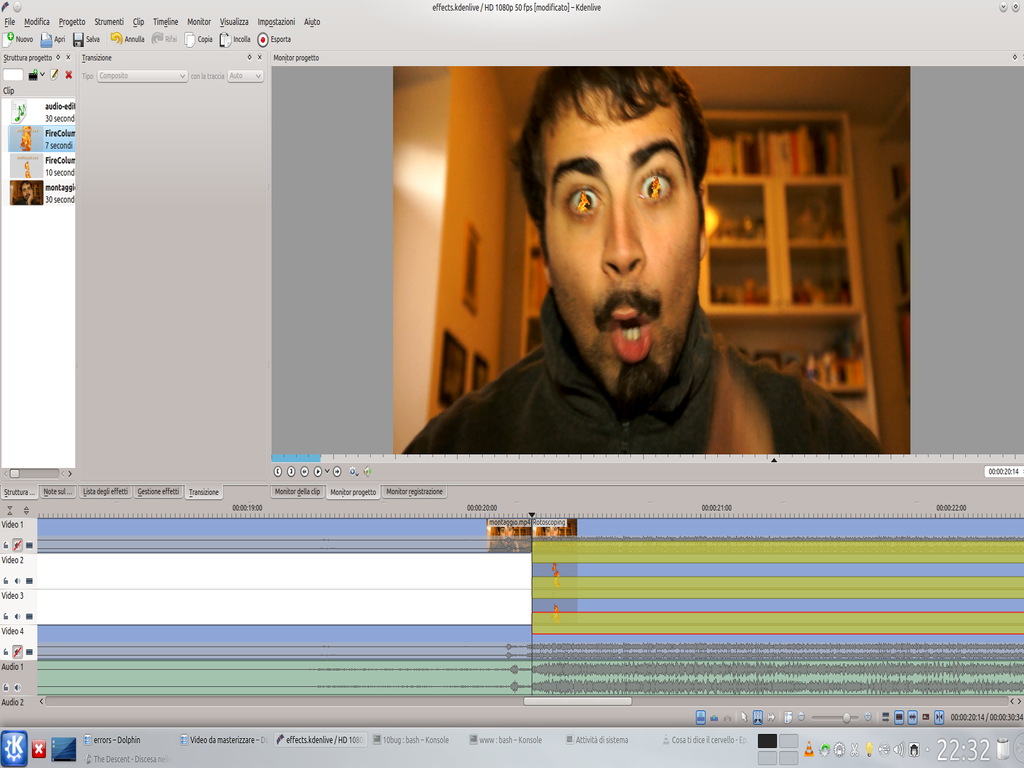 6 A CUT IS MADE – When the position of the flames is also correct, we only need to cut the clip Video1 , so that it is present only from the frame in which the fire appears until the one in which the flames disappear.

