Do you like the idea of making your actors fly? With Kdelive, a green towel, and some small tricks this is possible. And if you use the correct lighting your result will be able to compete with those of the great cinema productions.
Flying actors in films has never been easy. It was necessary to use slings and threads that had to be hidden between the stage costume and the backgrounds. We then began to use iodine vapor backgrounds, or backgrounds made with a color such as to be transparent in Technicolor negatives, and therefore to be easily superimposed on other images, even if obviously this entailed significant problems as regards the superposition of the two shooting, which had to be fixed. The possible movement of the camera had to be perfectly identical on both scenes (the one with the actor on a monochromatic background and the one with the landscape). The computerized editing, however, has solved most of these problems, and today even with Kdenlive we can make good movies in which we make our actors fly. Using the technique of Chroma Key, or the use of a monochromatic background. Of course, we will not use a iodine-colored background but rather a banal cloth or paper of a bright green color. To be clear, the gift card that is found in stationery shops can also be fine if you find one with a color of this type. All we have to do is shoot our actor using the cloth in question as a background: in this way we will have a movie of the actor acting without any other object, because the whole background will be of a uniform green color. If we position the video camera vertically instead of in the usual horizontal position, we can obtain allows the actor to act standing, and the result will appear as if the actor was floating in the air. The beauty is that then with Kdenlive we can simply use the effect Blue screen to decide to make the color green transparent. In a nutshell, to fly our actor we can shoot him on a green background and upload this movie to Kdenlive. Then, always in Kdenlive, we place under this movie (for example in the immediately lower video track) what the real background must be, for example a shot of the sky with some clouds. Then we ask Kdenlive to eliminate the green color from the video of the upper track and you’re done: instead of the green color the sky will appear. Of course, our green fabric could have different shades due to the light. But there is no problem: since there are no limits to the effects for Kdenlive, we can apply the effect several times Blue screen . We simply apply the effect once to make a shade of green disappear. Then we apply it again by selecting a different shade. And we go on like this until the whole background has disappeared perfectly. The beauty of this method is that everything that is green will disappear from the video to be replaced with the image below. So if we want to make any object disappear, just cover it with the green sheet. For example, let’s imagine blowing the actor from a chair: just cover the chair with the same green cloth as the background, and it will disappear. At that point we only have to “replace” the Kdenlive chair with another image (for example a window) and here in the final video the actor will jump out of the window. As always, you can see the example video at the following address: https://www.youtube.com/watch?v=aFLVDbG_OFI
 The actor is falling from the sky
 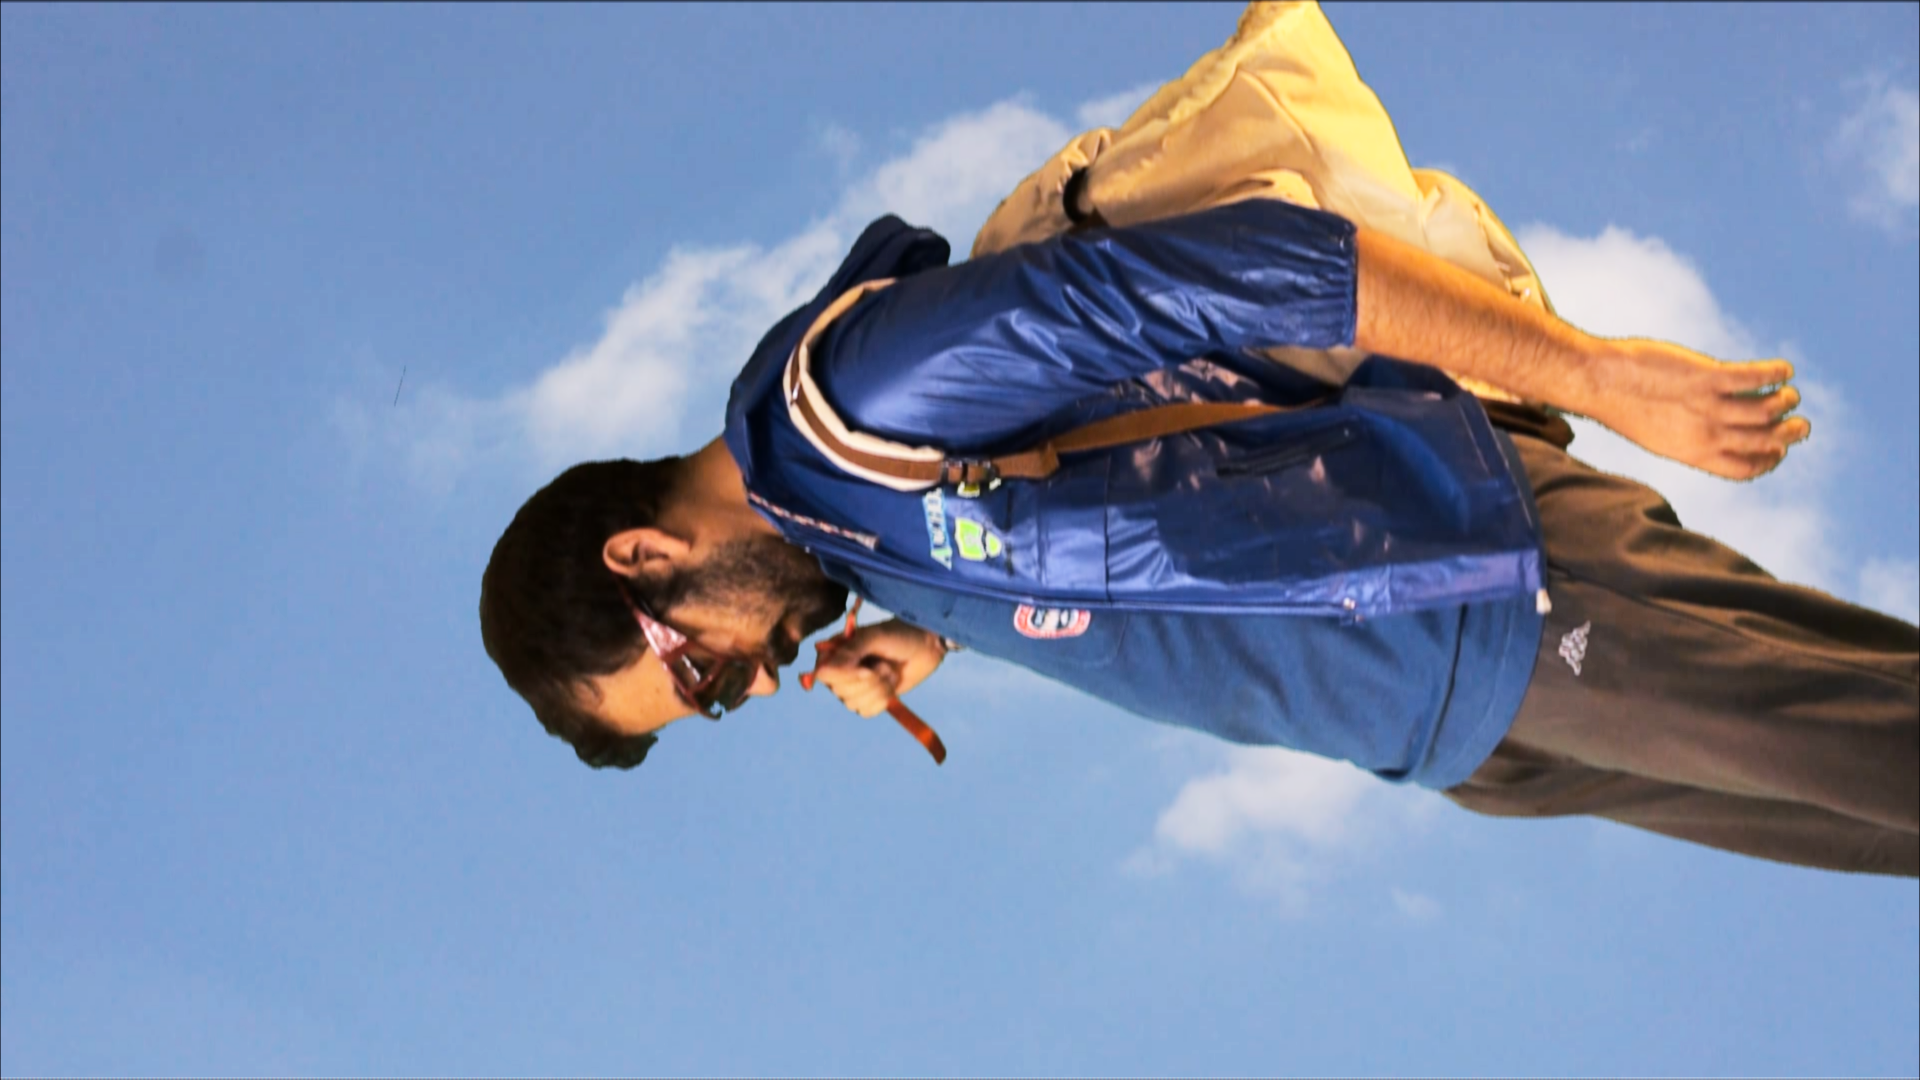 The actor is flying
  To resume the flight, the video camera must be positioned vertically, then we will flip the video with Kdenlive
 Eliminate the shadow in the background
To obtain a good chroma key it is important to correctly illuminate the shots on the green sheet. In particular, it is important to try to cancel the shadows cast on the sheet, so as to make it almost a single color. This simplifies the use of the effect Blue screen , because with fewer shades of green, it will be necessary to use fewer effects of this type to obtain a good result. Erasing shadows is not always easy: to begin with, it is necessary to stretch the cloth to eliminate possible creases. Secondly, it is good to work with three light sources: one, the main one, which illuminates the subject. And two more placed on the right and left side of the green cloth, which illuminate the cloth itself, so as to produce a uniform light stronger on it than that which strikes the actor. This means that any shadow produced on the sheet by the actor’s lamp is covered by the light beams that come laterally to the sheet itself.
The first chroma key
We prepare the first scene by deleting the green sheet
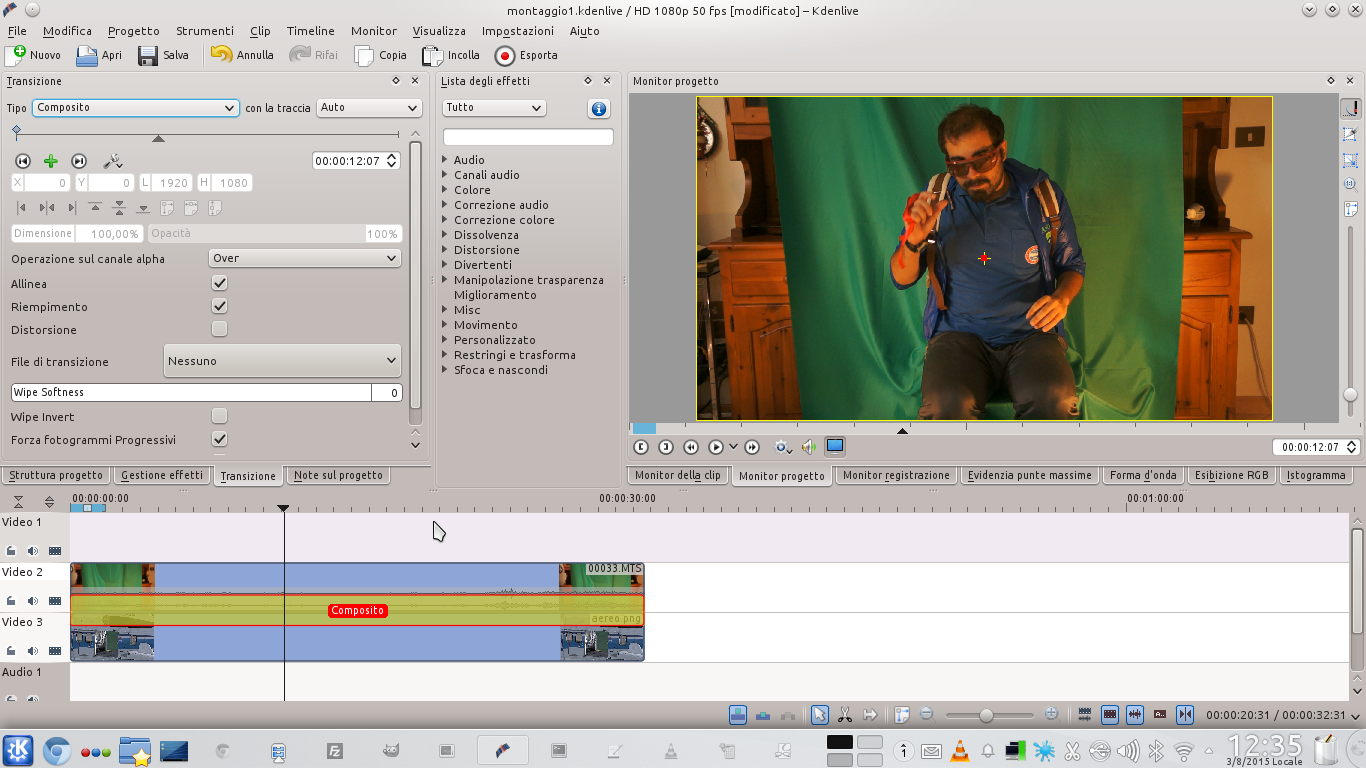 1 OVERLAPPING CLIPS – Let’s start with the plane launch scene. The scene shot with the green cloth must be positioned on the track Video2 , while the image of the plane with the hatch open (which we can download from the internet) must be positioned in Movie3 .
 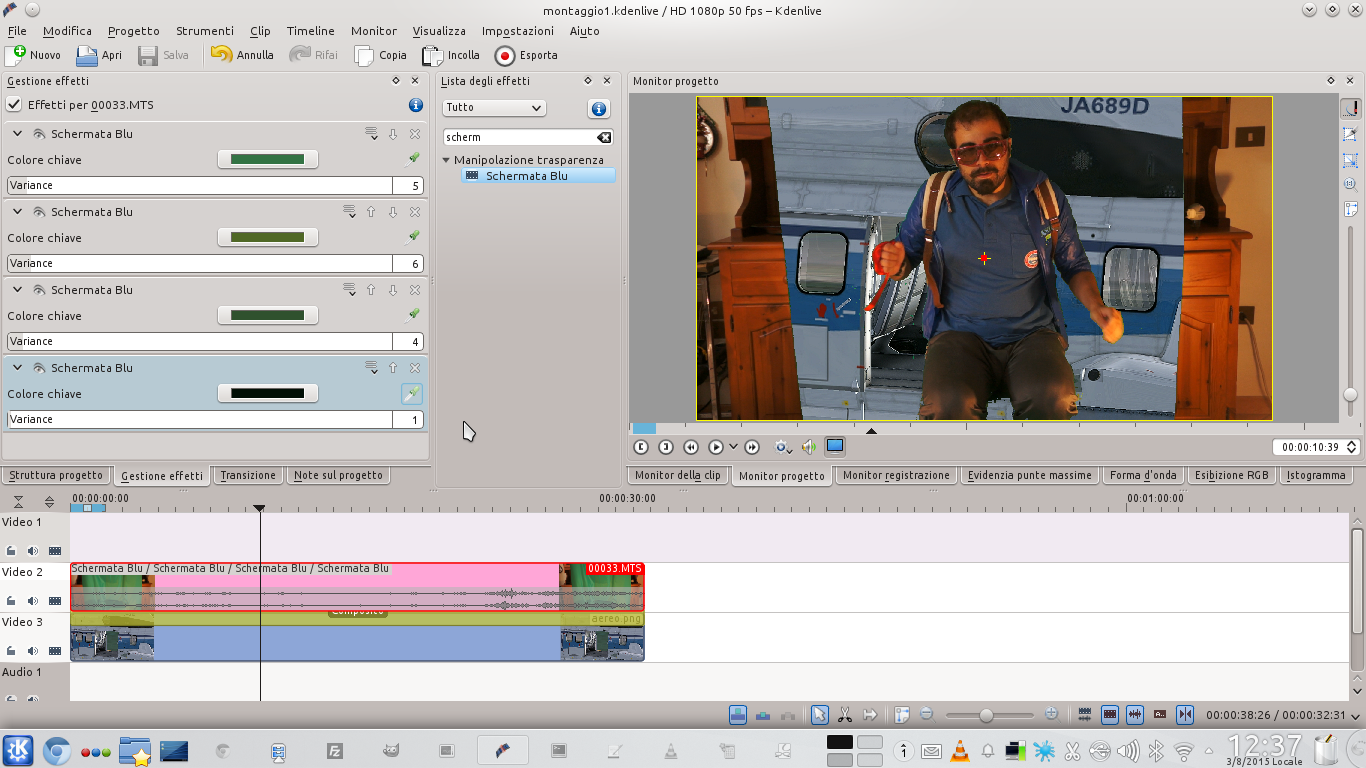 2 A TRANSITION – We need a type transition between the two clips Composite . At this point we can eliminate the green background using the effect Blue screen . Just load the effect, choose the color to hide, and its variability. We can use multiple effects.
 Now the actor can fly
We superimpose the image of the actor on that sky sky
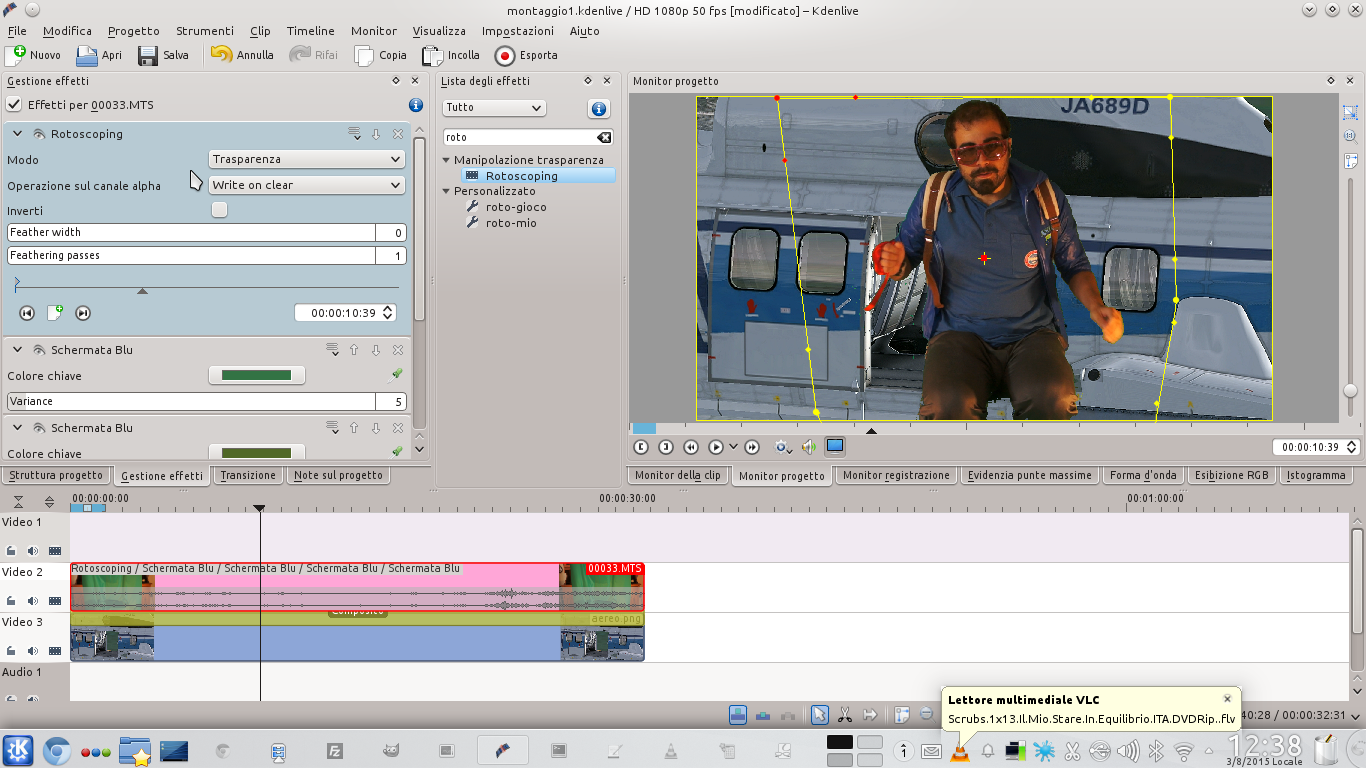 1 THE ROTOSCOPE – We add to the track clip Video2 the effect rotoscoping , placing it above all other effects. With this effect we can eliminate all unnecessary portions of the video, i.e. those outside the green sheet.
  2 COMPOSITION – Working on the transition Composite , we reduce the size in such a way as to make the actor perfectly fit into the aircraft door. In addition, we must position it to give the impression that it is really sitting on the edge of the tailgate.
 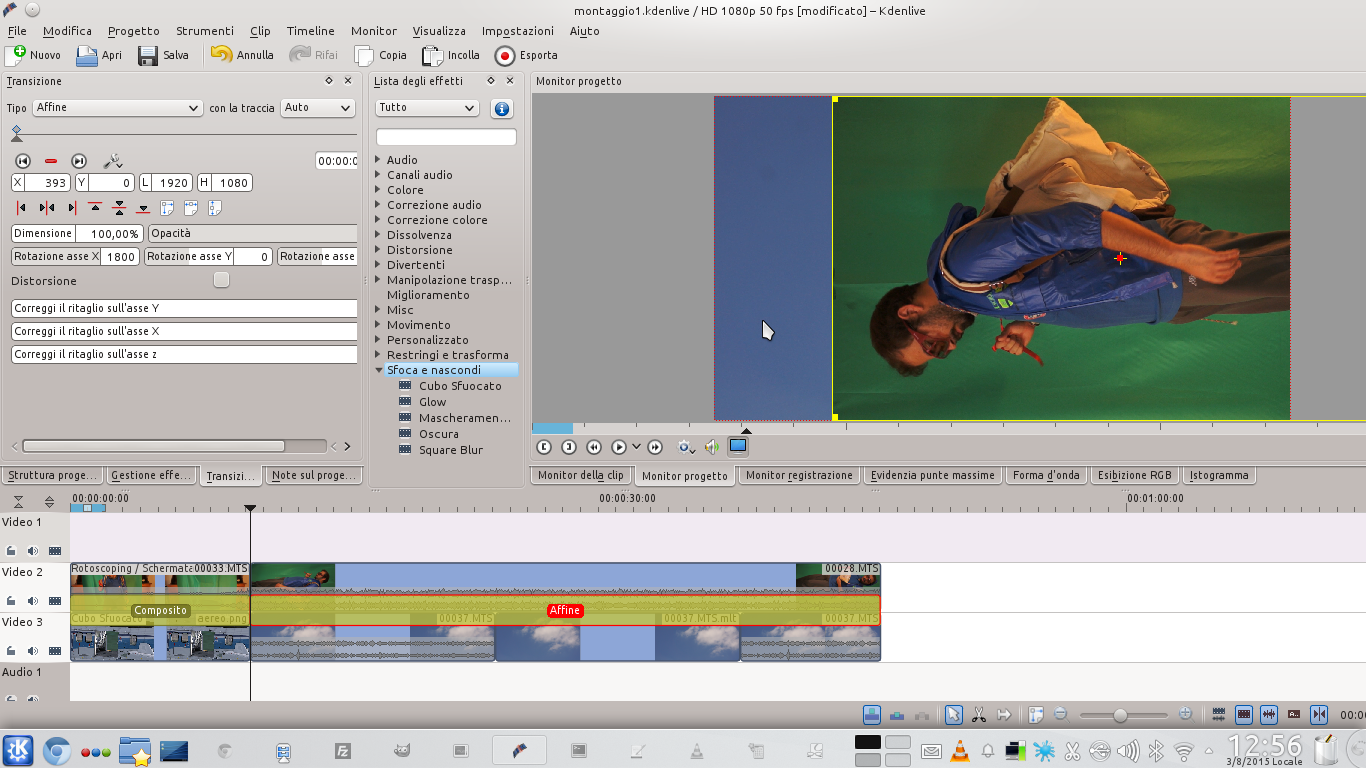 3 THE OTHER SCENE – Now let’s move on to the flight scene. We position in the track Video2 the clip shot on the green background, and in Movie3 the clip with a shot of the sky. Between the two clips we have to insert a transition of type Affine , properly correcting the rotation X .
  4 ROTATION -180° – Probably, the rotation will have to be set to -1800 . The clip can be positioned to cut a part of the actor. Let’s add the effect rotoscoping to hide any parts of the image that we don’t need.
 The exit from the scene
We move the actor’s clip so that it disappears from the frame
 1 BLUE SCREEN – Just like we did for the clip of the jump from the plane, also for this clip it is necessary to eliminate the green background. And we will always do this using multiple type effects Blue screen . Just choose one shade to be removed at a time, so as to be very precise.
  2 BALANCING – Finished deleting the background via the effects Blue screen , we can correct the color of the image using the effect White balance . In addition, we can also adjust brightness and contrast by drawing one curvature of type luma .
  3 THE TRANSITION – To get a more realistic result we use the transition Affine changing the position in order to swing the actor’s image. Just move along the timeline and create a new keyframe by changing the position of the image.
 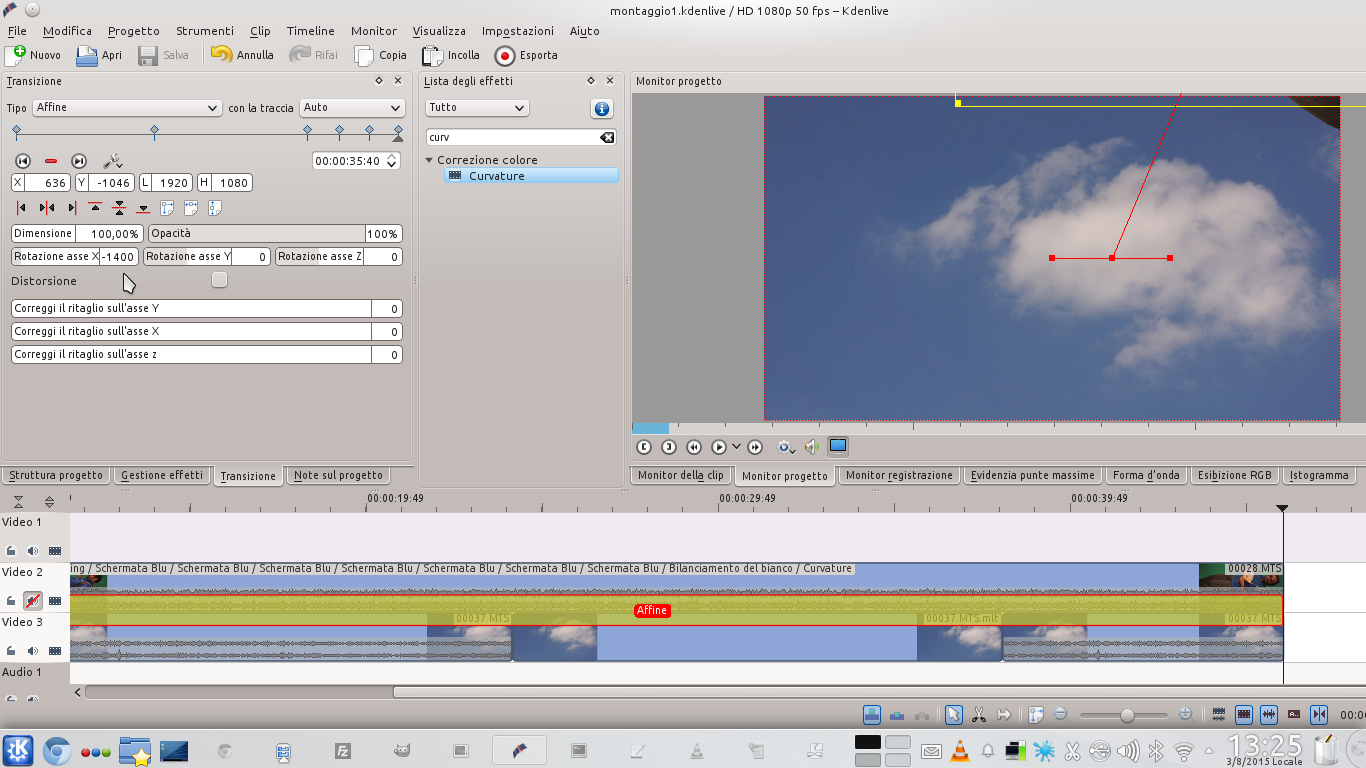 4 SCENE EXIT – If we want to make our actor disappear, we can create a key frame at the end of the clip. In this frame we will have to modify the transition Affine so as to make the actor come out upwards, and rotate him with his legs down.
 Fall without hurting yourself
We use transitions to drop the actor from the sky
 1 CLIP CUT – Now, in the Video3 track we load the clip that represents the ground without the actor, and then the one that instead represents the ground with the actor jumping and falling to the ground. This second clip should be cut when the actor reaches the maximum height of the jump.
 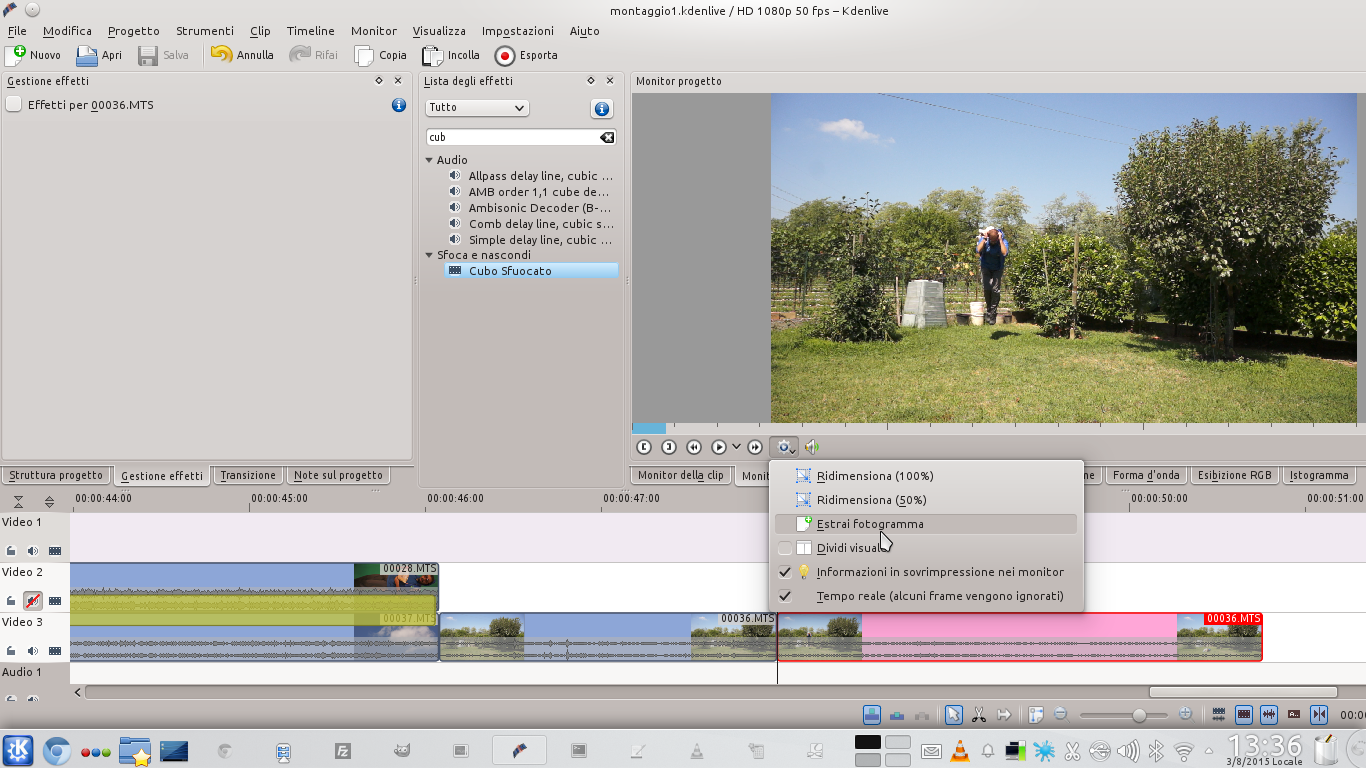 2 THE PHOTOGRAM – At the cutting point we must also extract the frame by clicking on the appropriate gear-shaped menu and choosing the item Extract frame . After the cut, we eliminate the first part of the clip in order to keep only the fall.
  3 CHANGE IN GIMP – We open the frame extracted in GIMP, and we use the Lasso Selection to select only the figure of the actor. Then we press Ctrl + I to reverse e Delete to remove the background. We save the produced image on another png file.
 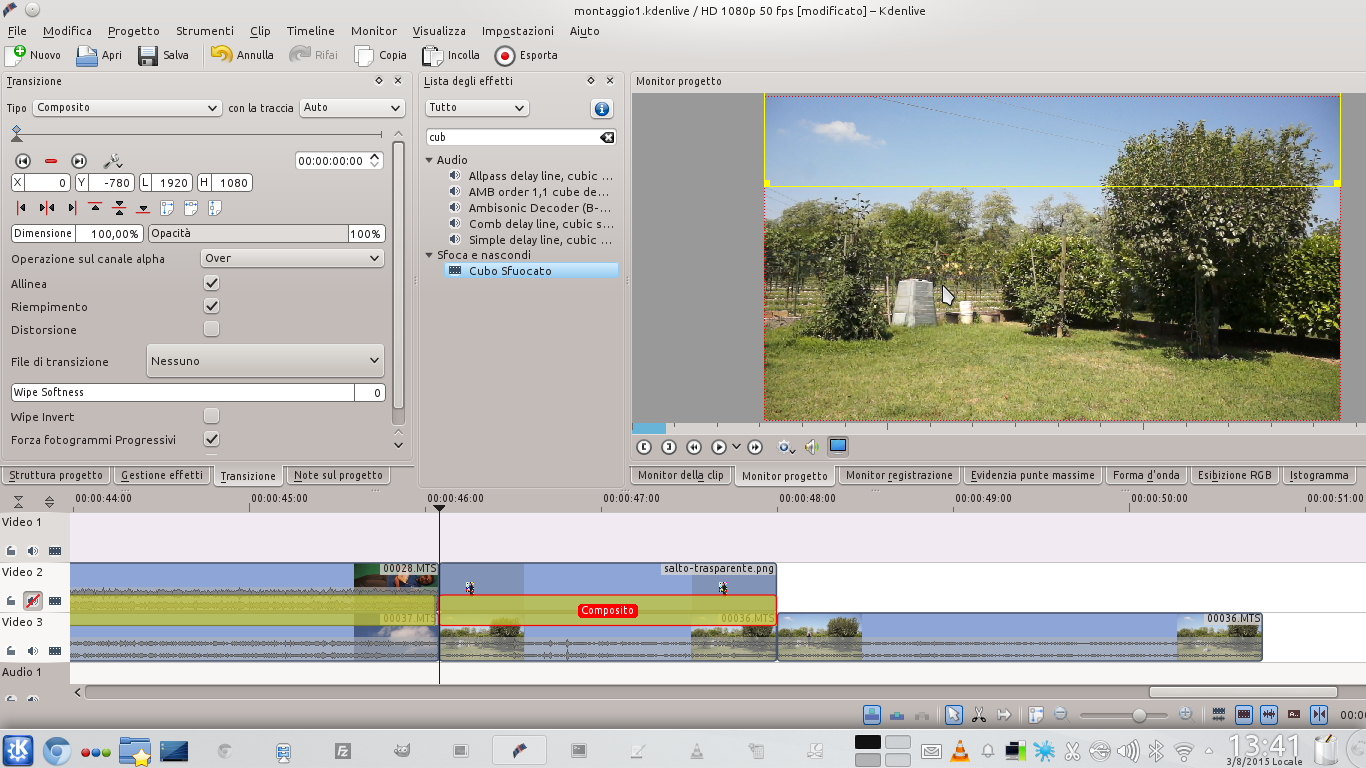 4 STARTING POINT – We load the new png file just created in the track Video2 , above the clip that contains only the background. We interpose a type transition between the two tracks Composite and we raise the clip bringing the actor out of sight.
  5 AND POINT OF ARRIVAL – To raise the image just decrease the value of Y and keep 0 that of X . At the end of the clip, we add a new key frame to the transition and position the actor’s image at the original position (i.e. by setting X and Y to the value 0).
  6 A BLURRING – Finally, we add the effect to the clip of the image produced by GIMP Blurred cube by setting the blur factor to 1 , the horizontal multiplier ad 1 and the vertical multiplier to a number between 5 is 10 .

